

Note: if you have your own UI design and want to build on the meeting features yourself, we also provide the more flexible and full-featured MeetingKit SDK. See our MeetingKit API (Chinese) documentation to learn more.
Features
The kit provides a rich set of interactions—scheduled meetings, audio and video control, screen sharing, meeting recording, member management, meeting controls, in-meeting chat, and more—and supports a variety of business scenarios.Run the demo
Prerequisites
- iOS 12.0 or later
Download the demo
1. Download the source code
- Option 1: download the MeetingKit Demo source code from GitHub.
- Option 2: run the following command directly in the terminal:
2. Add the dependency
3. Install the dependency
Run the demo
1. Generate your own certificate
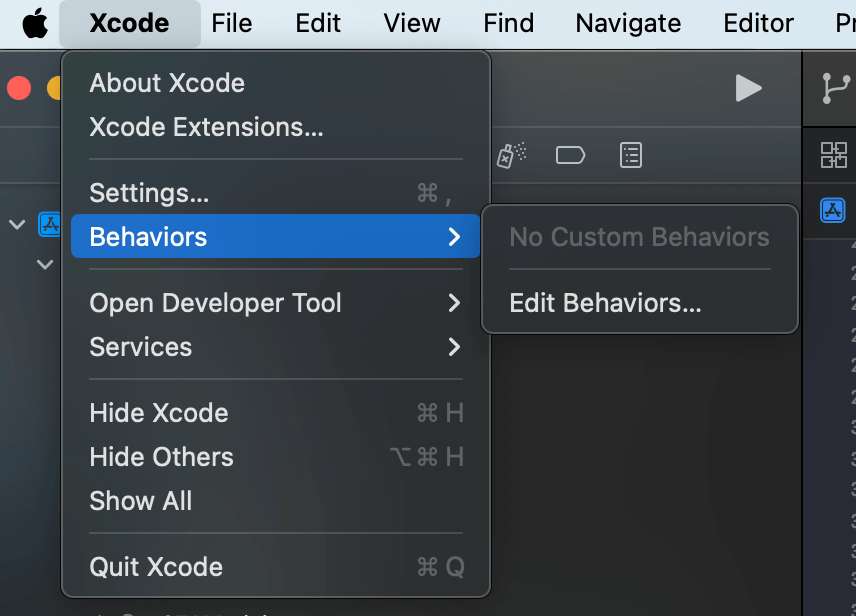
1.1. In Xcode, find Edit Behaviors.
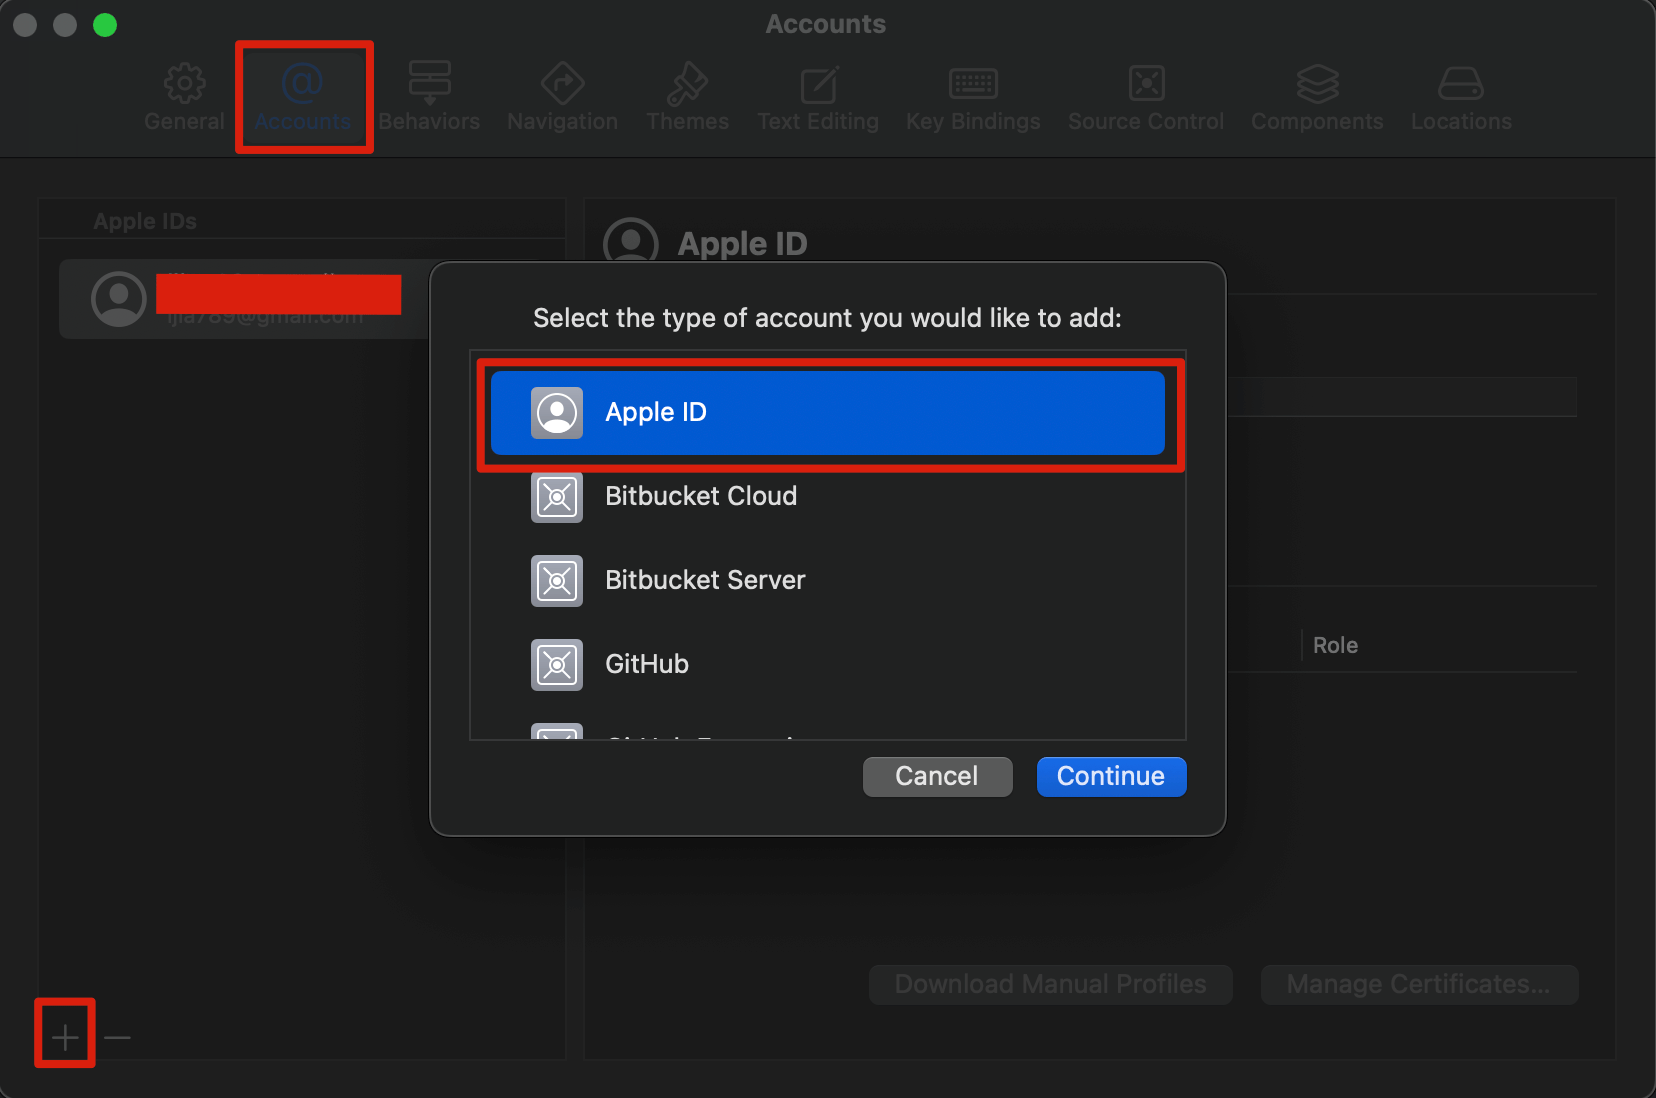
1.2. Click the Account tab, click the + button in the lower-left corner, choose to add an Apple ID, and click Continue.
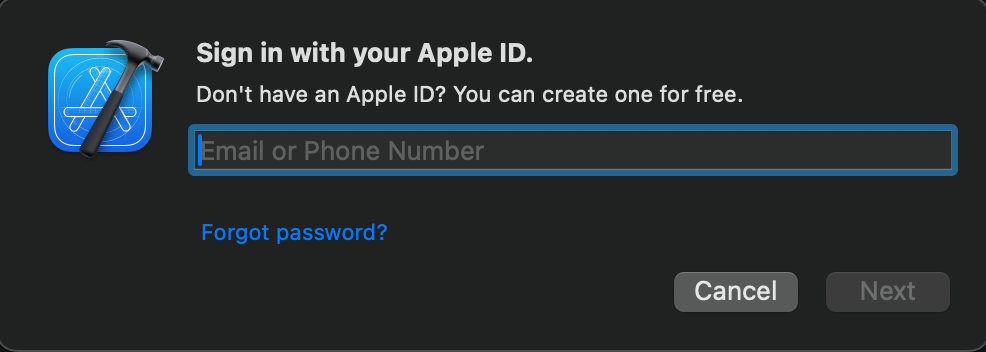
1.3. Enter your Apple ID and password to log in.
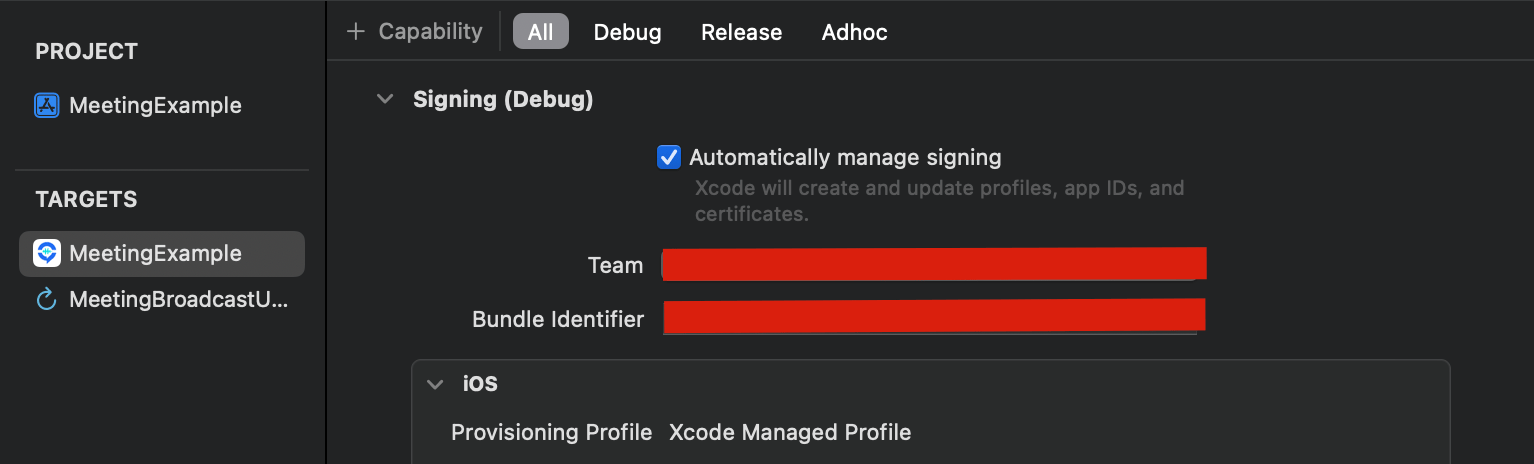
2. Open the Signing & Capabilities tab under the project’s TARGETS and select your own developer certificate in Team
3. Run the project
3.1. First turn on Developer Mode on the iOS device under Settings > Privacy & Security > Developer Mode. Connect the device to your computer and select it as the run destination for the demo in Xcode.
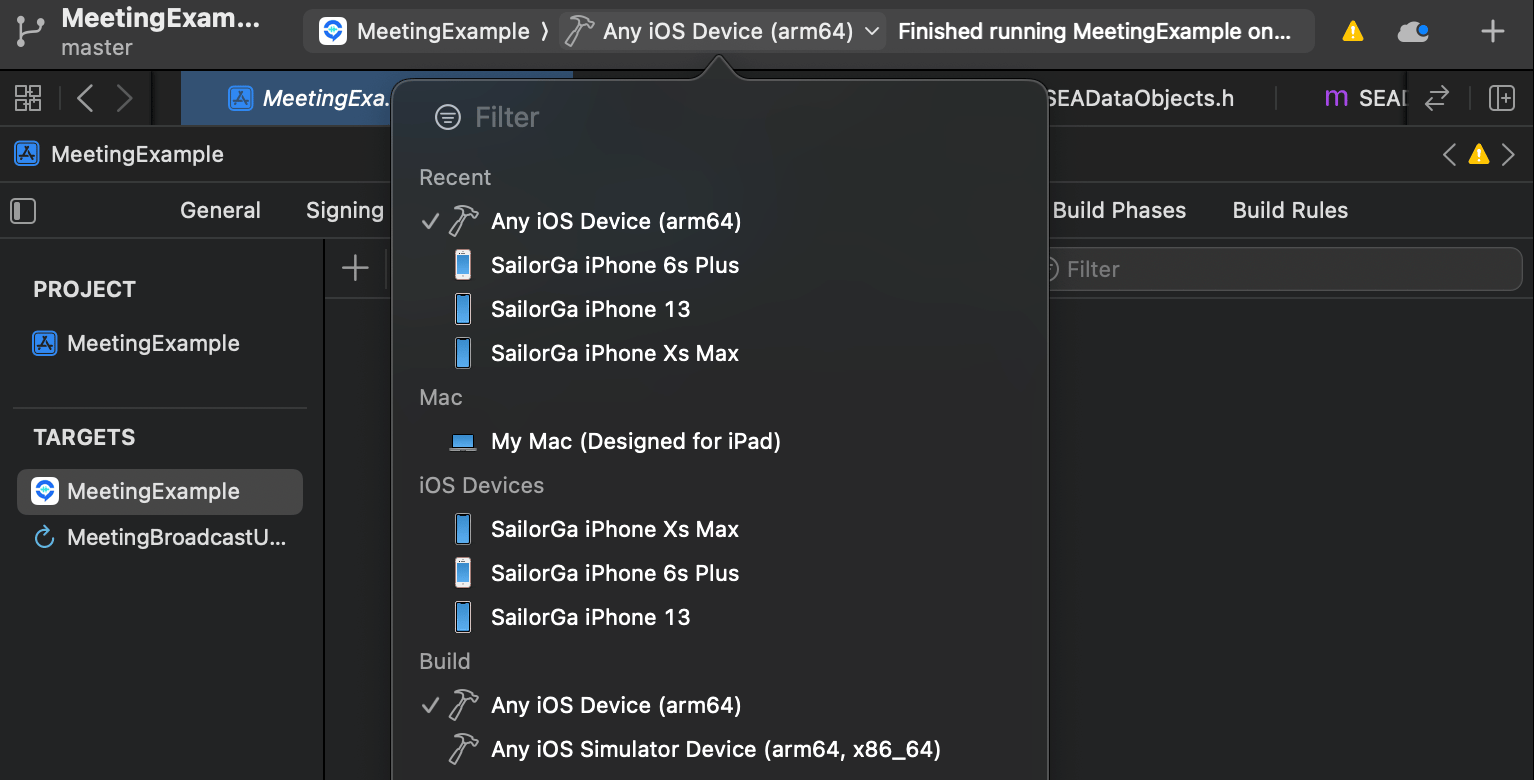
3.2. Click Run to run the MeetingKit iOS Demo on the target device.
| Login screen | Main screen | Create meeting screen |
|---|---|---|
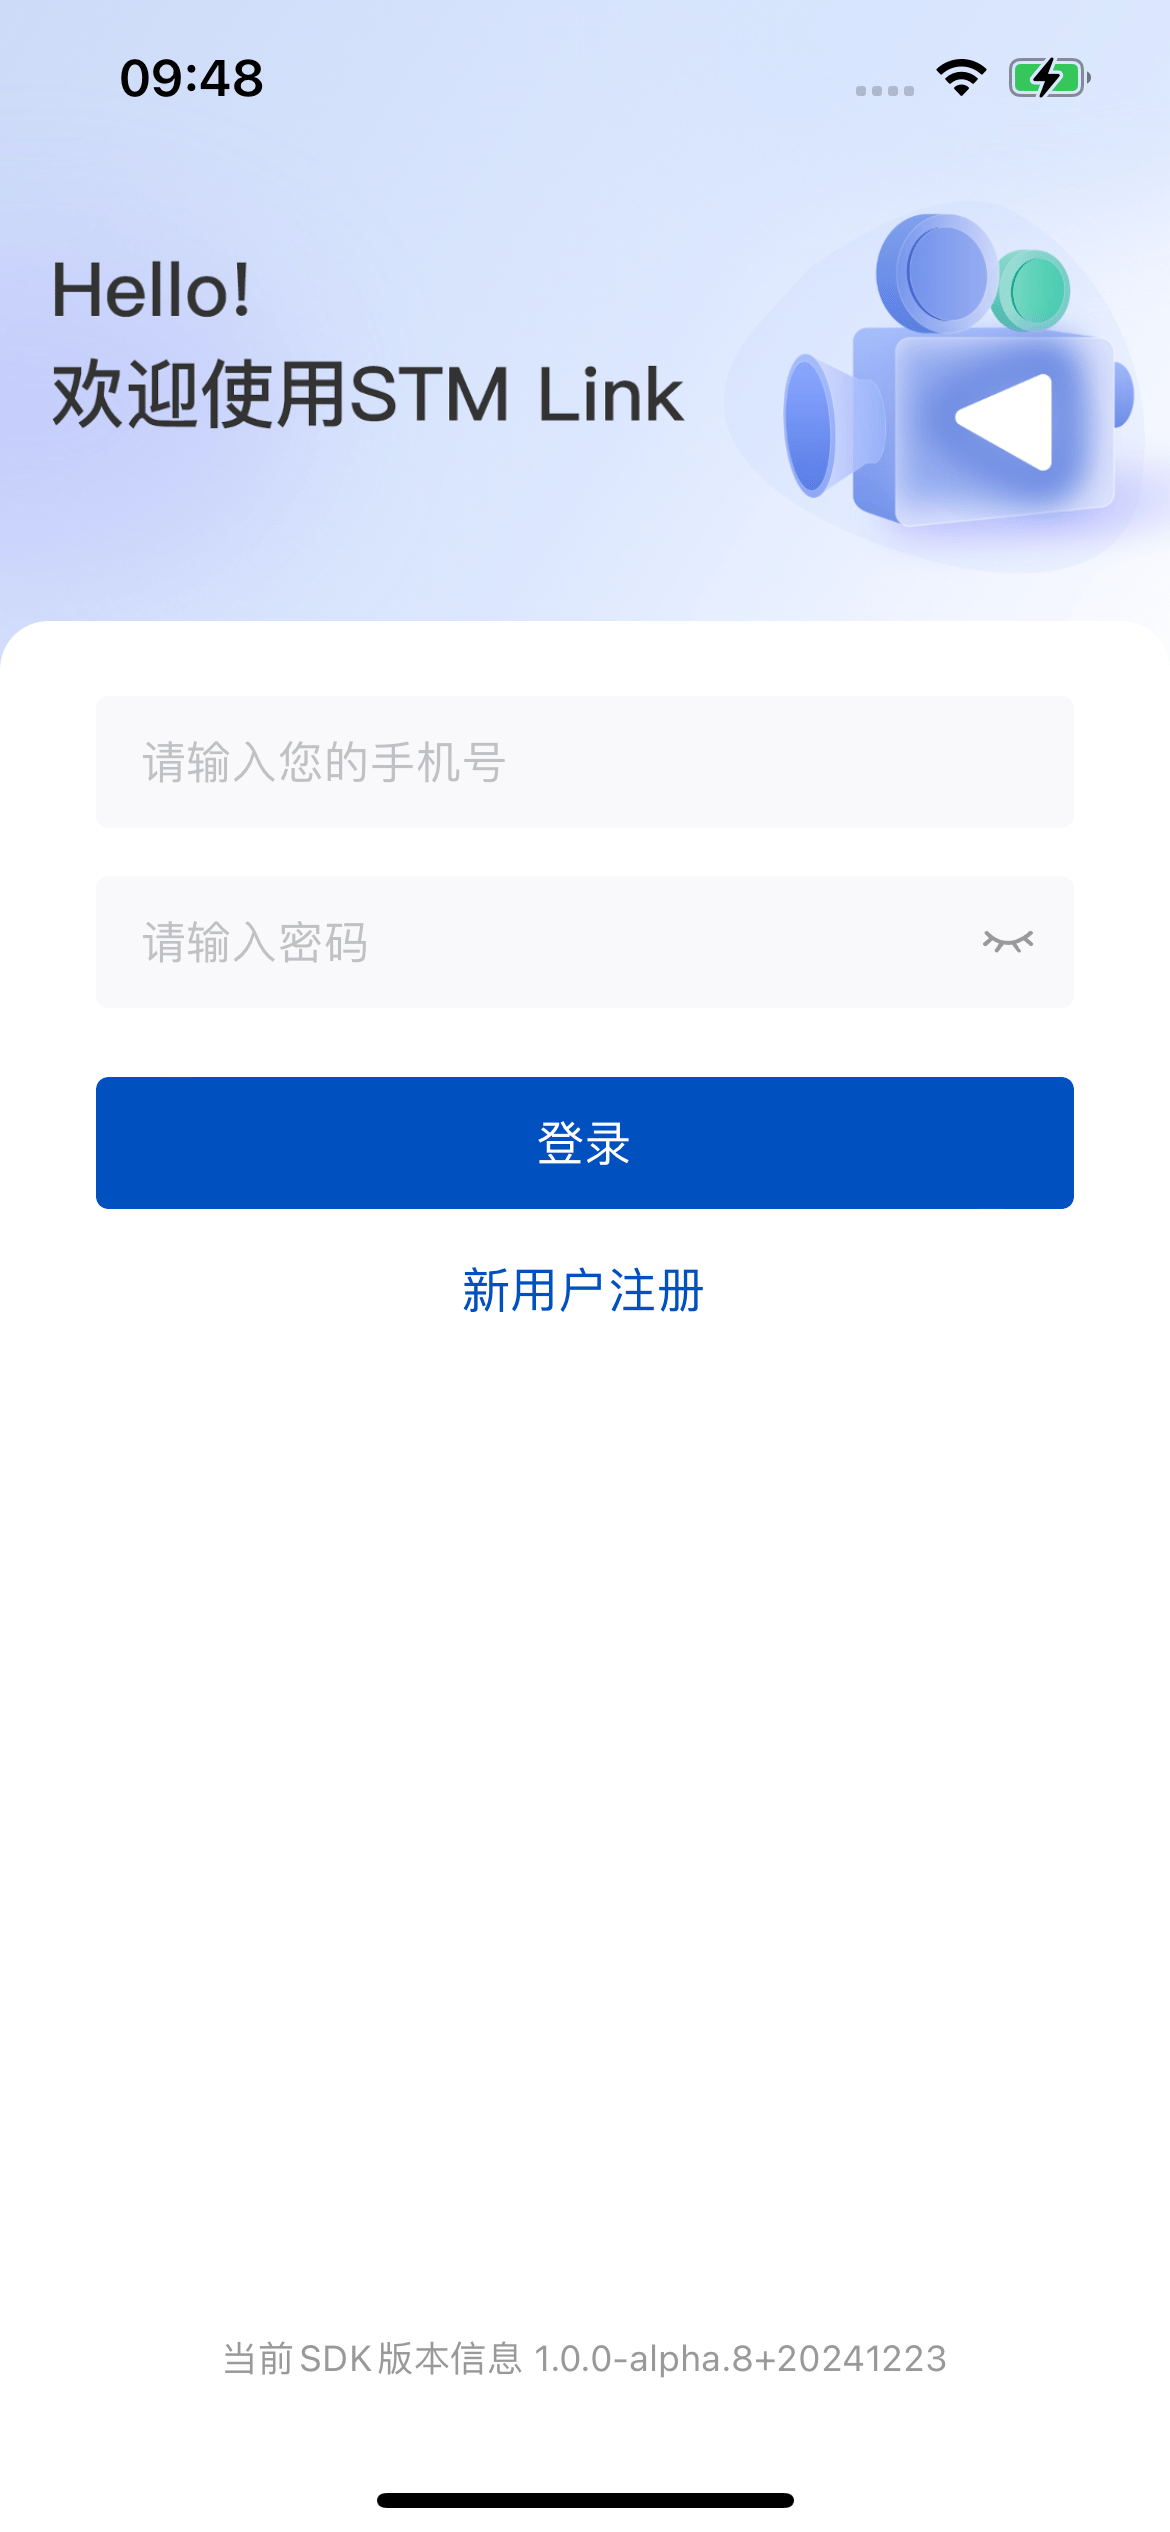 | 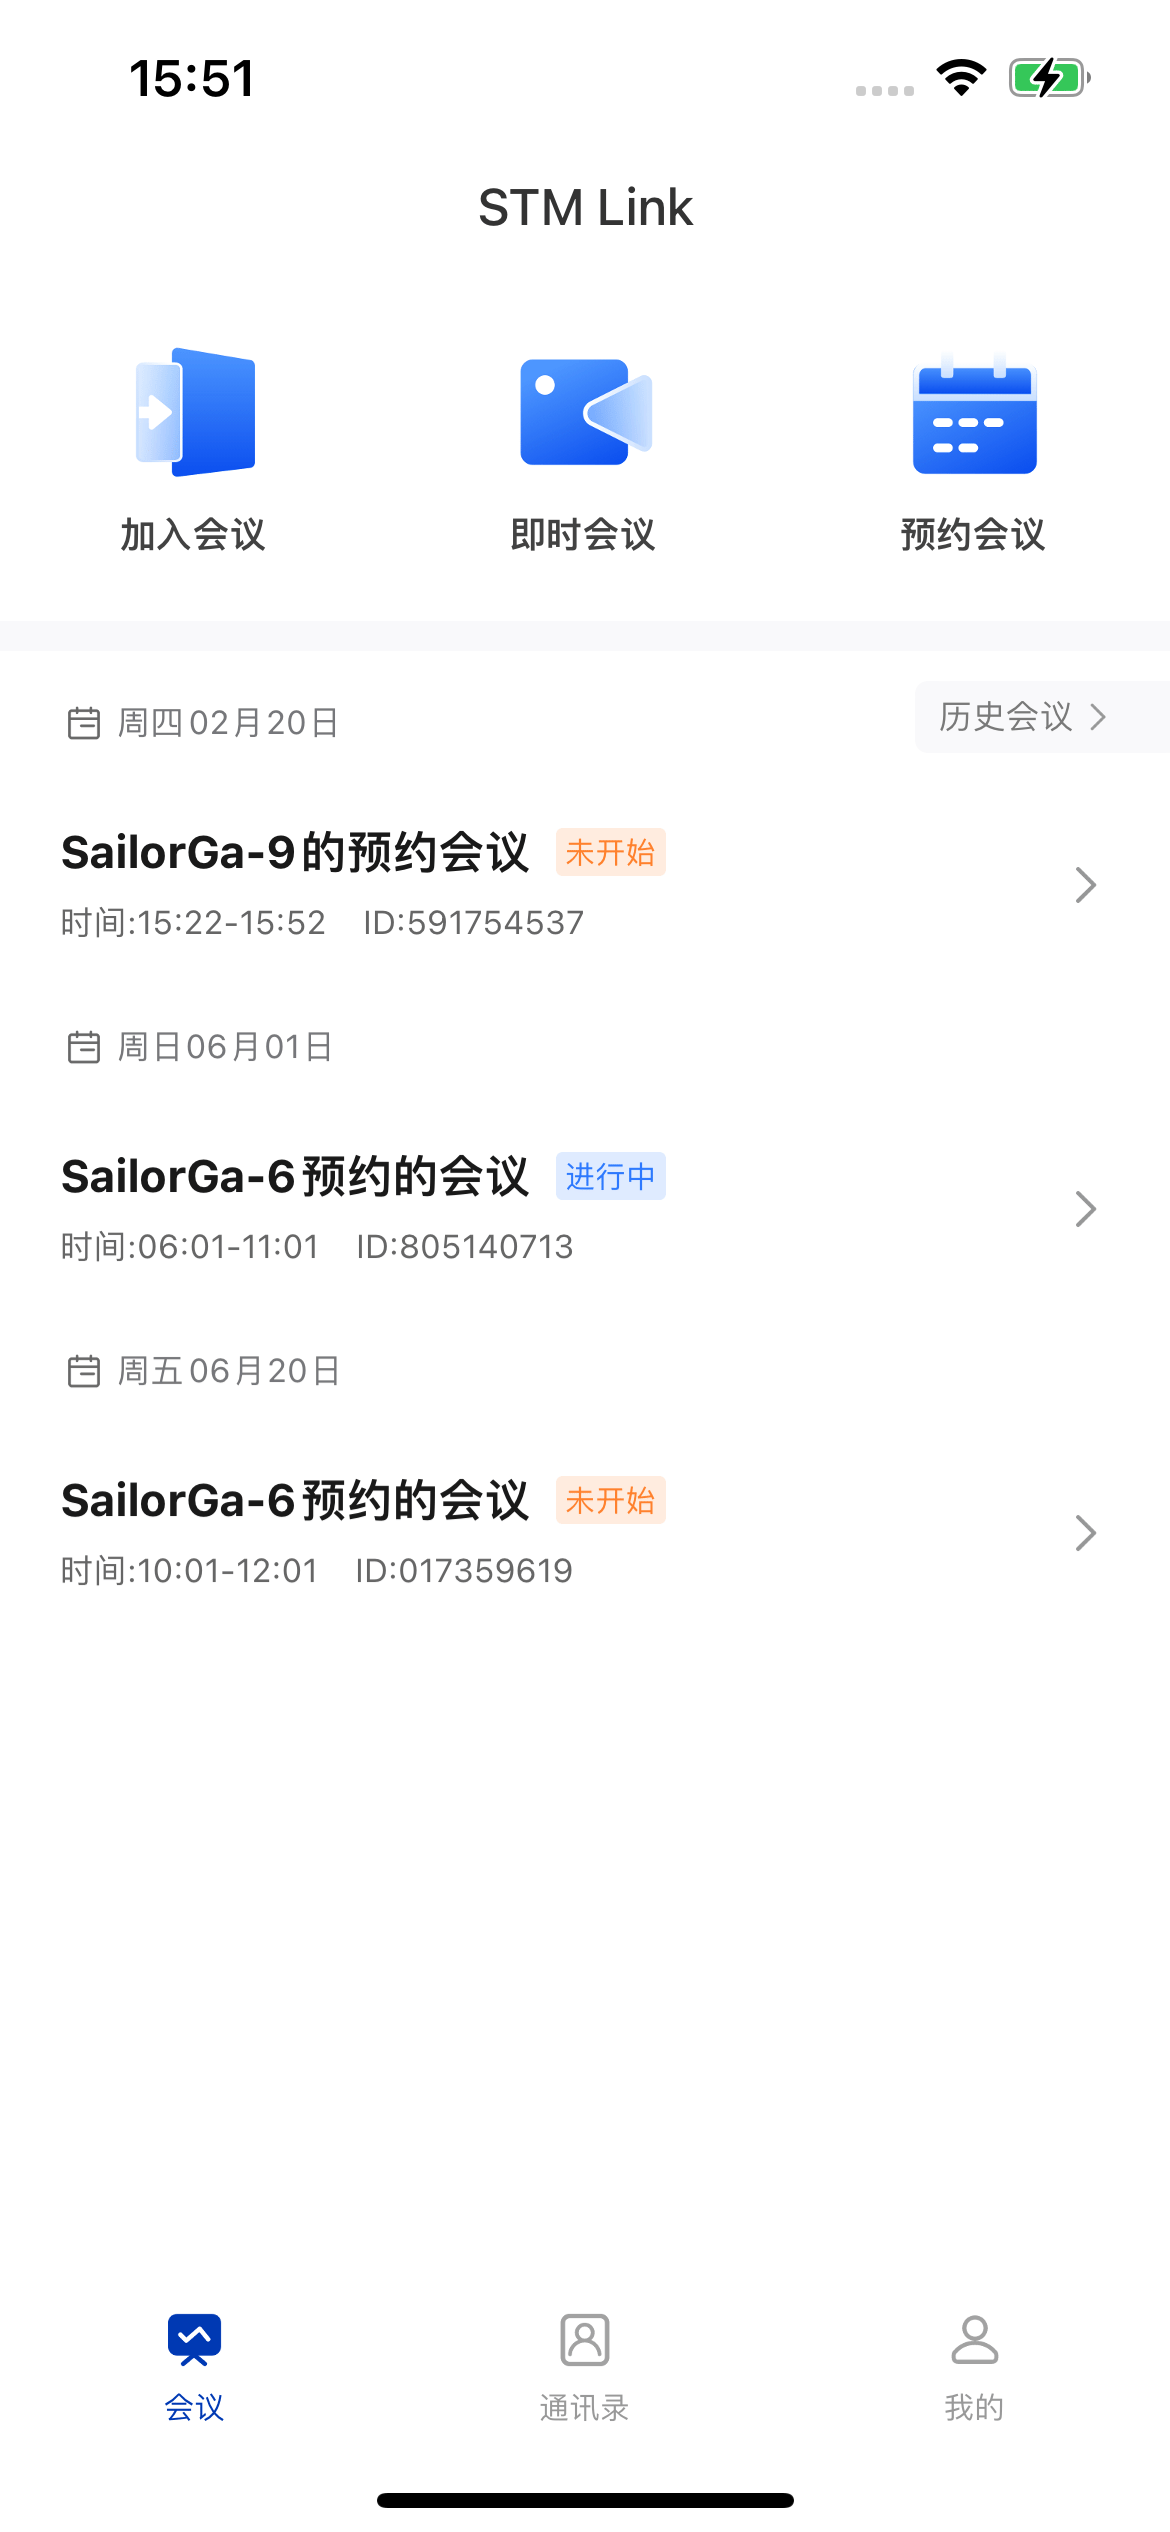 | 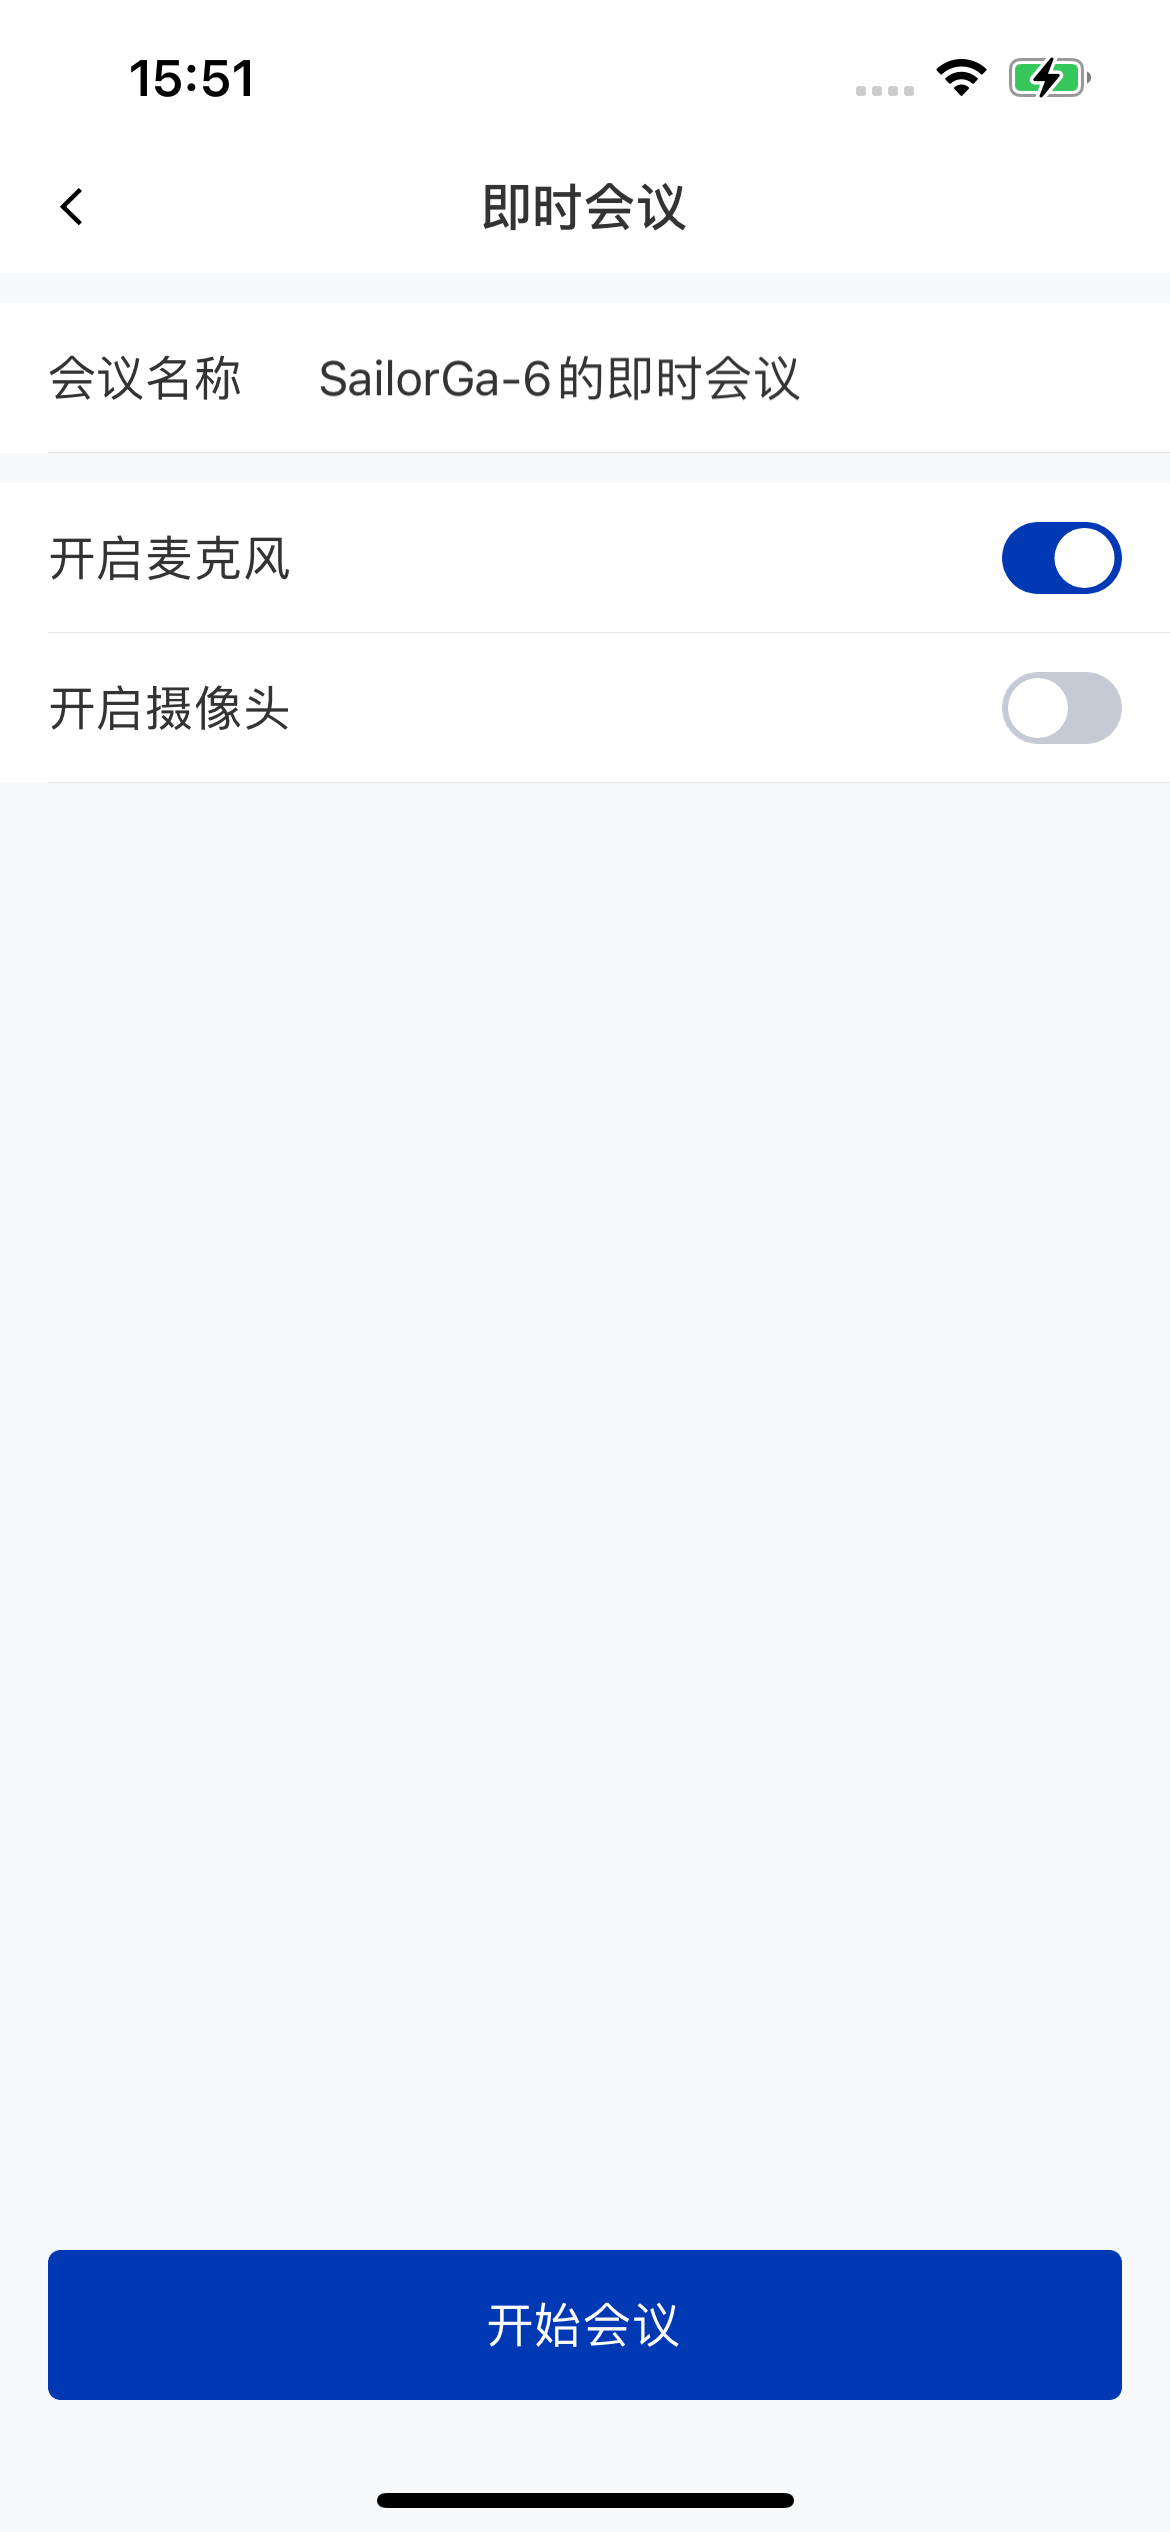 |
Host starts a meeting
The meeting main screen isFWRoomViewController. After creating a room with the MeetingKit API, create and navigate to FWRoomViewController as in the example below to start a quick meeting.
Create a room
Build meeting parameters
Meeting parameters consist of many fields, but you usually only need a few of them. See SEAMeetingParam (Chinese) for details.Create the room
Enter a room
Build meeting entry parameters
Navigate to the meeting main screen
| In-meeting screen | Meeting controls screen |
|---|---|
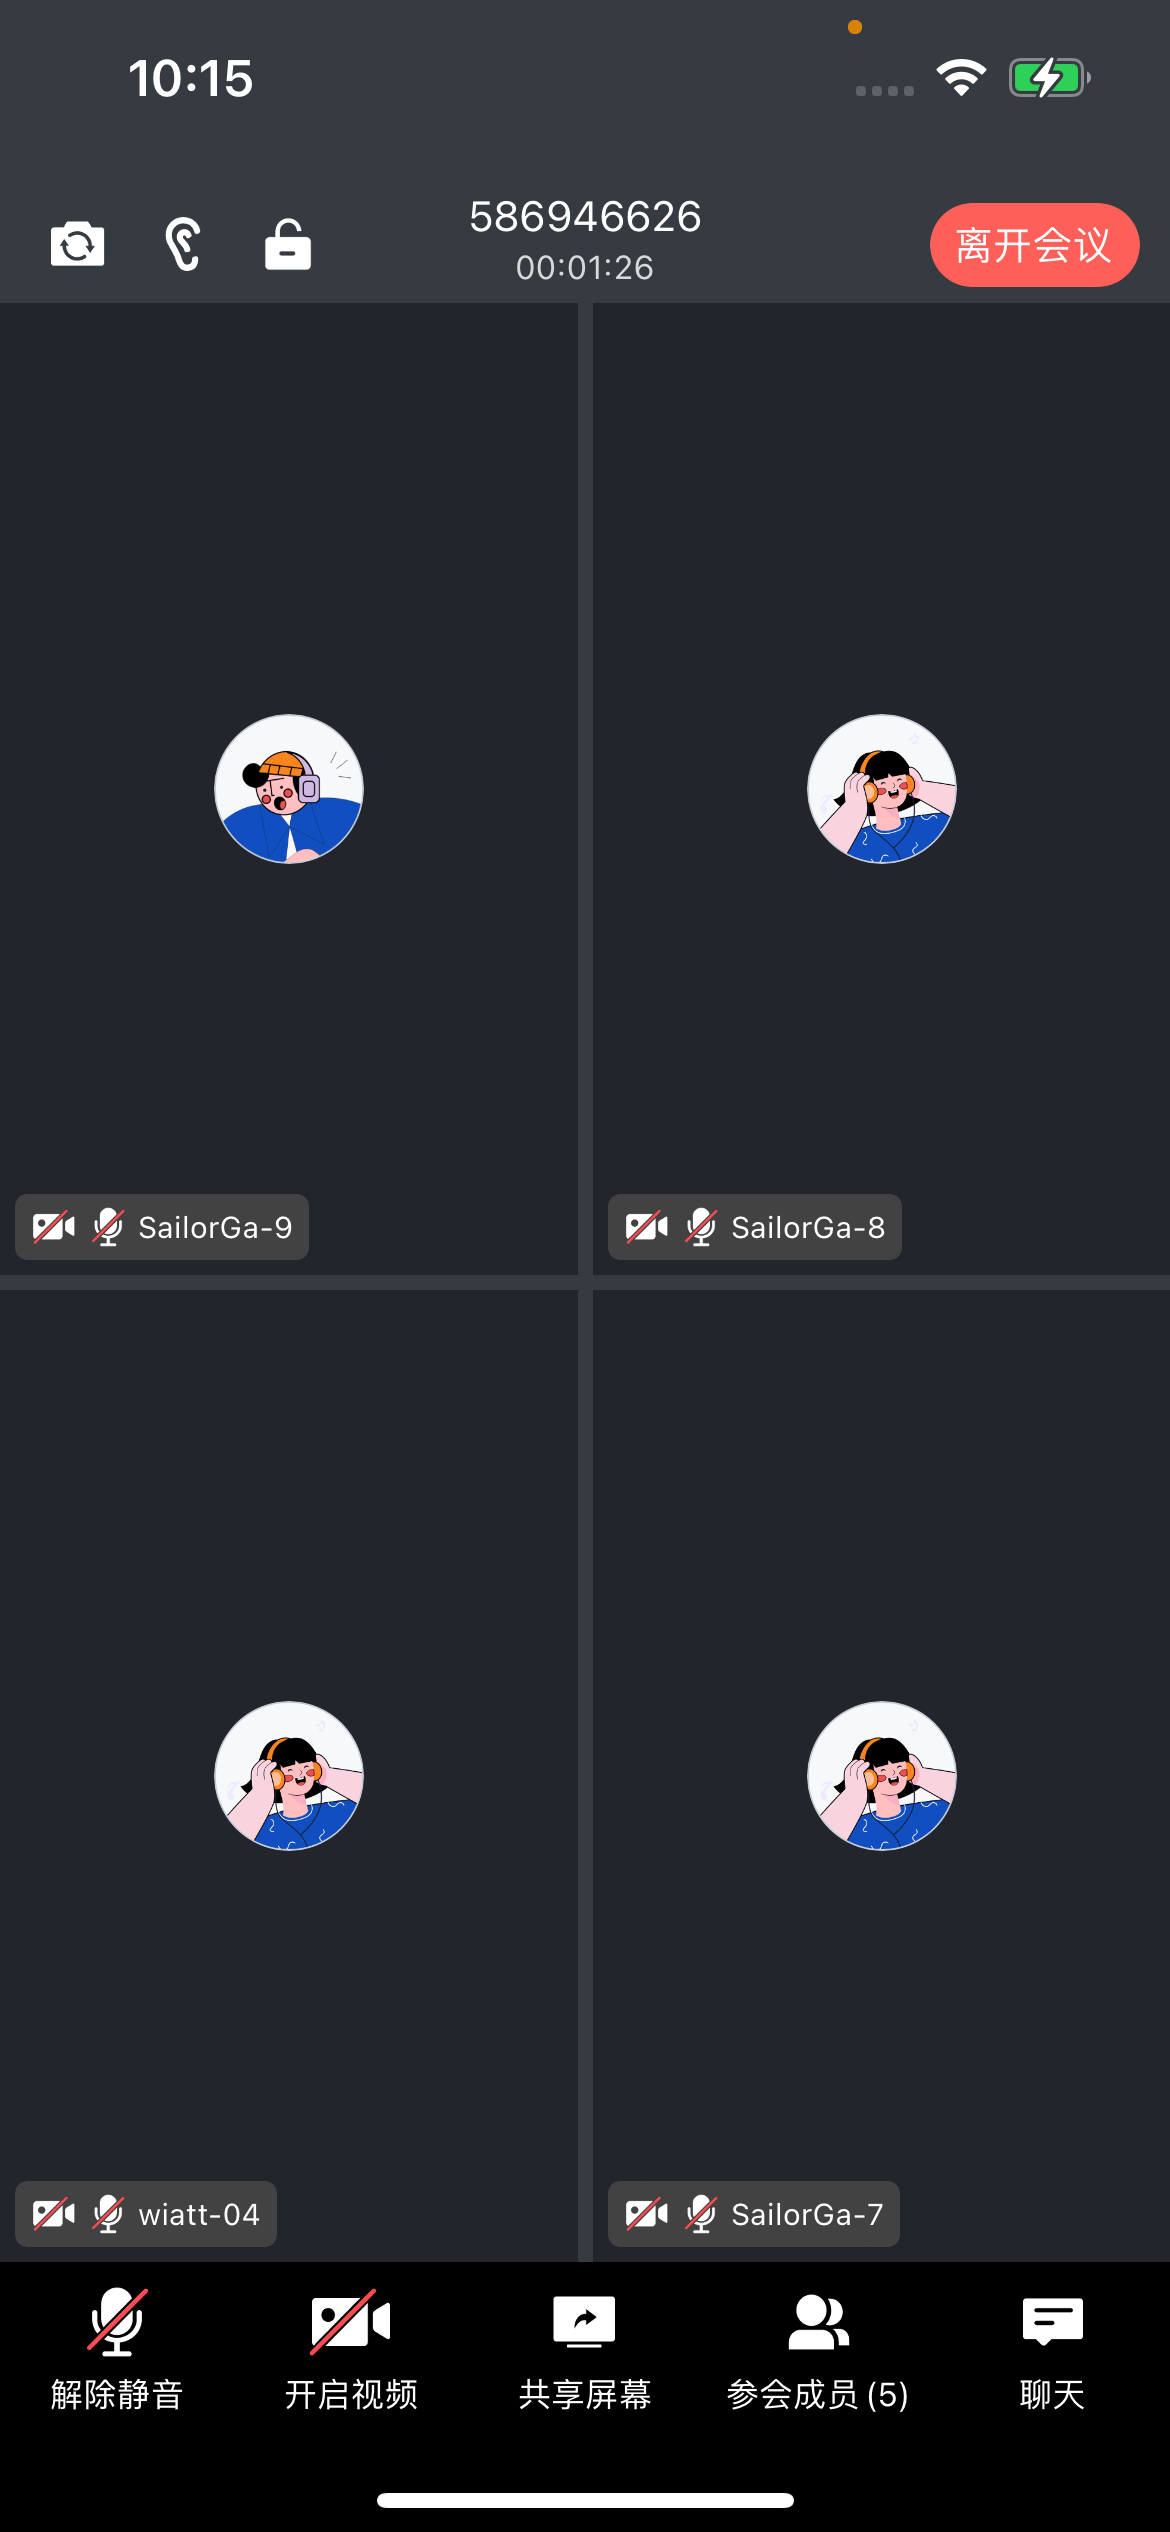 | 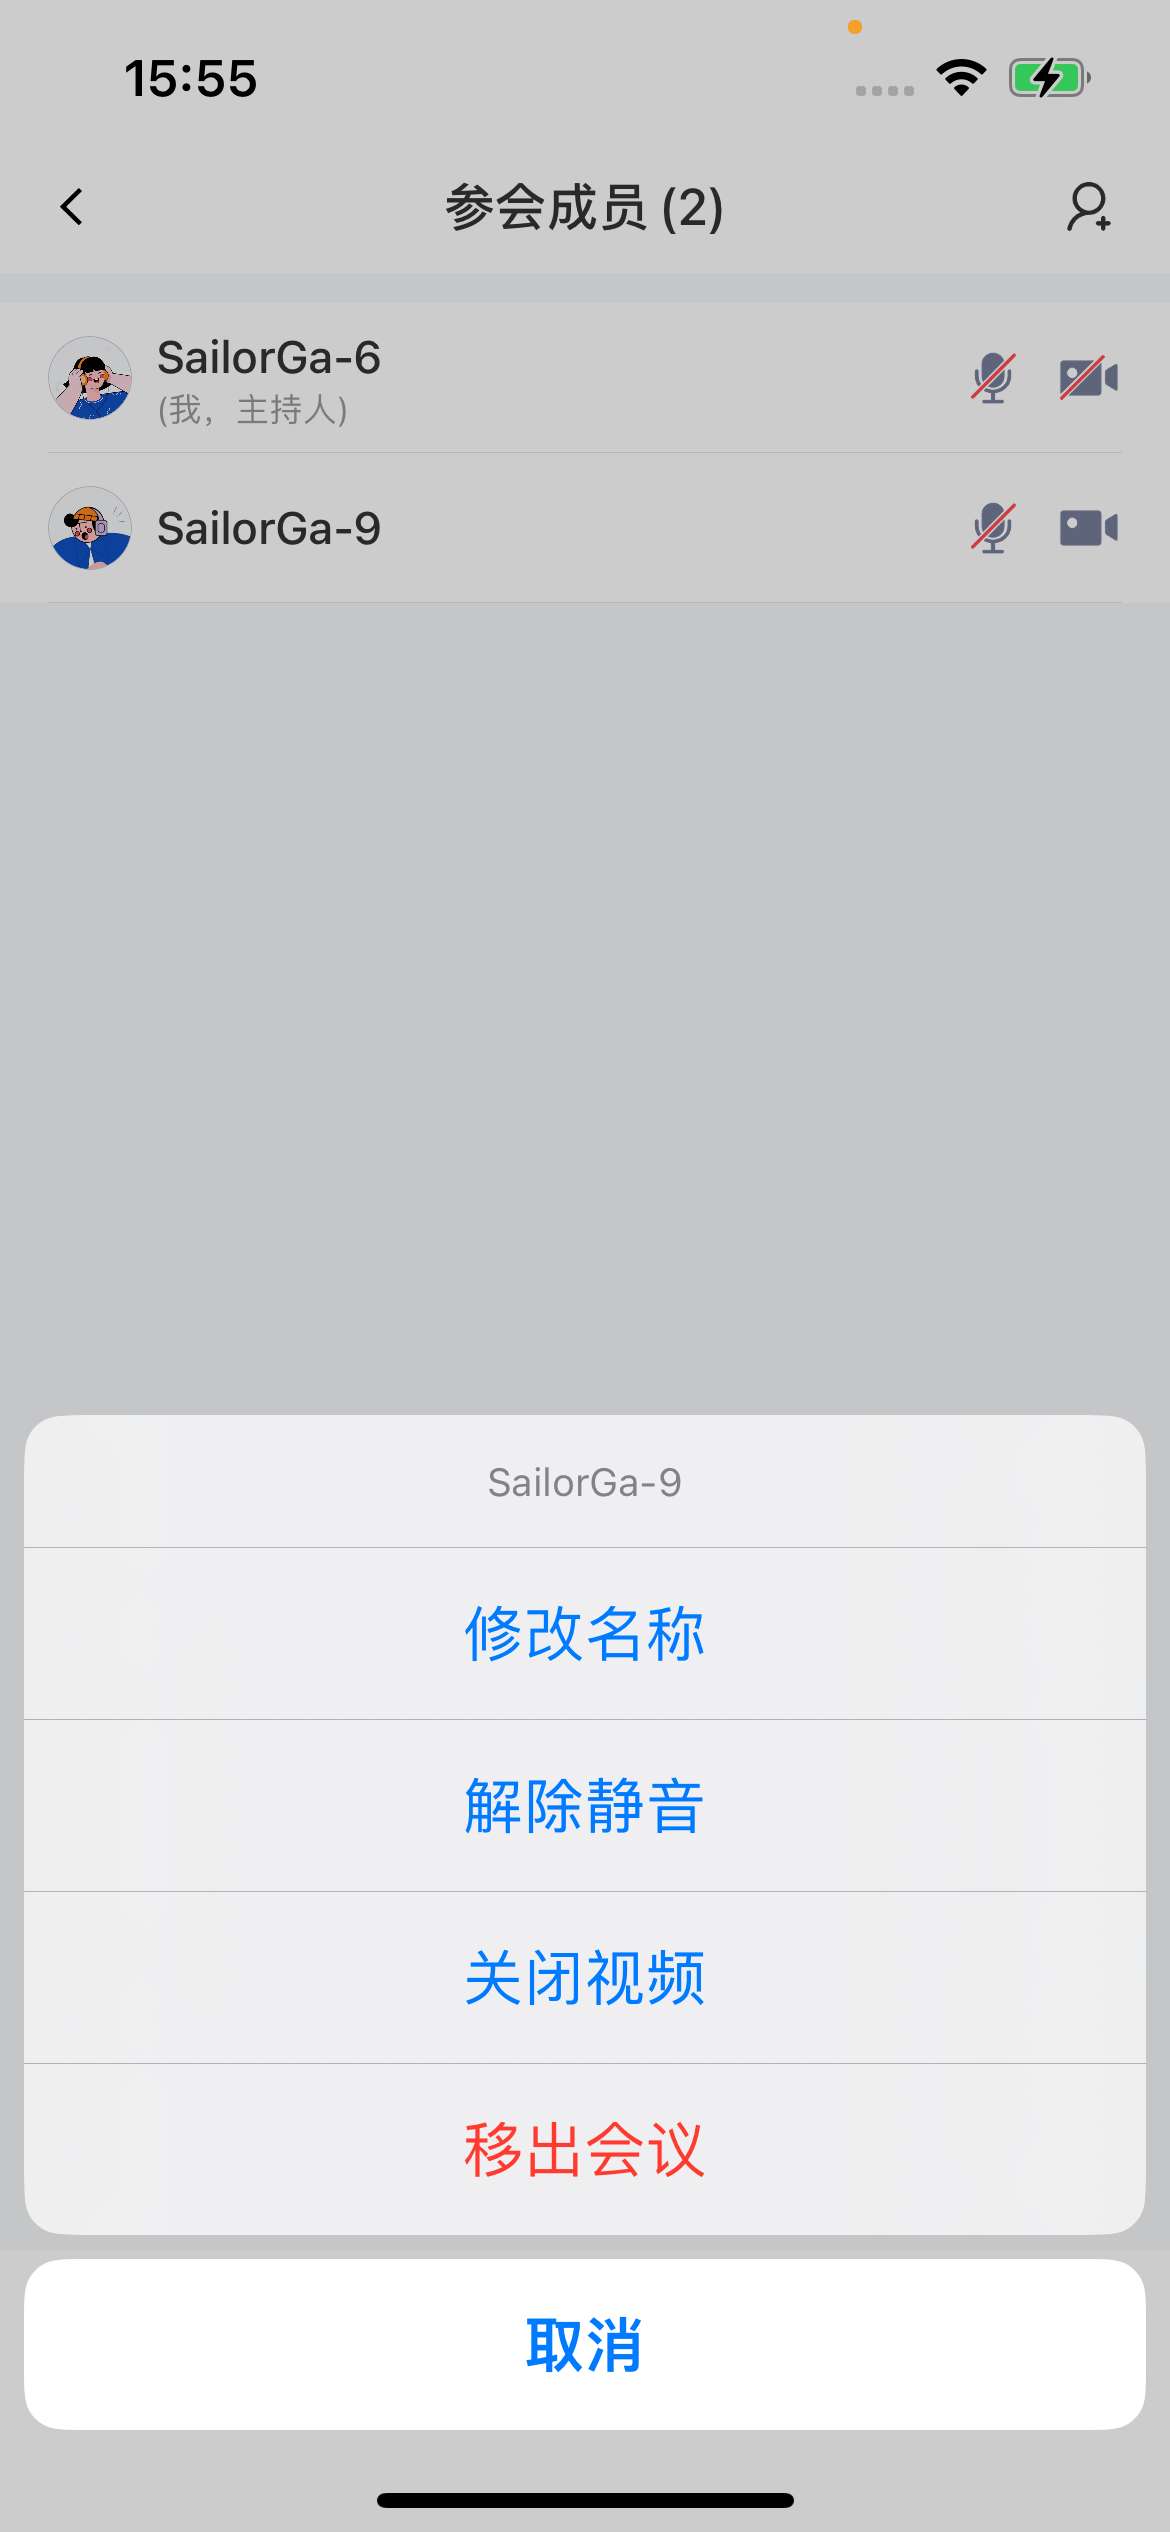 |
Regular members enter a meeting
Create and navigate to the meeting main screen as in the Enter a room example above to enter a meeting.| Enter meeting screen | In-meeting screen |
|---|---|
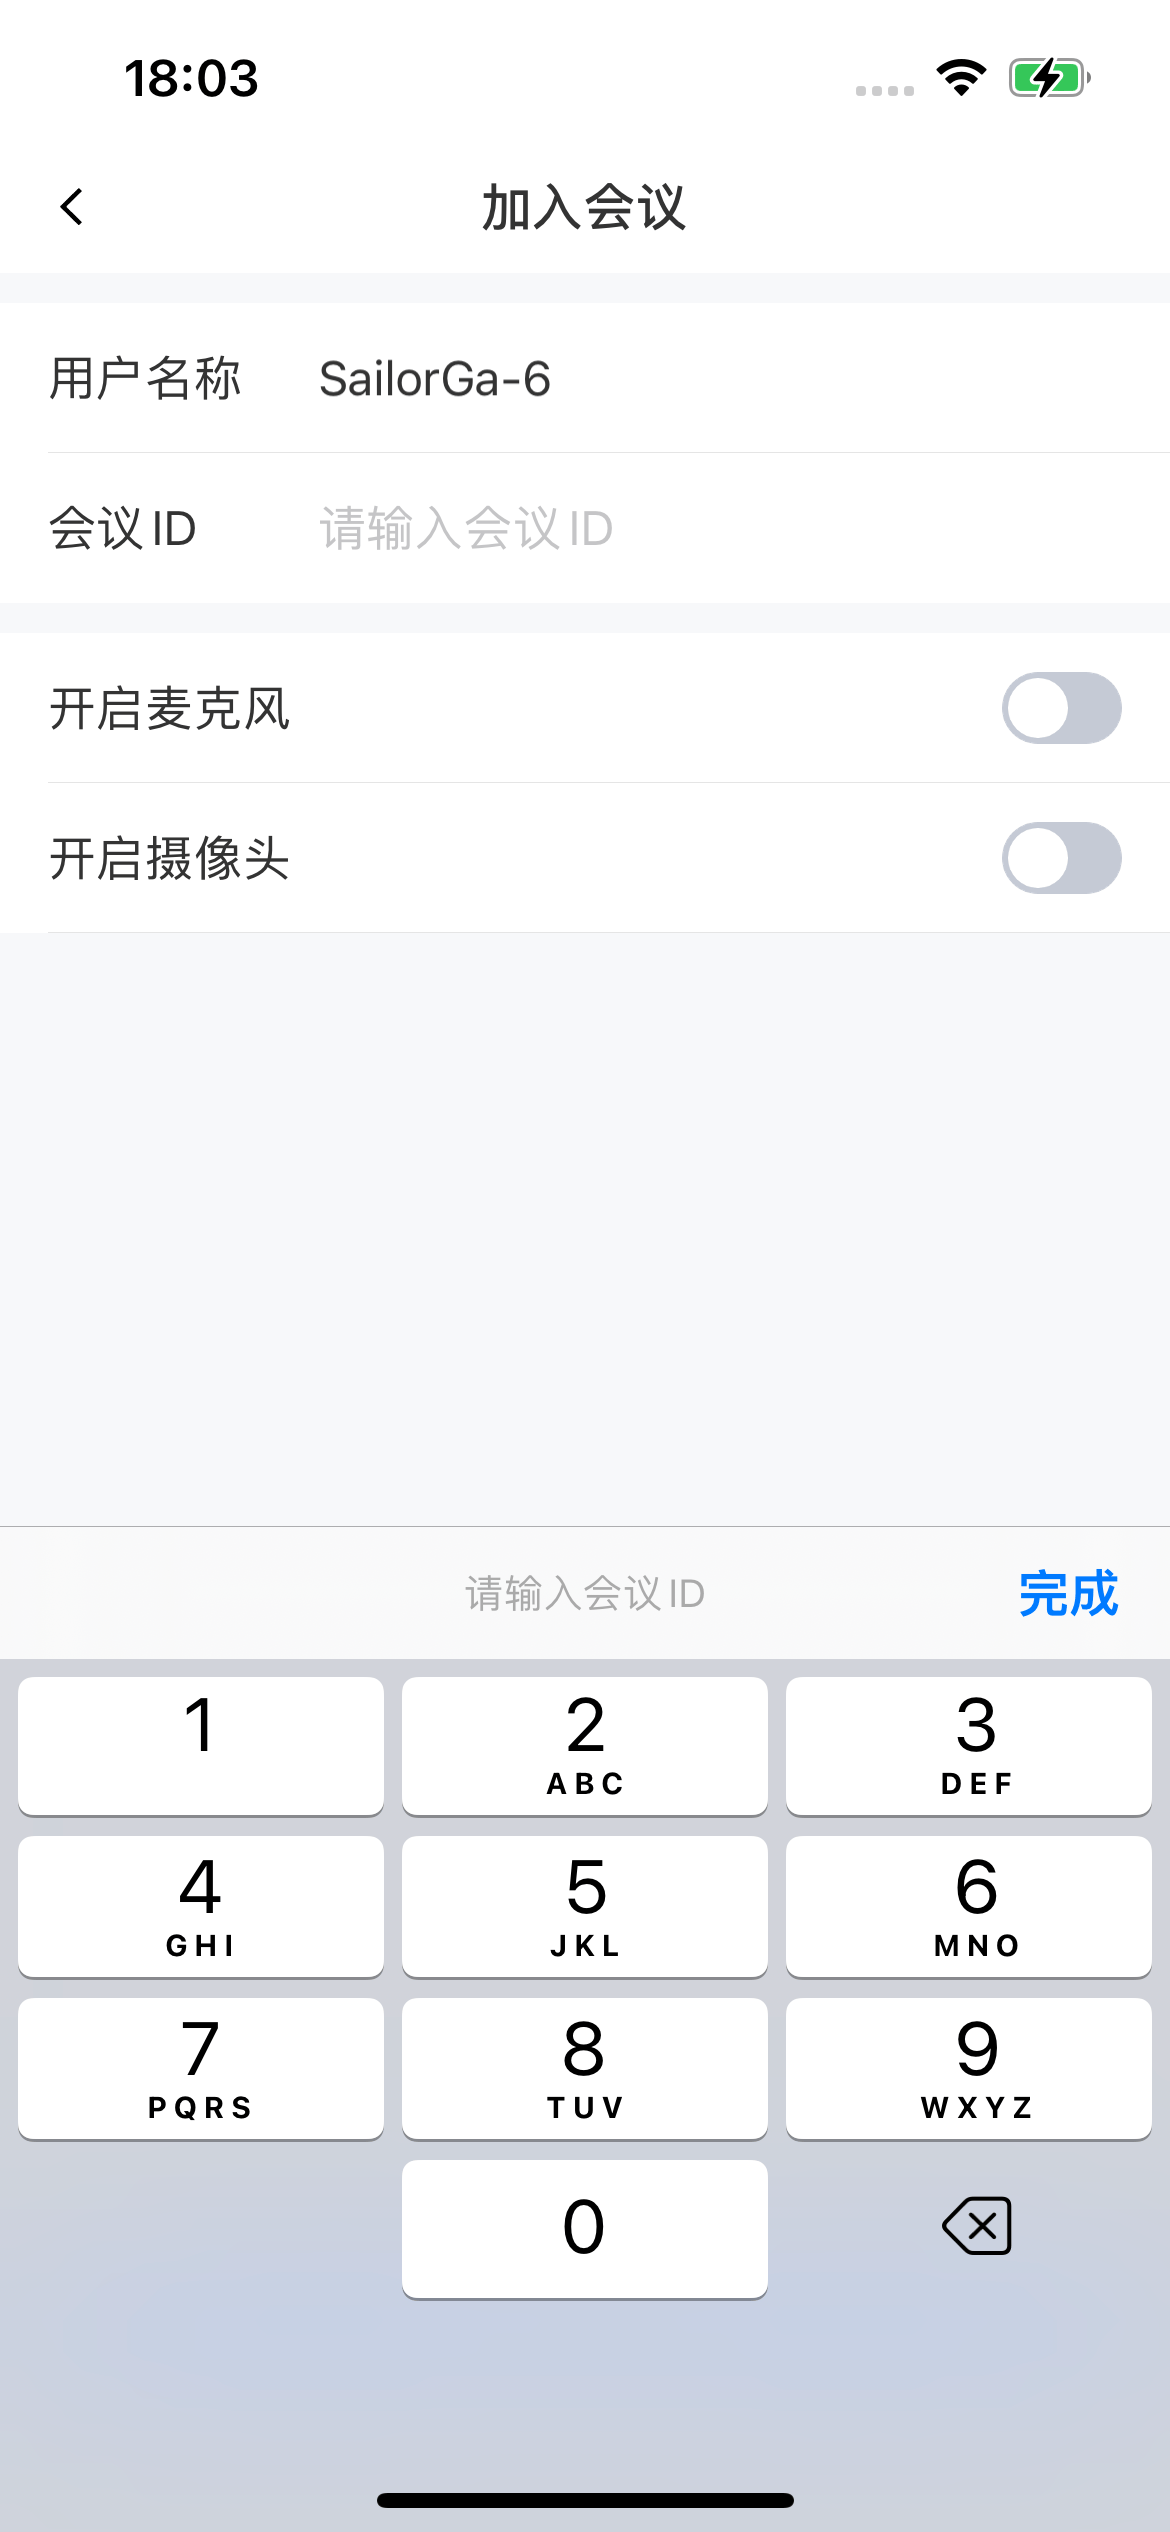 | 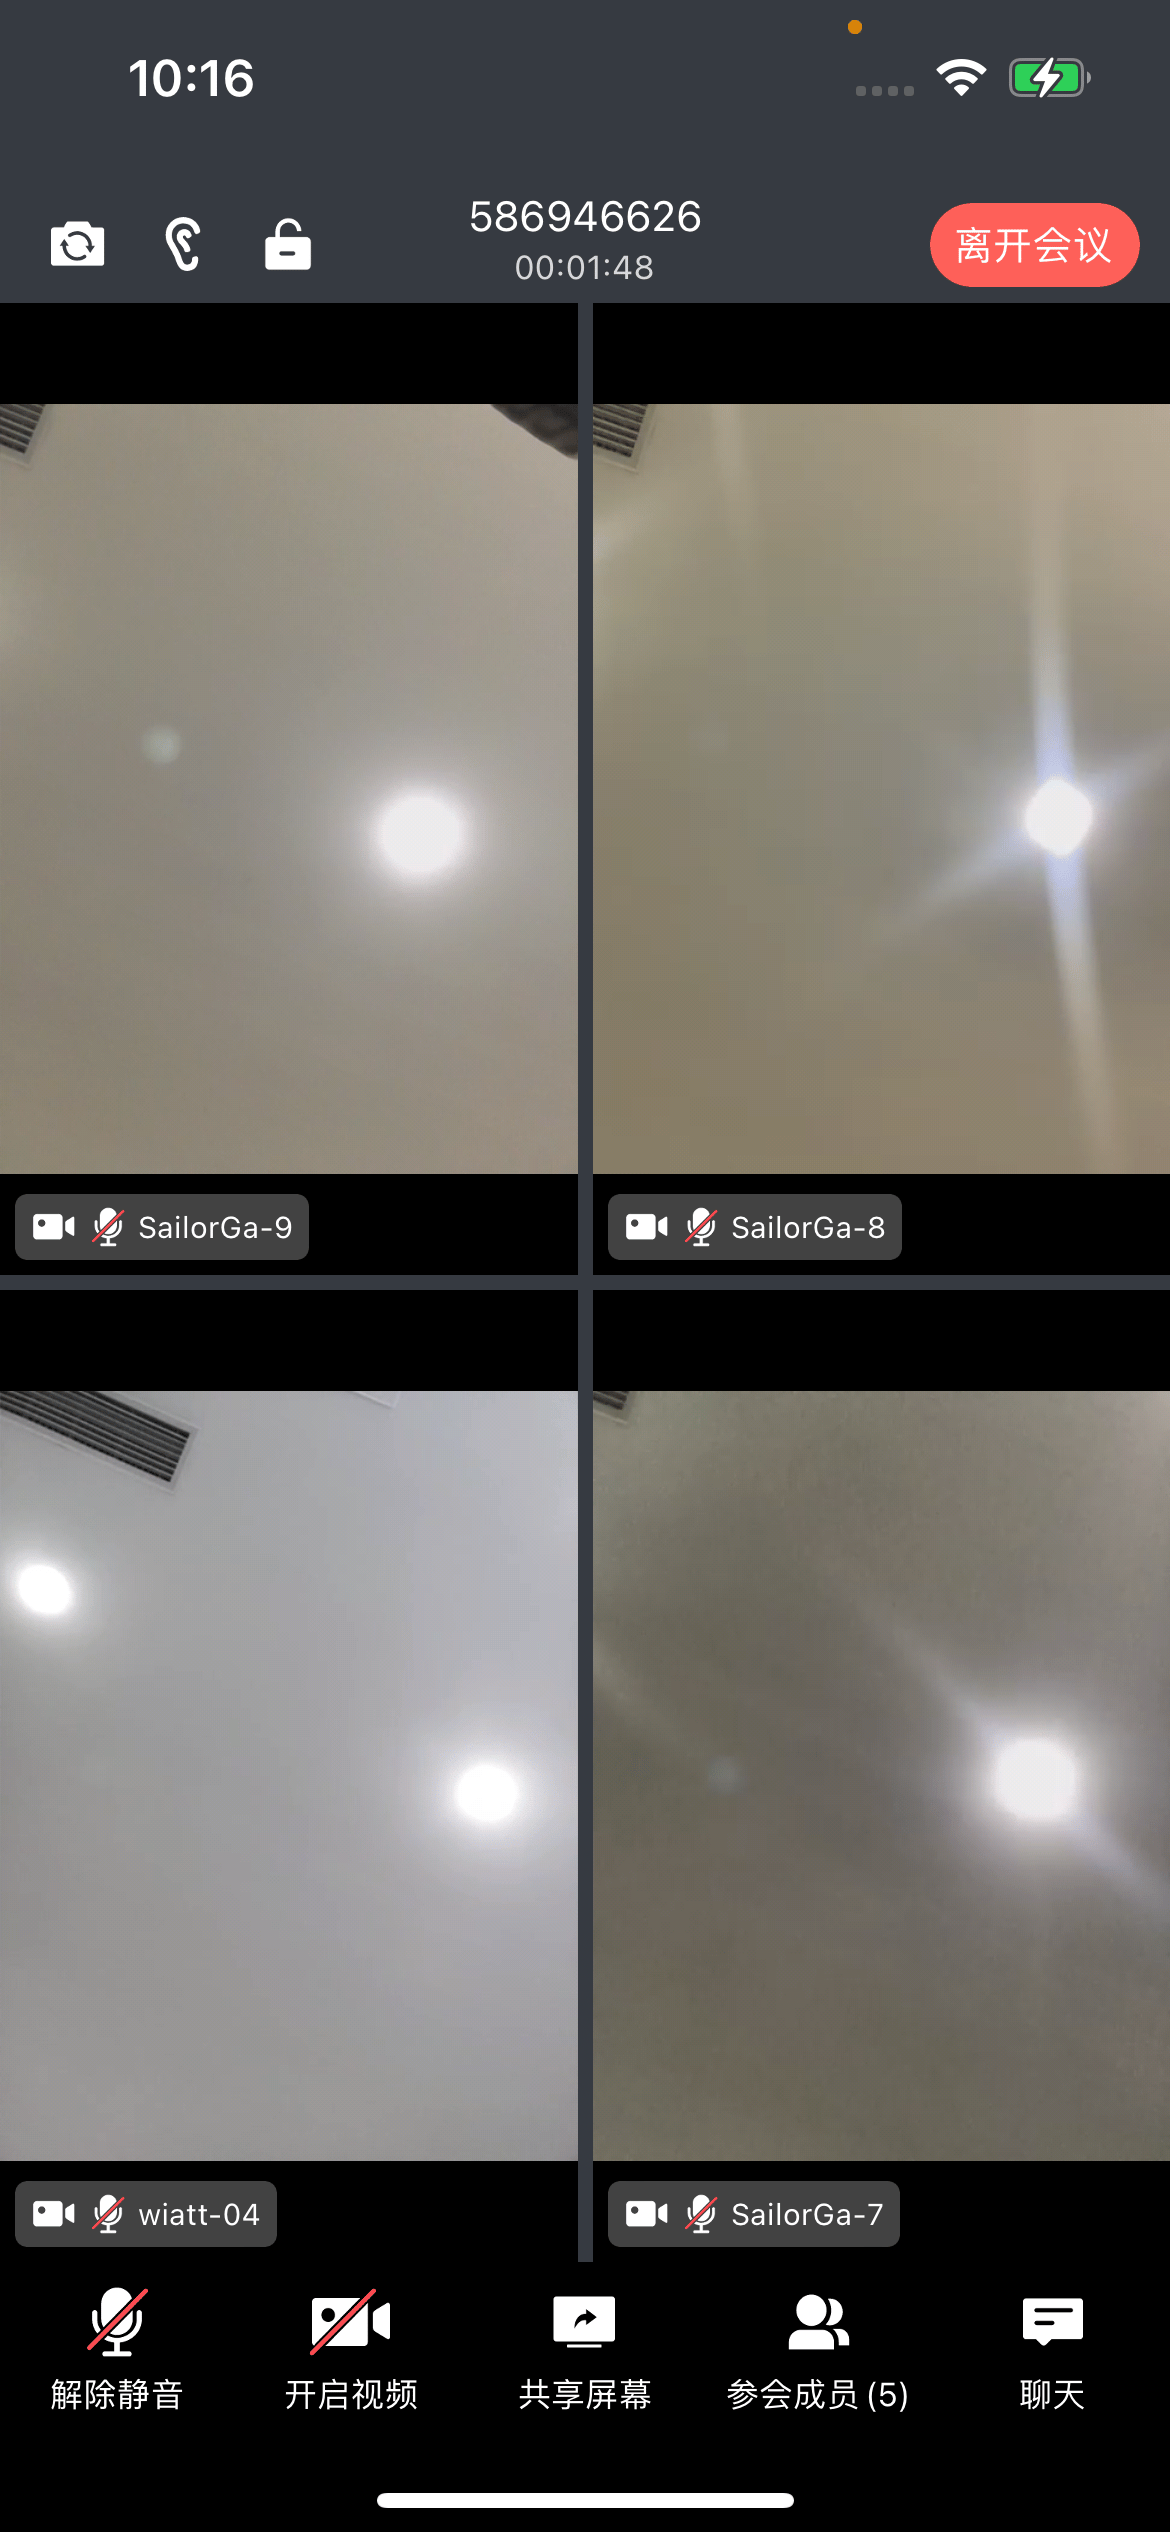 |
Scheduled meetings
Overview
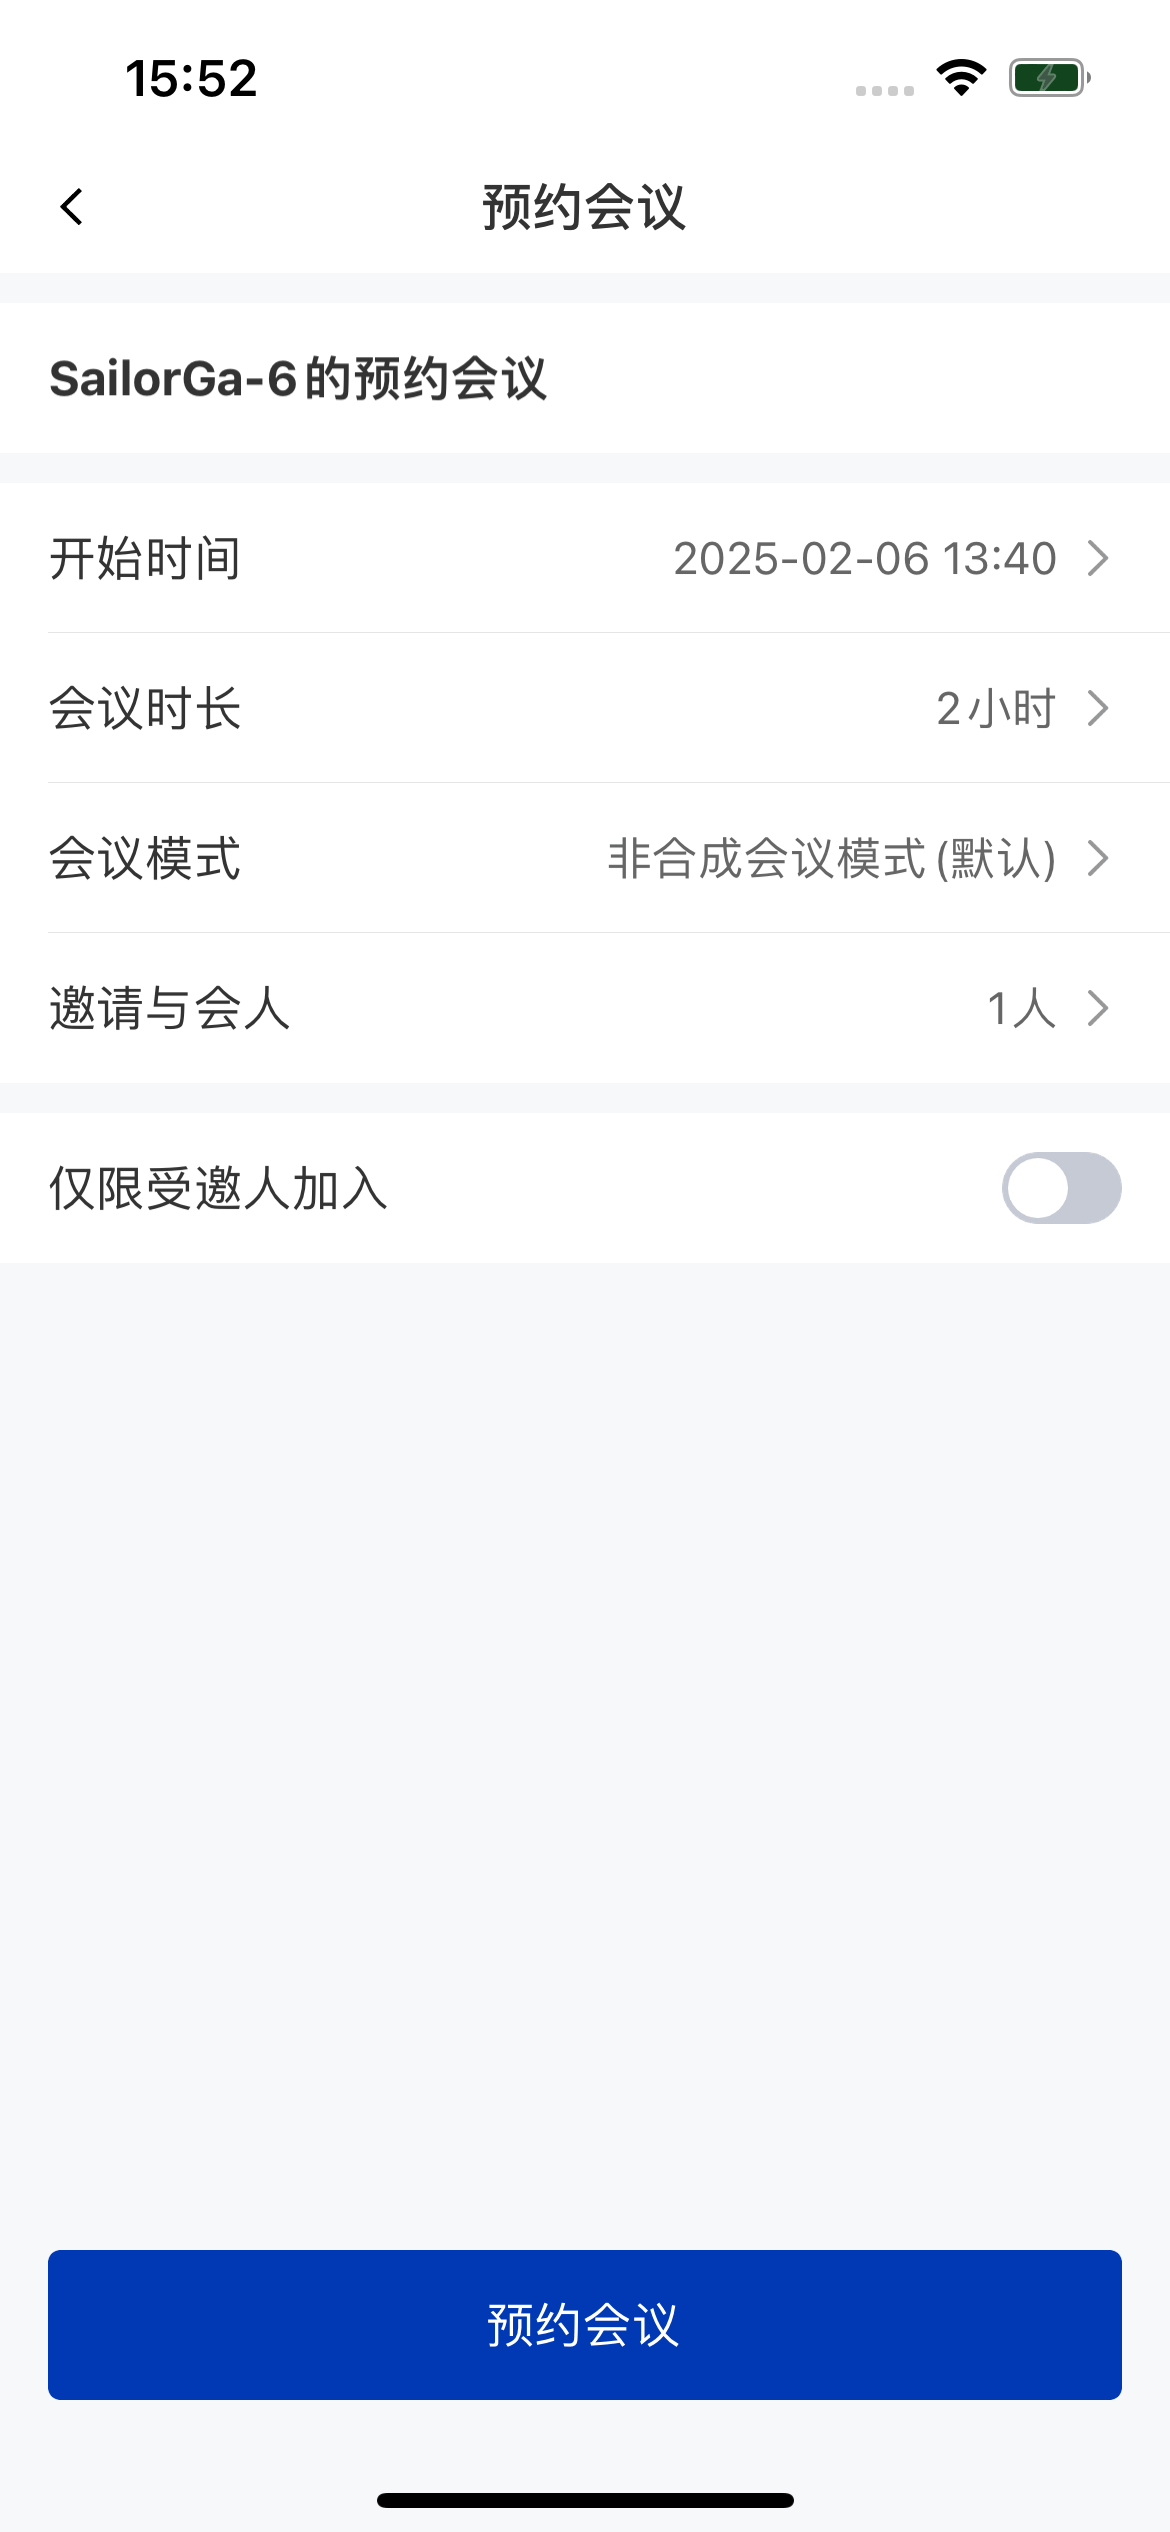
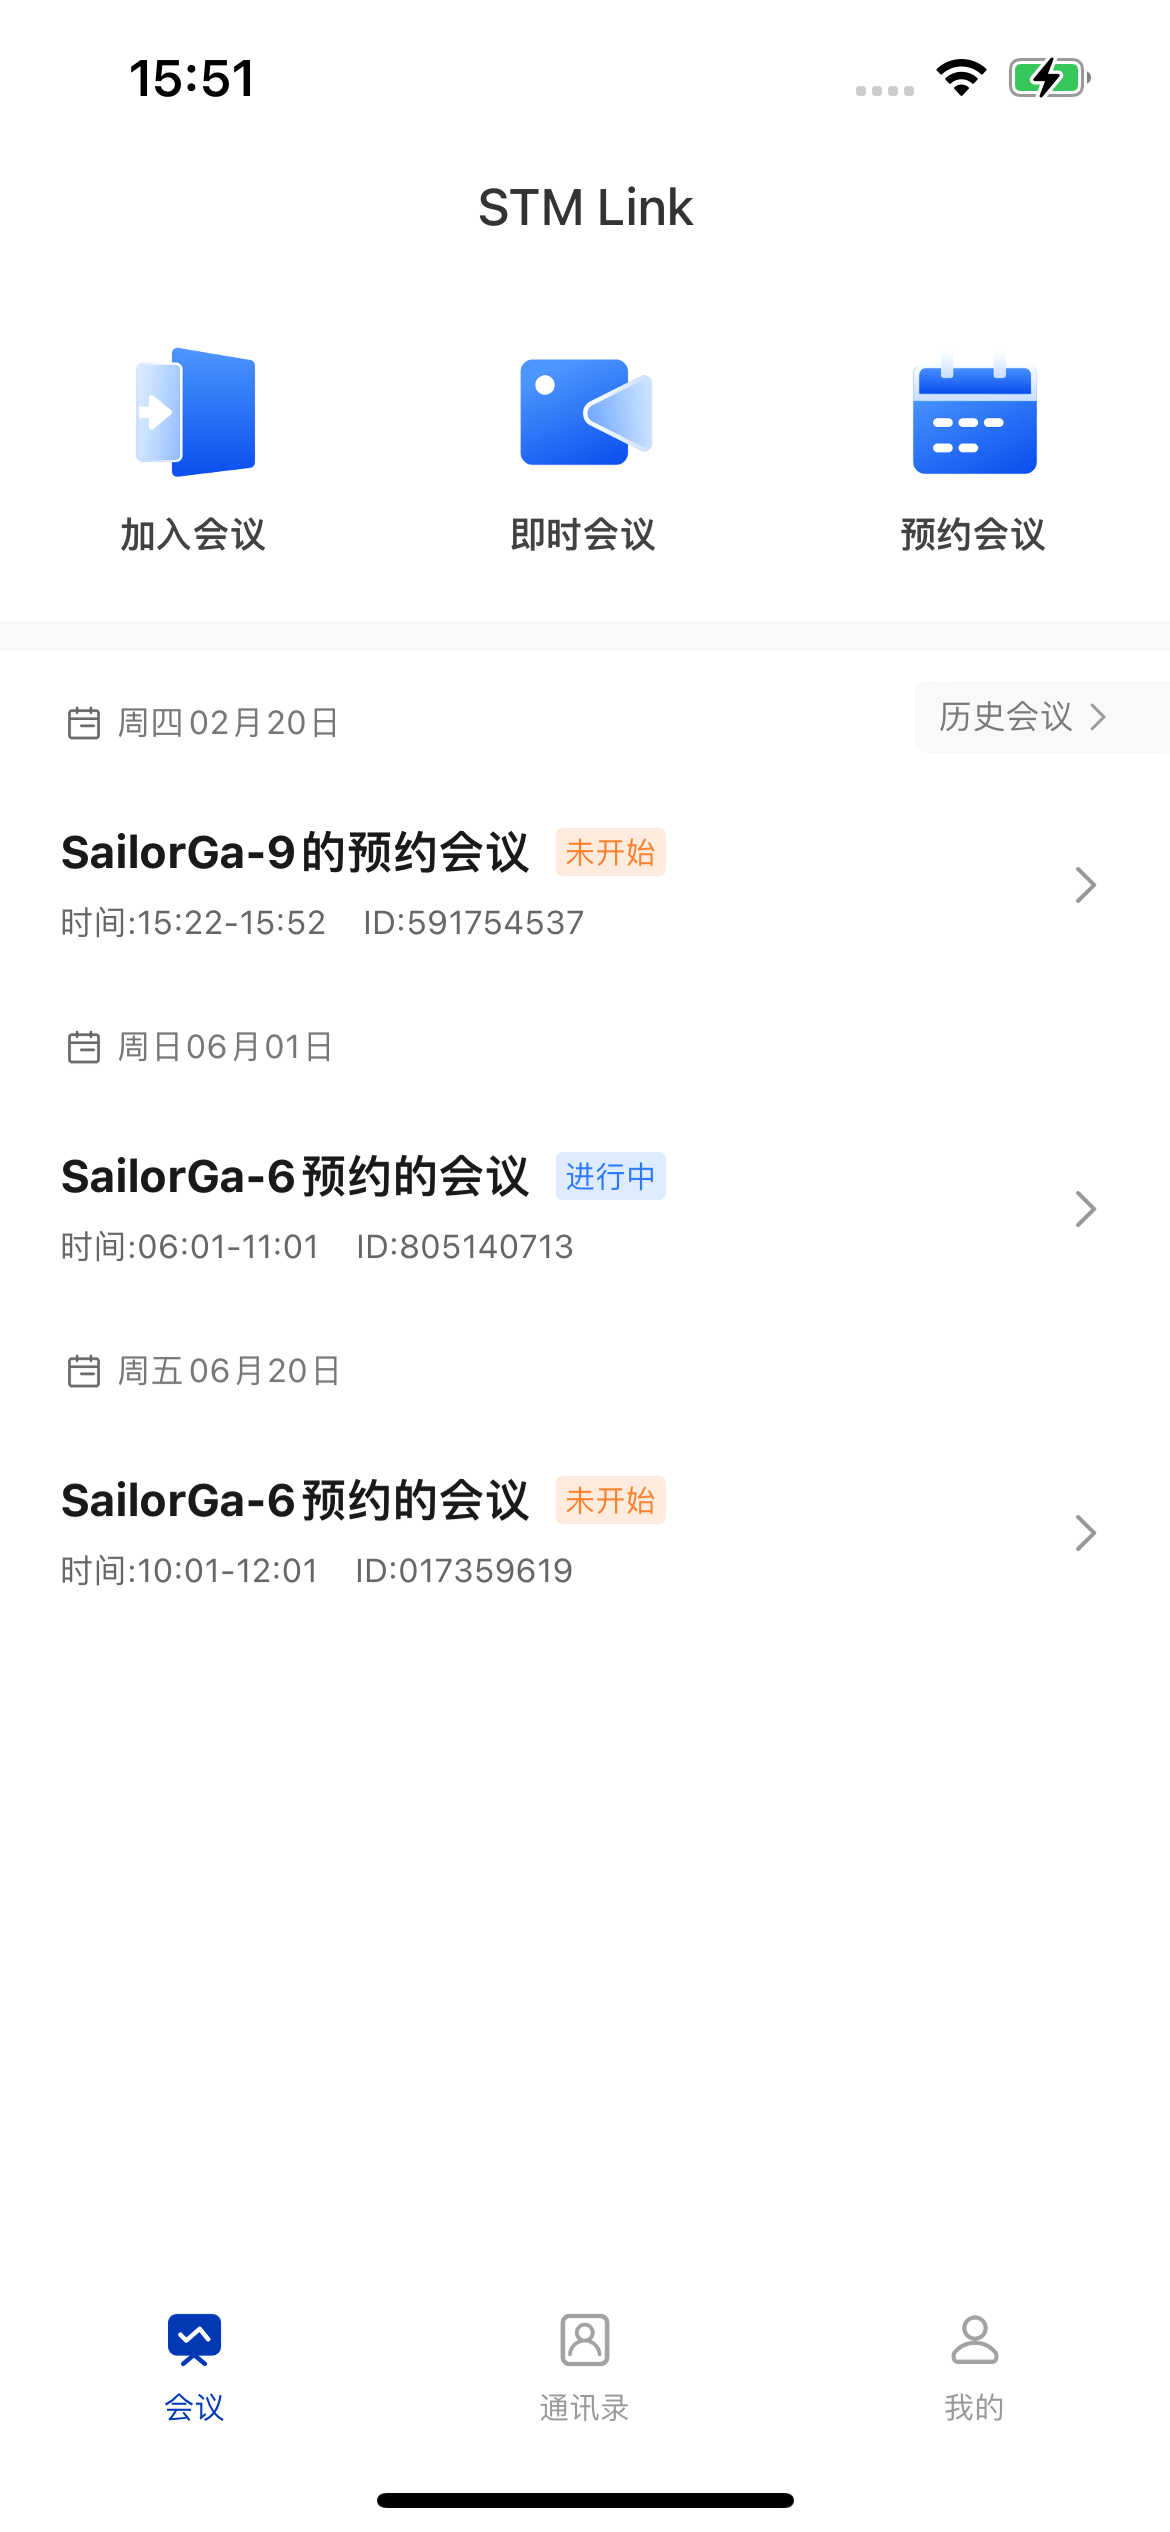
Users can schedule a room and arrange a meeting in their calendar. When the meeting time comes, they can start the meeting with a single tap.| Schedule a meeting | Meeting list |
|---|---|
 |  |
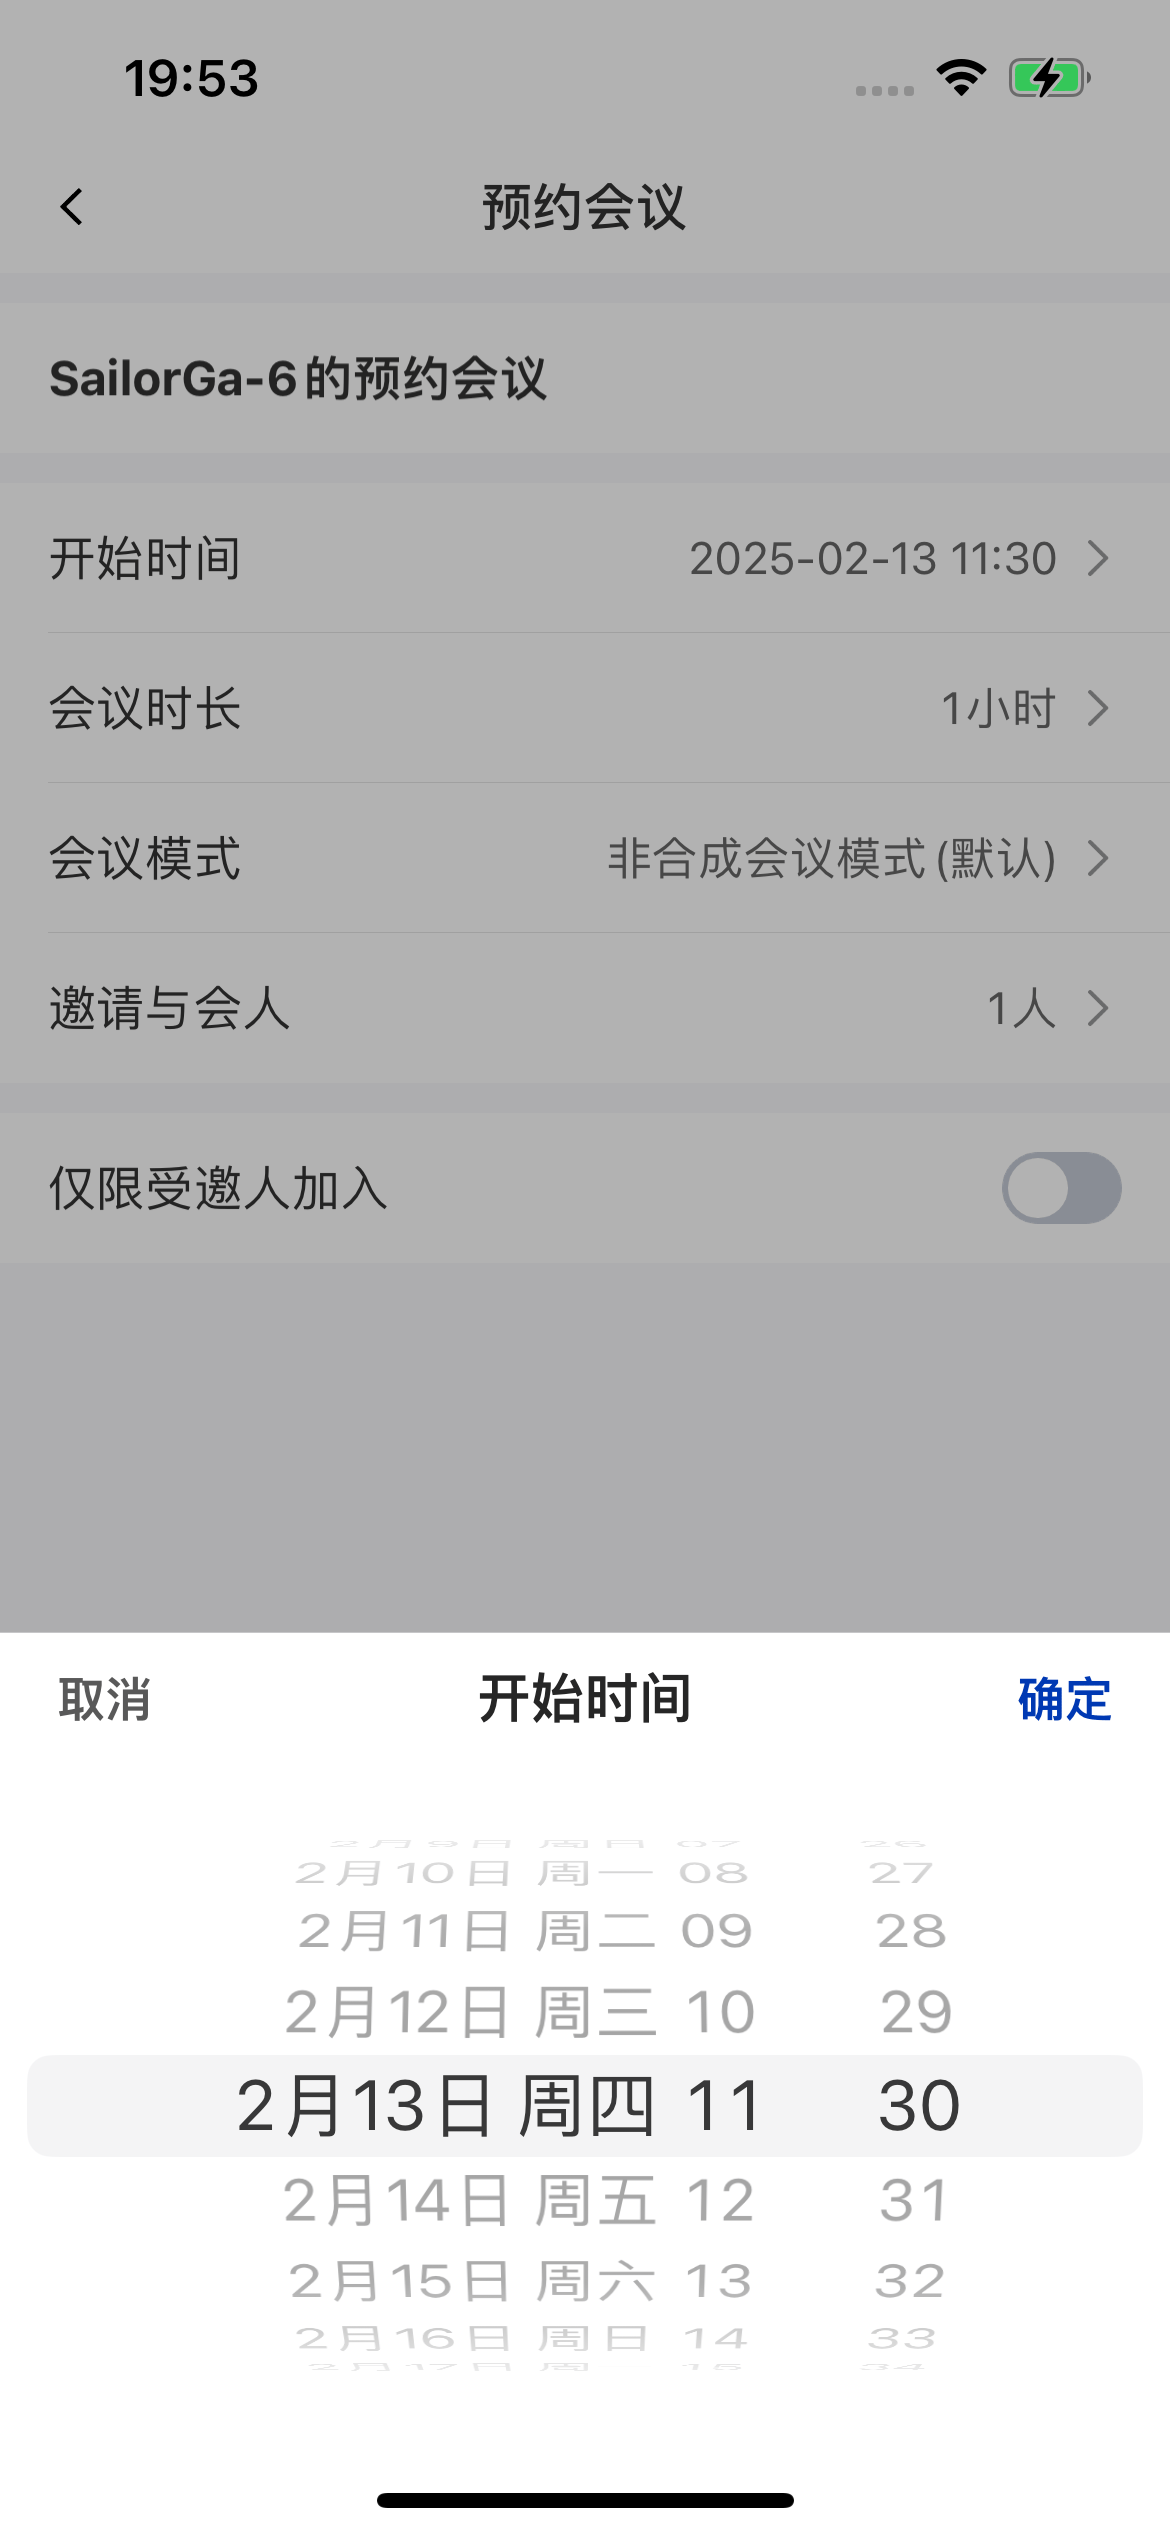
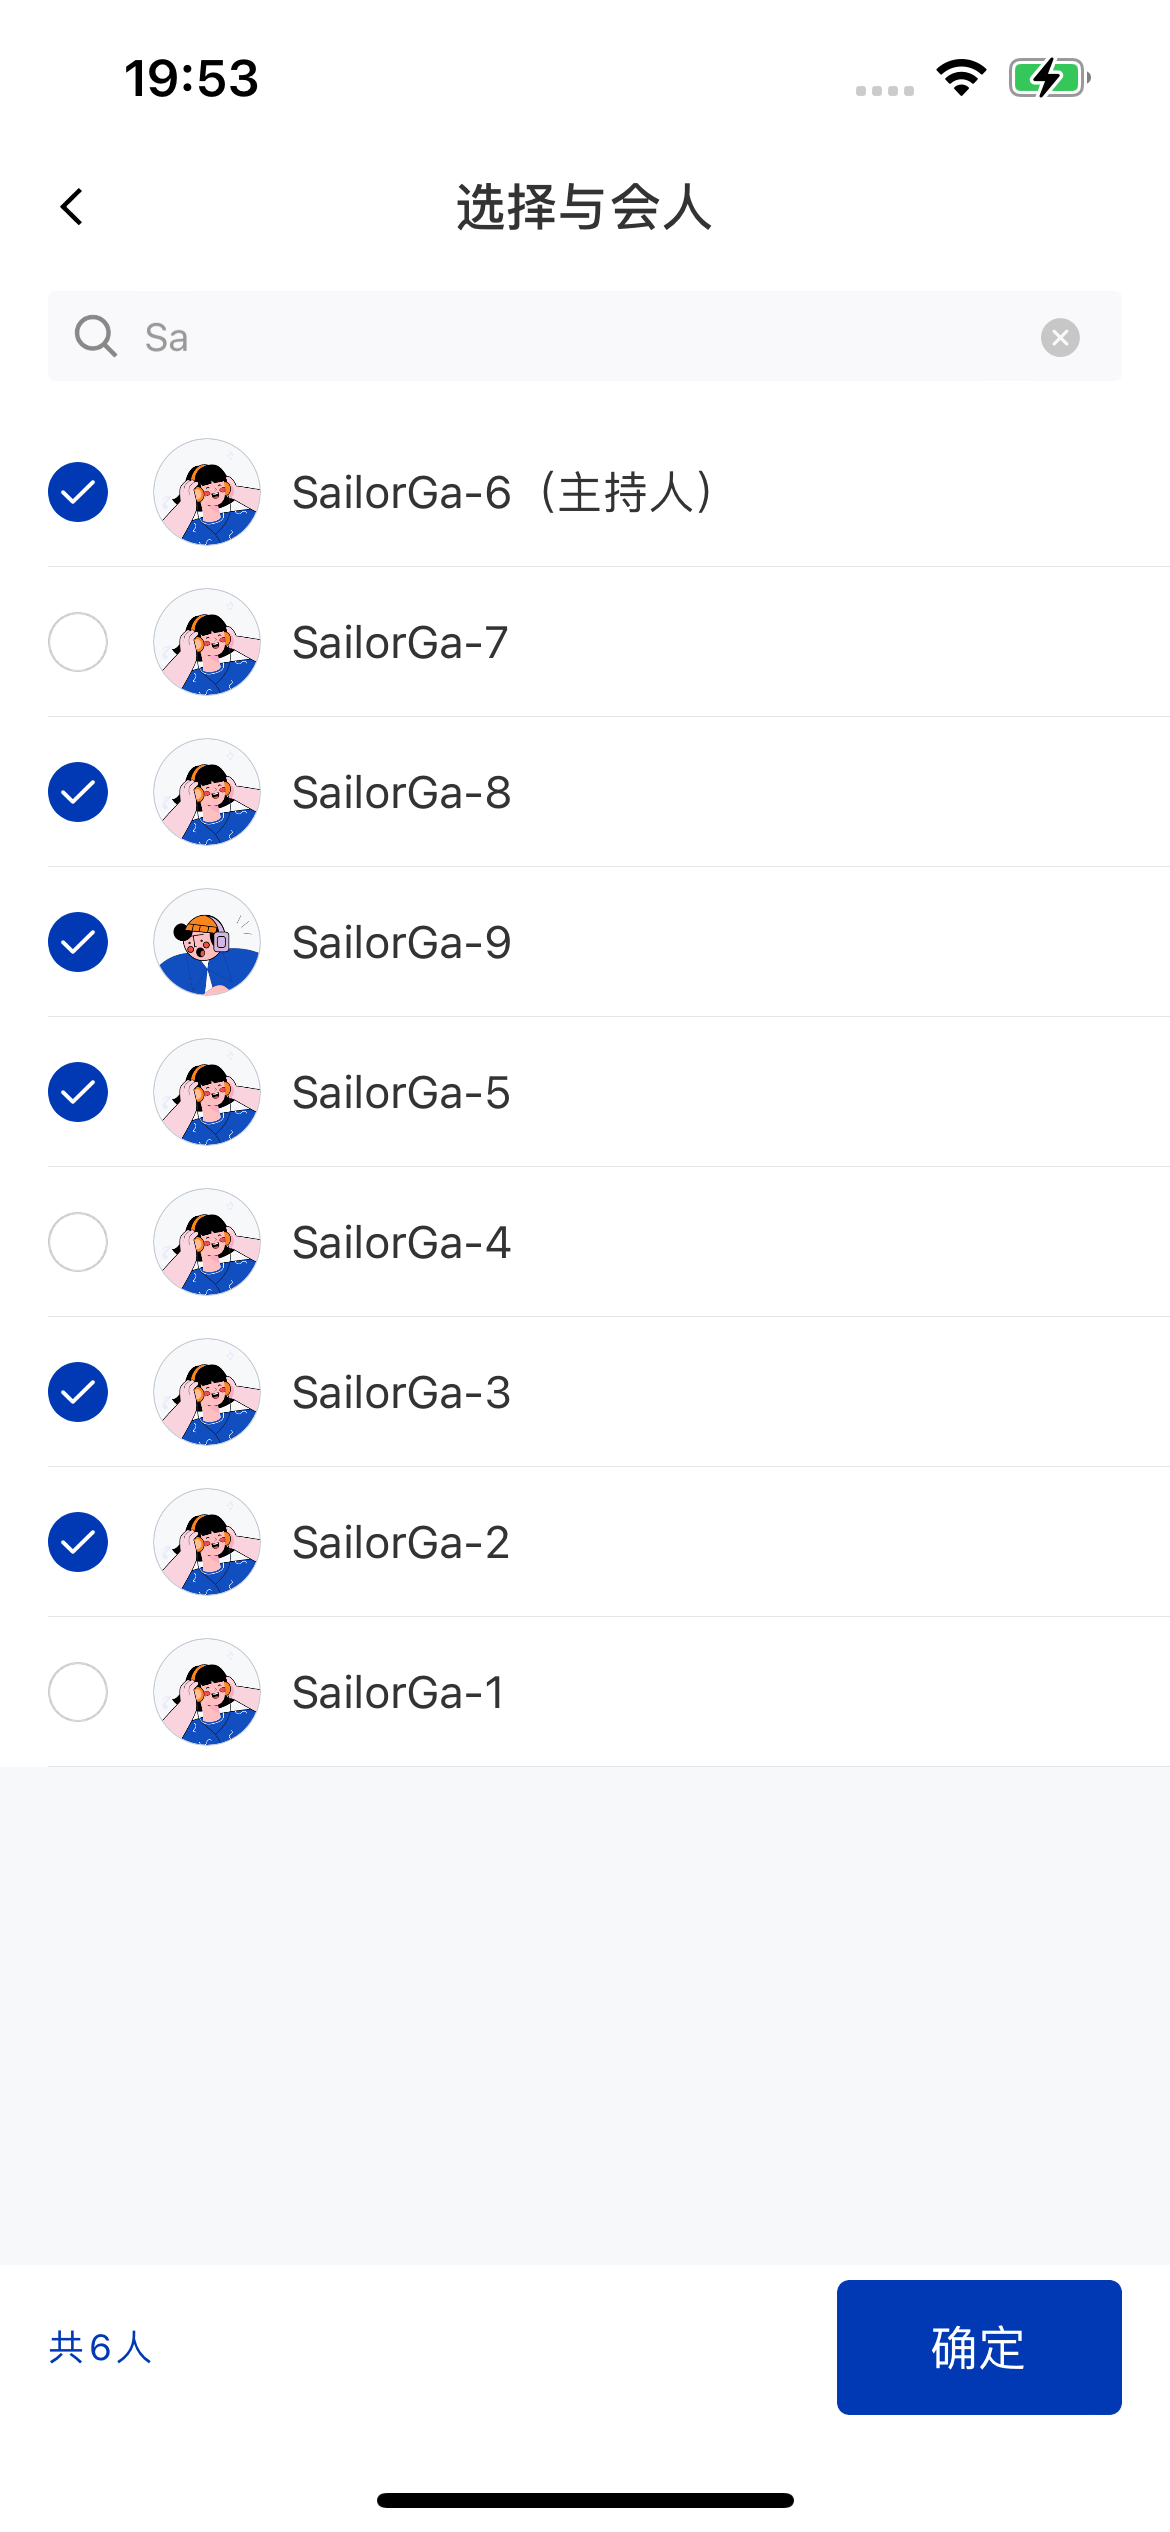
| Meeting settings | Invite members |
|---|---|
 |  |
Integration
Schedule a room
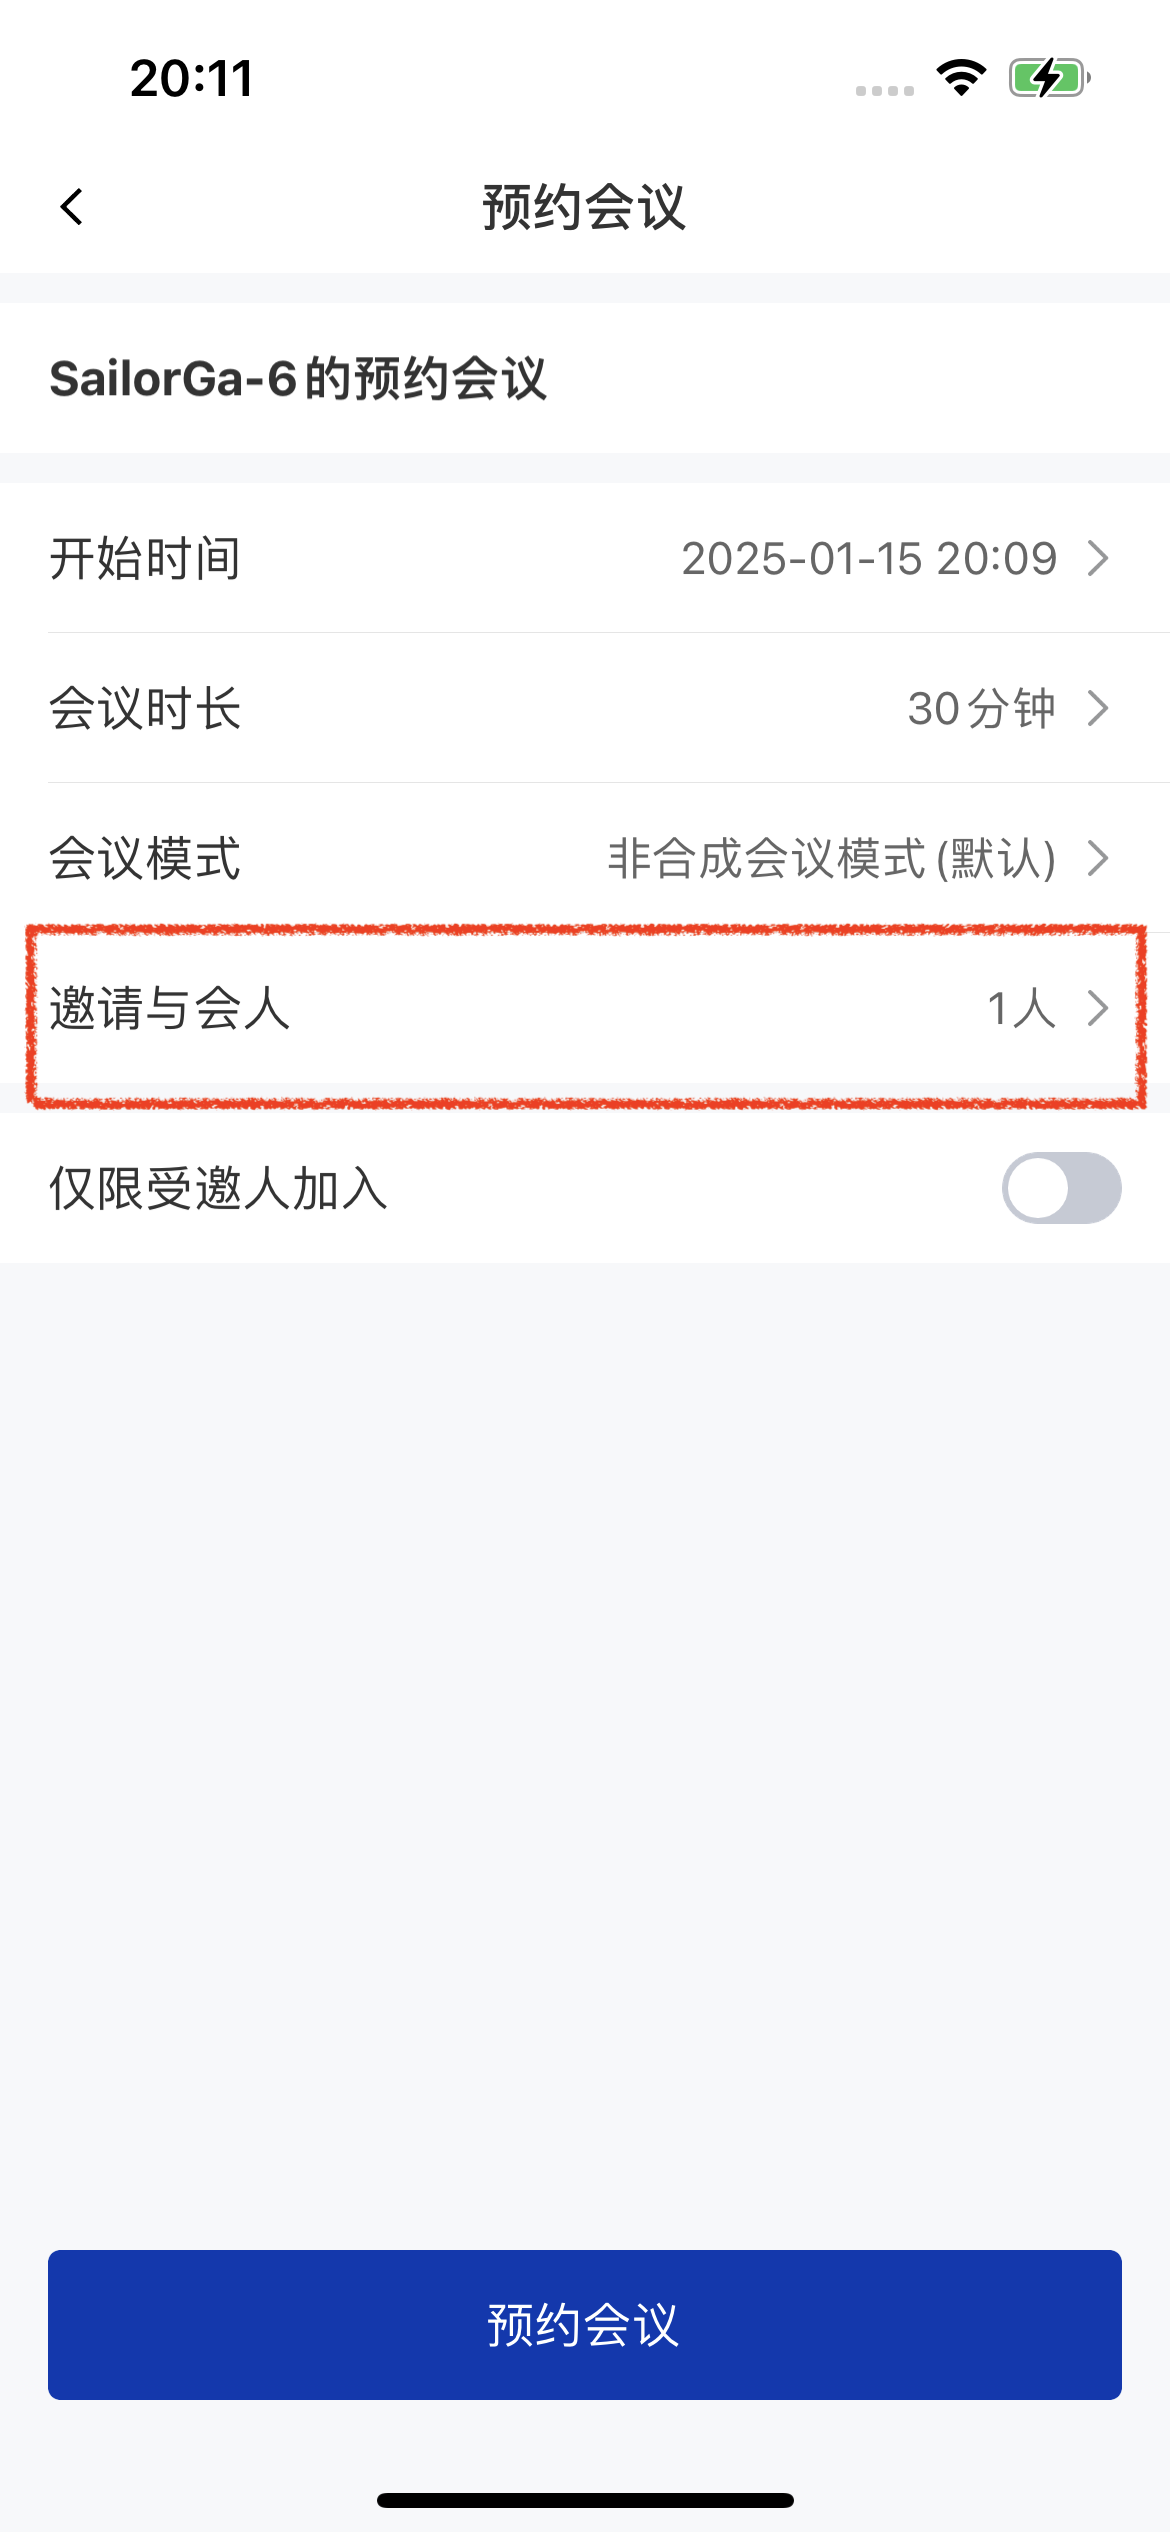
To use room scheduling, bring up the room scheduling page provided in the demo:- Properties you can set for a scheduled meeting: meeting name, meeting type, start time, meeting duration, meeting mode, invited members, meeting password, member management, and more.
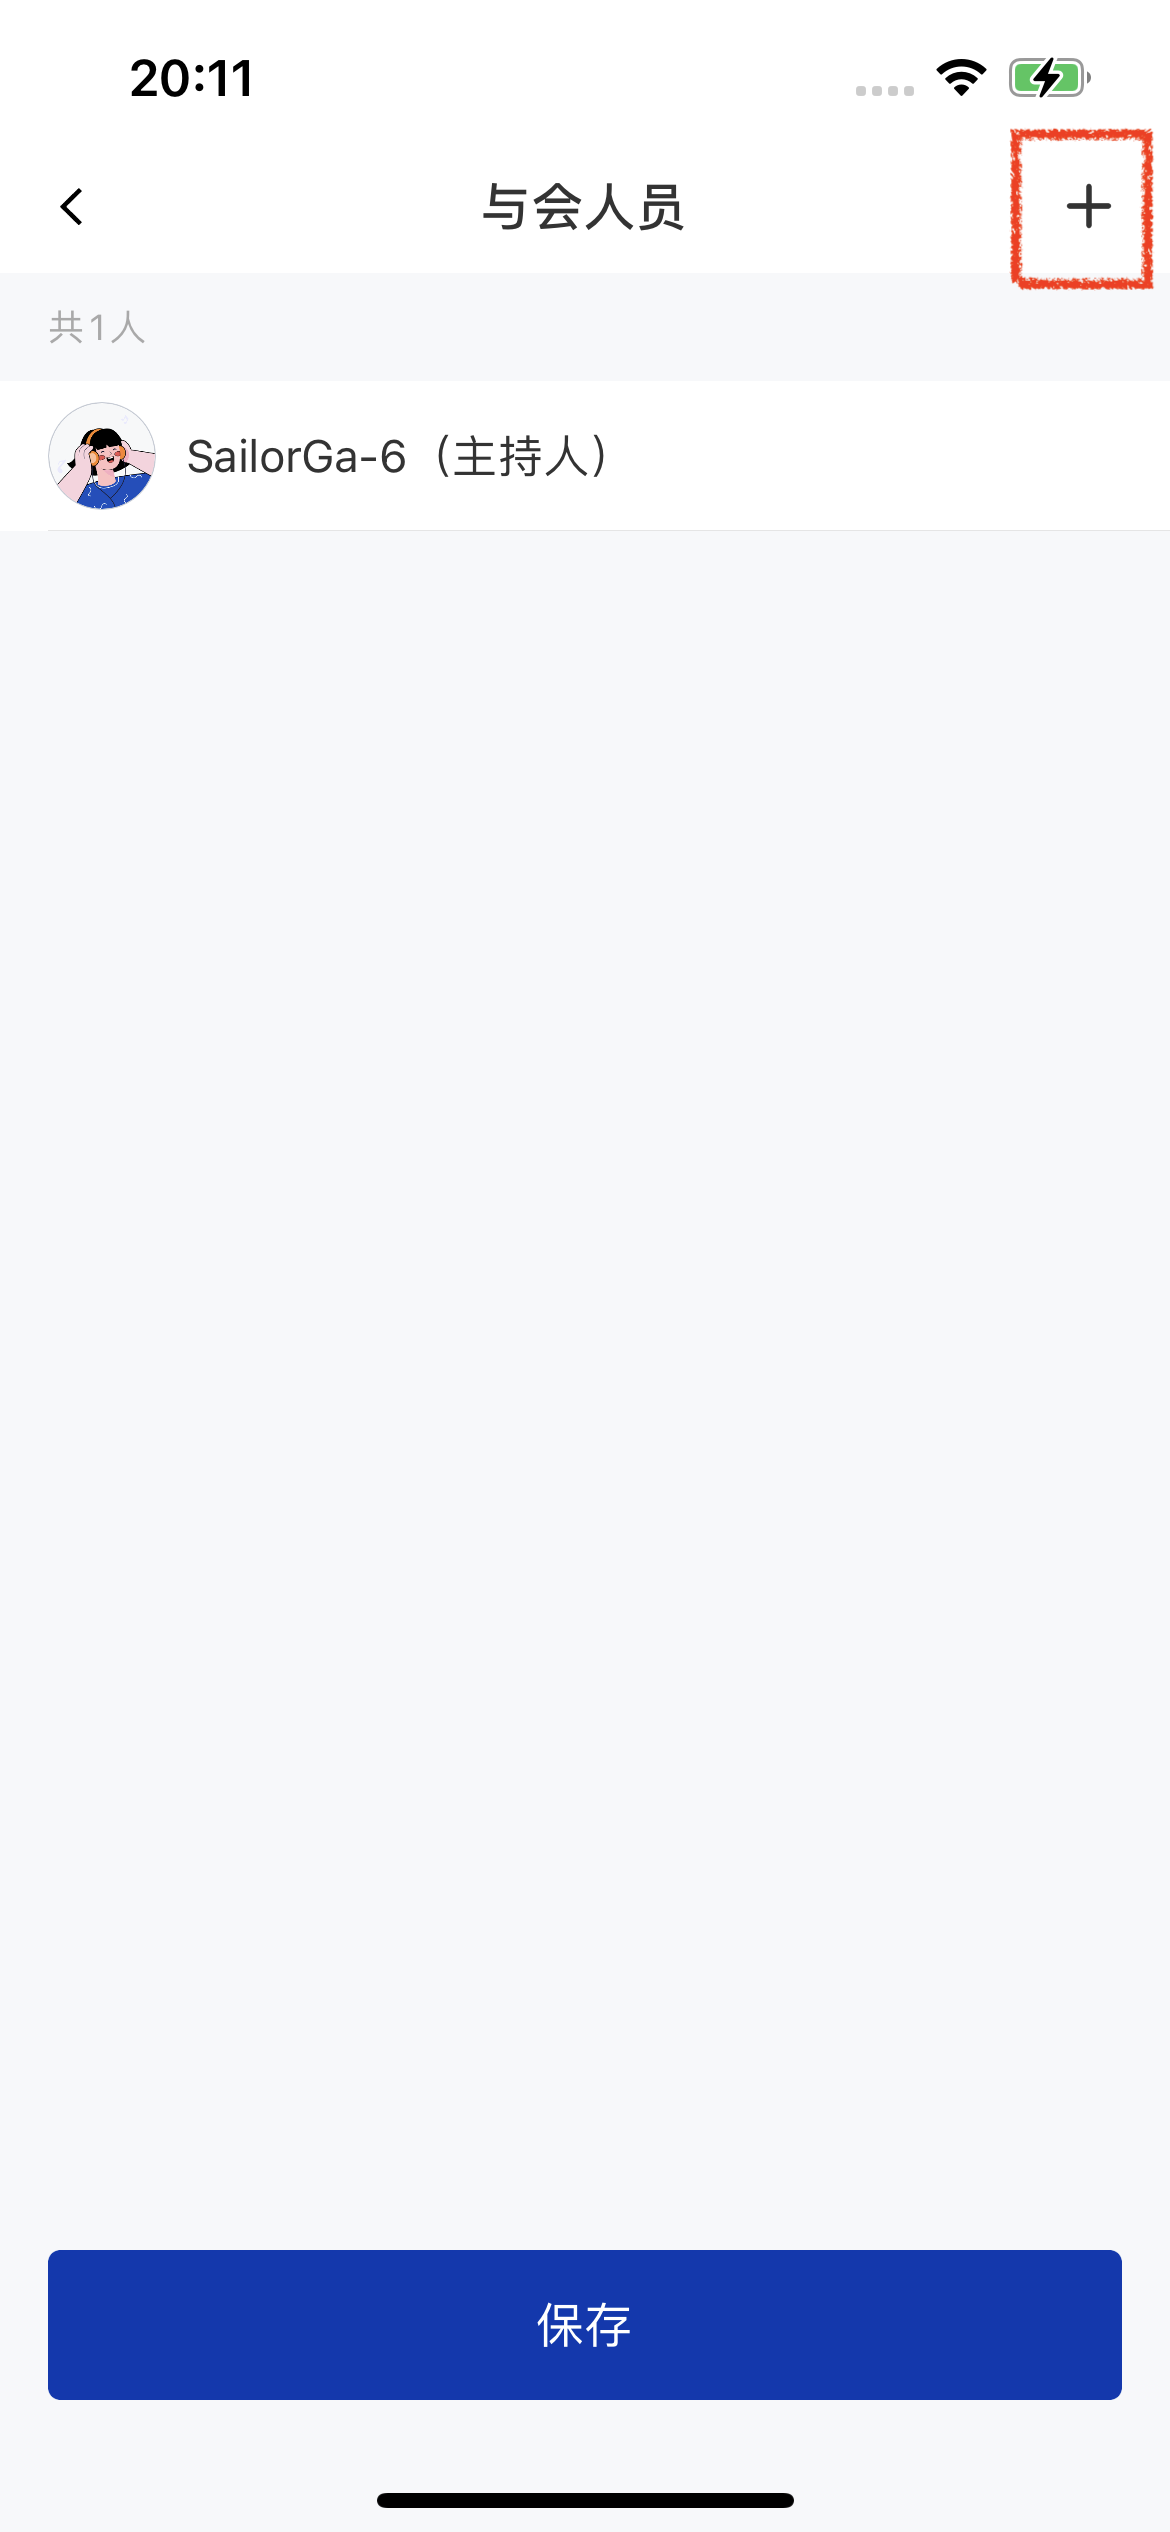
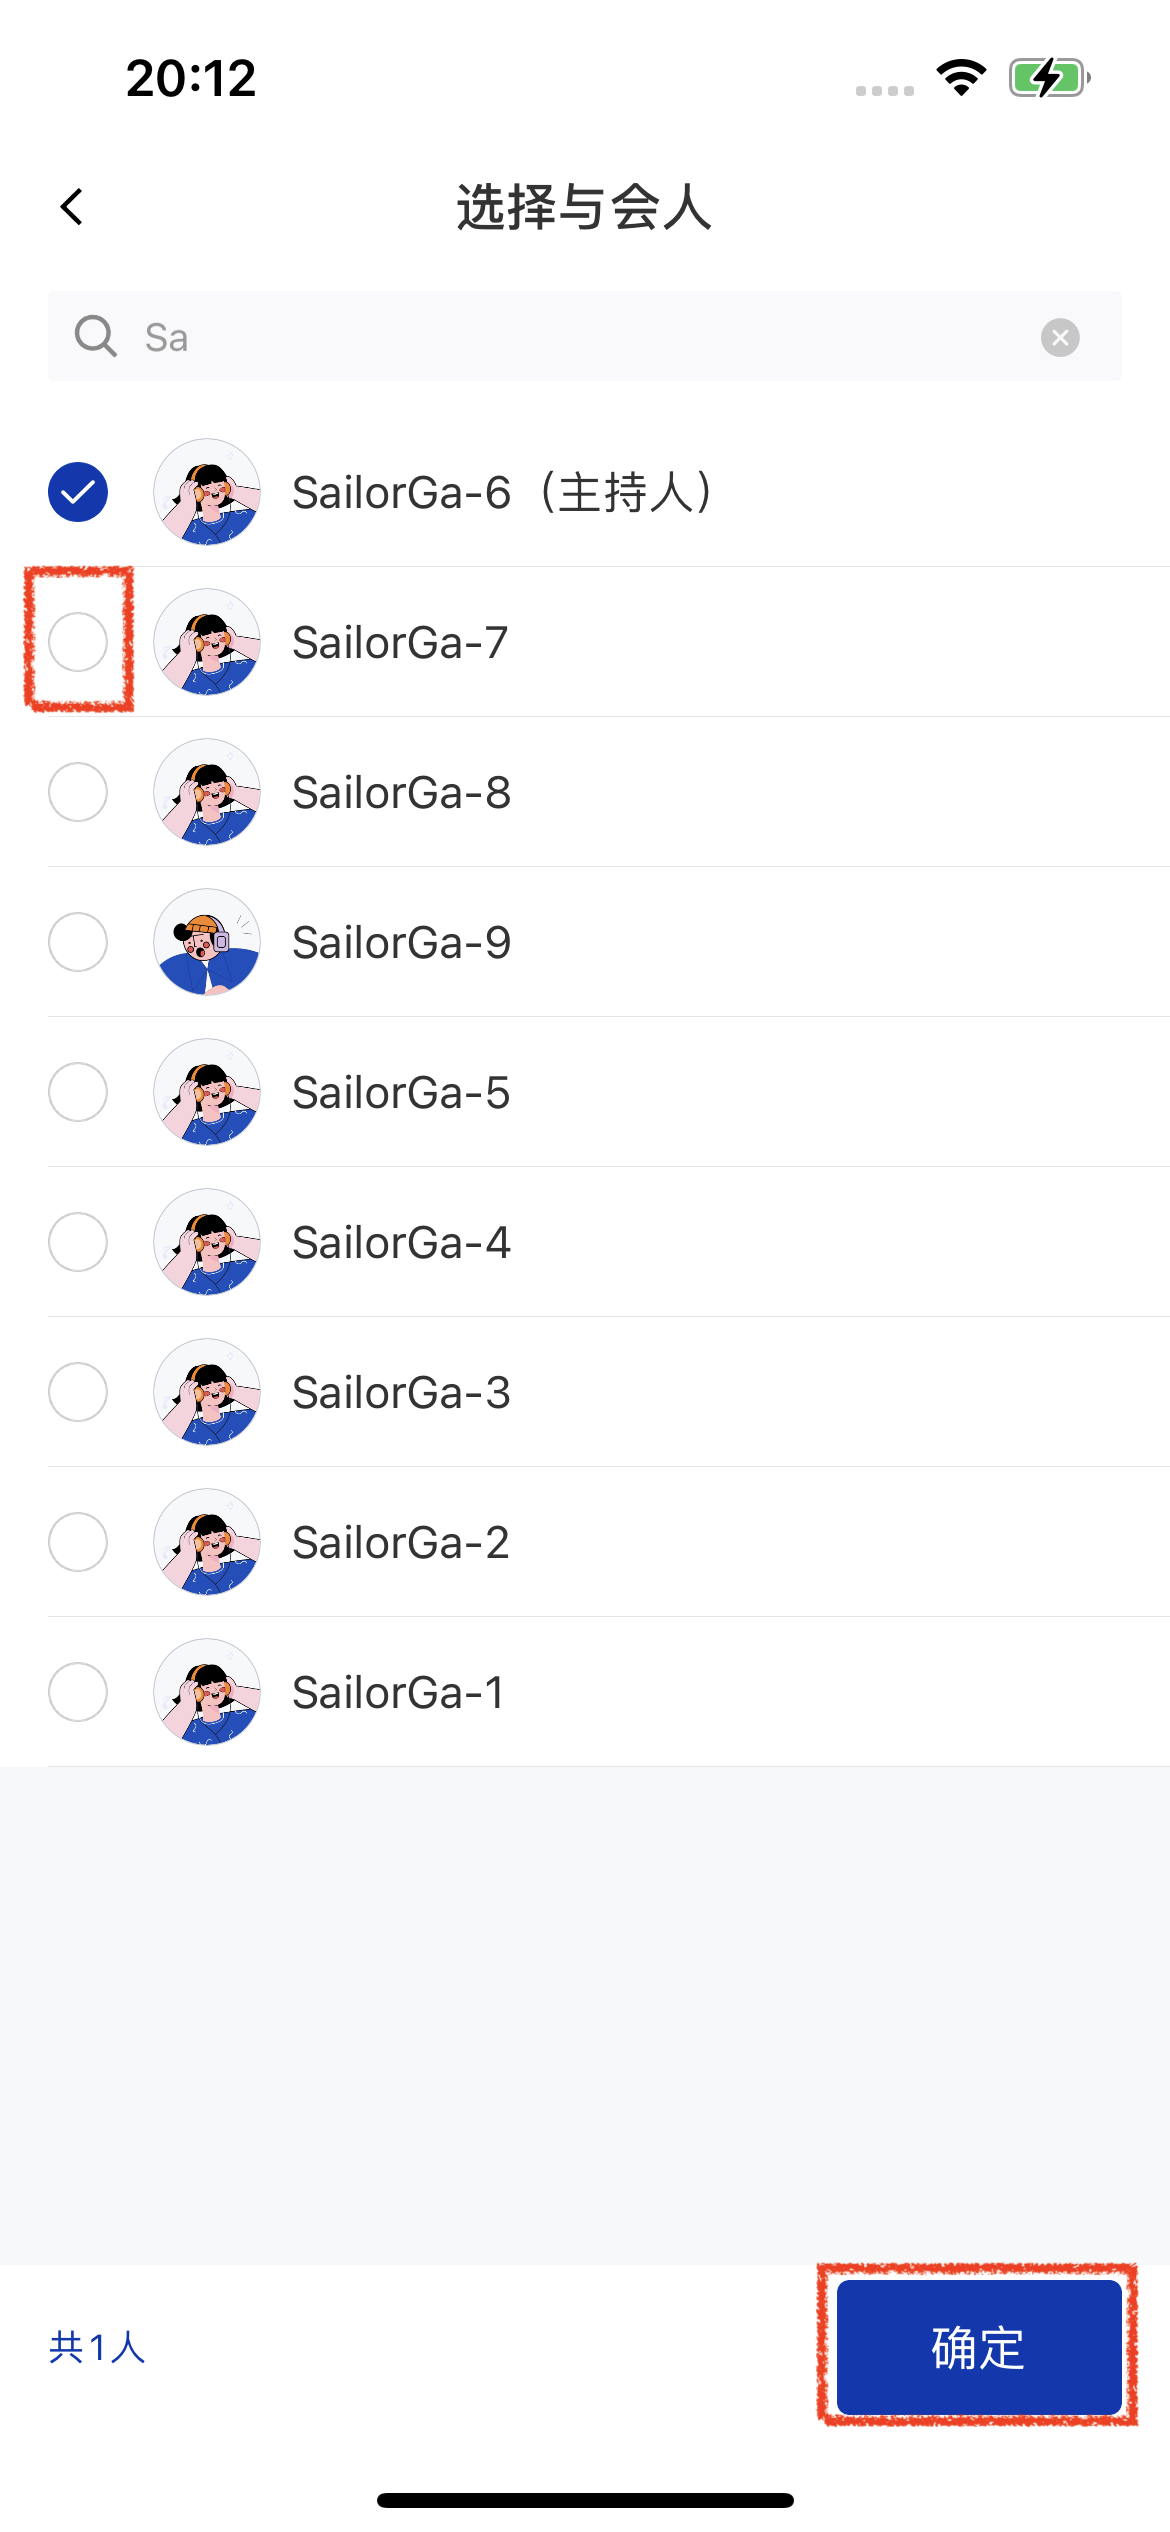
- How to invite members: tap 邀请与会人 (Invite invitees) -> 添加 (Add) to invite members.
| Invite invitees | Invitee list | Select invitees |
|---|---|---|
 |  |  |
View scheduled rooms
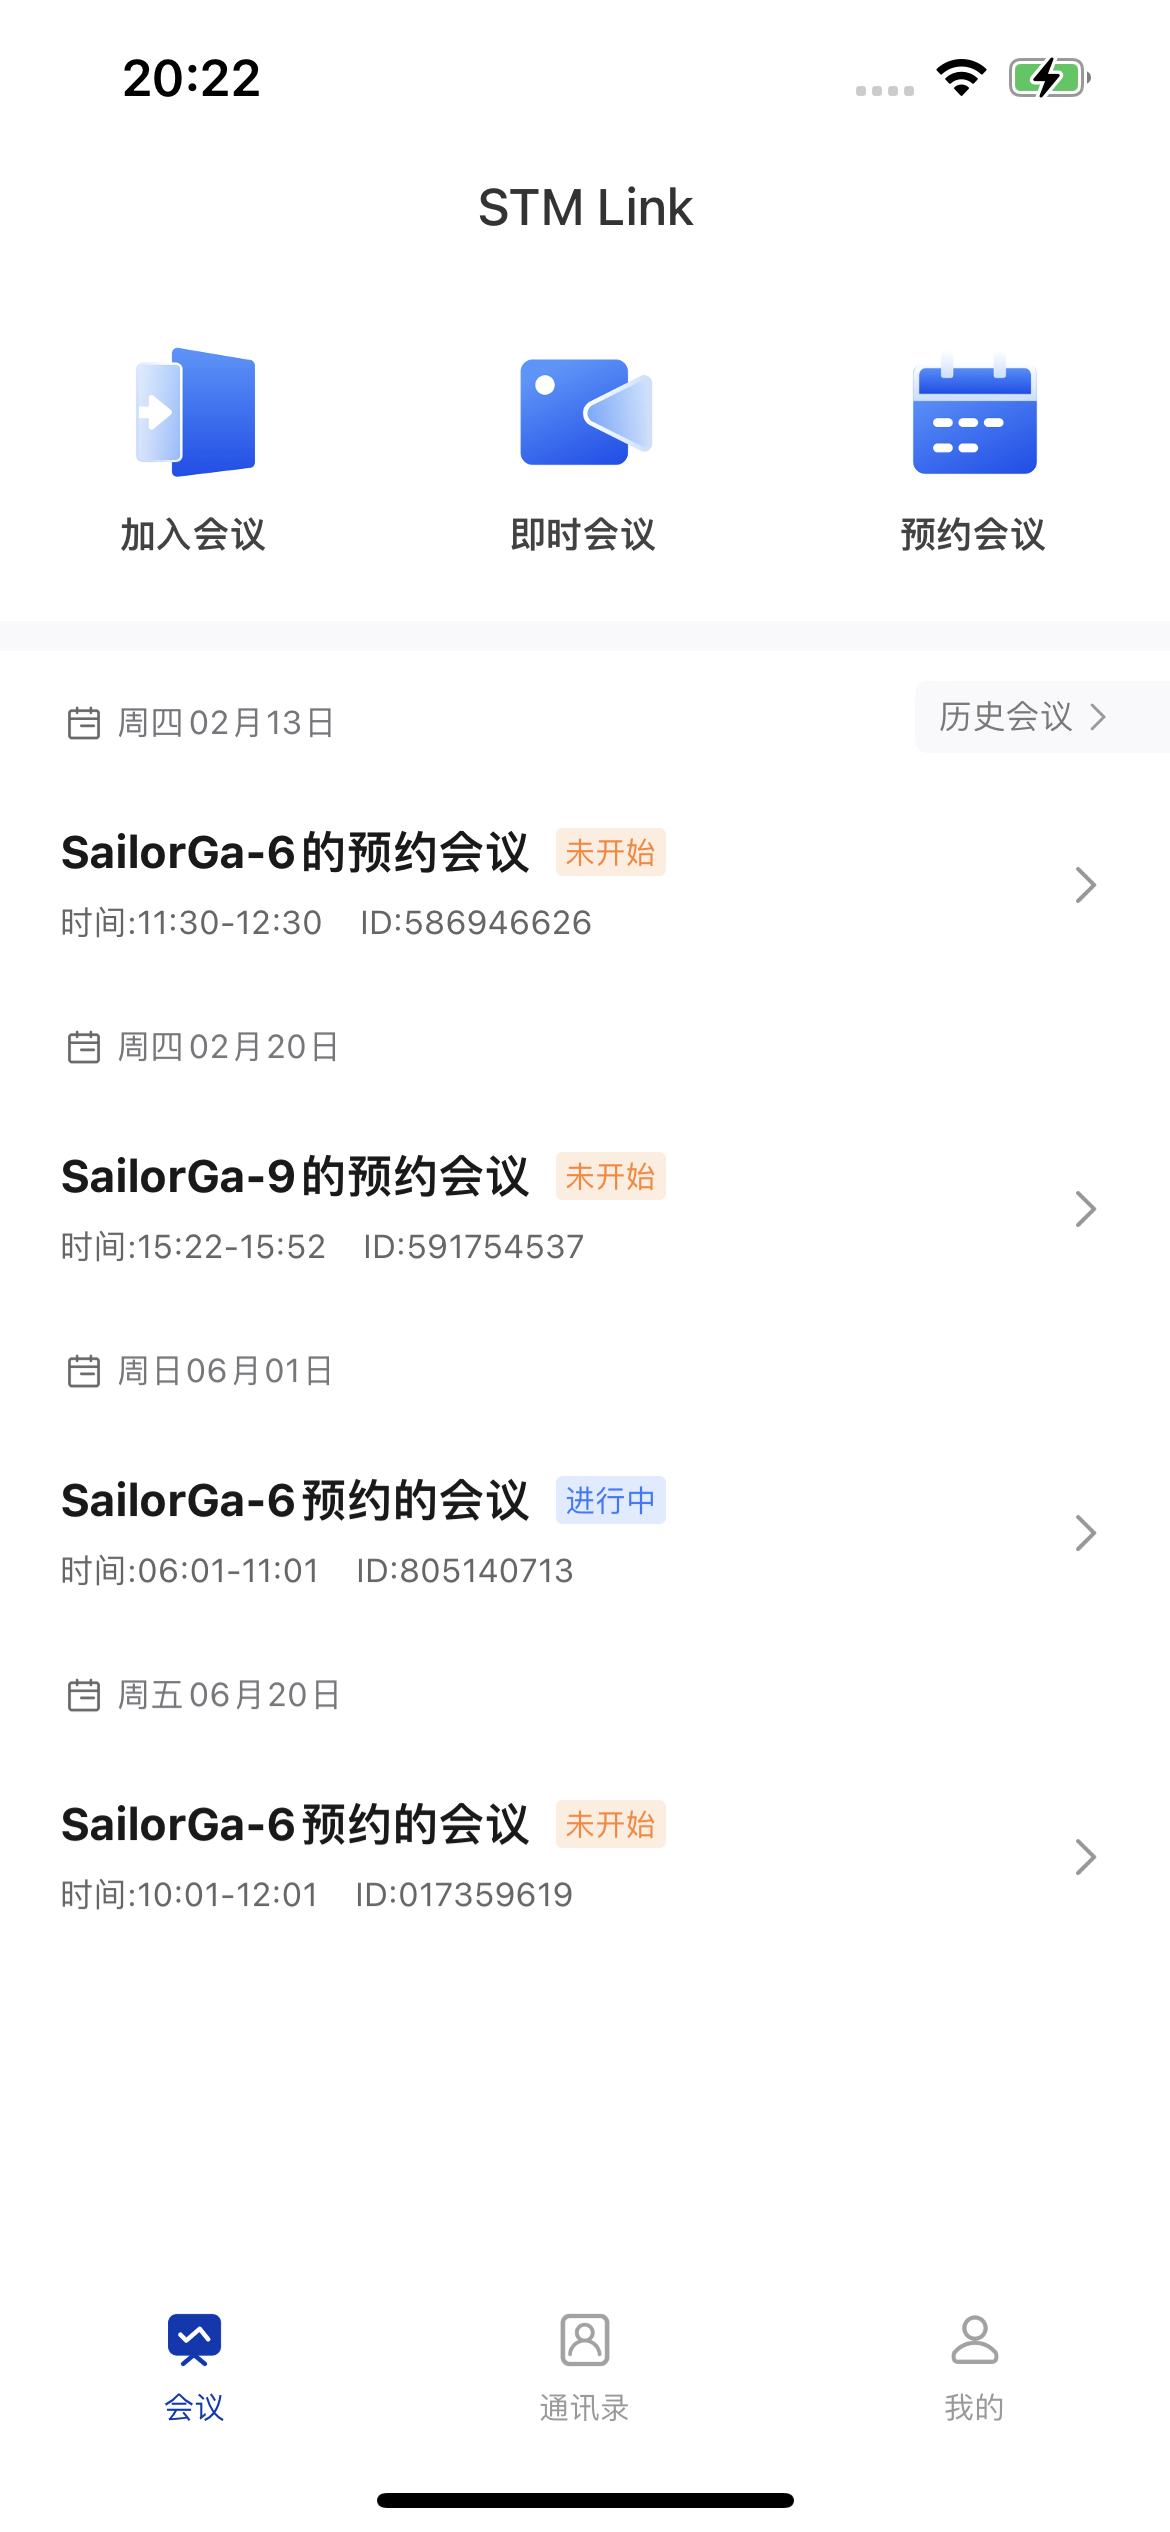
The demo provides a room list UI view,FWHomeViewController. The meeting list provides the following features:
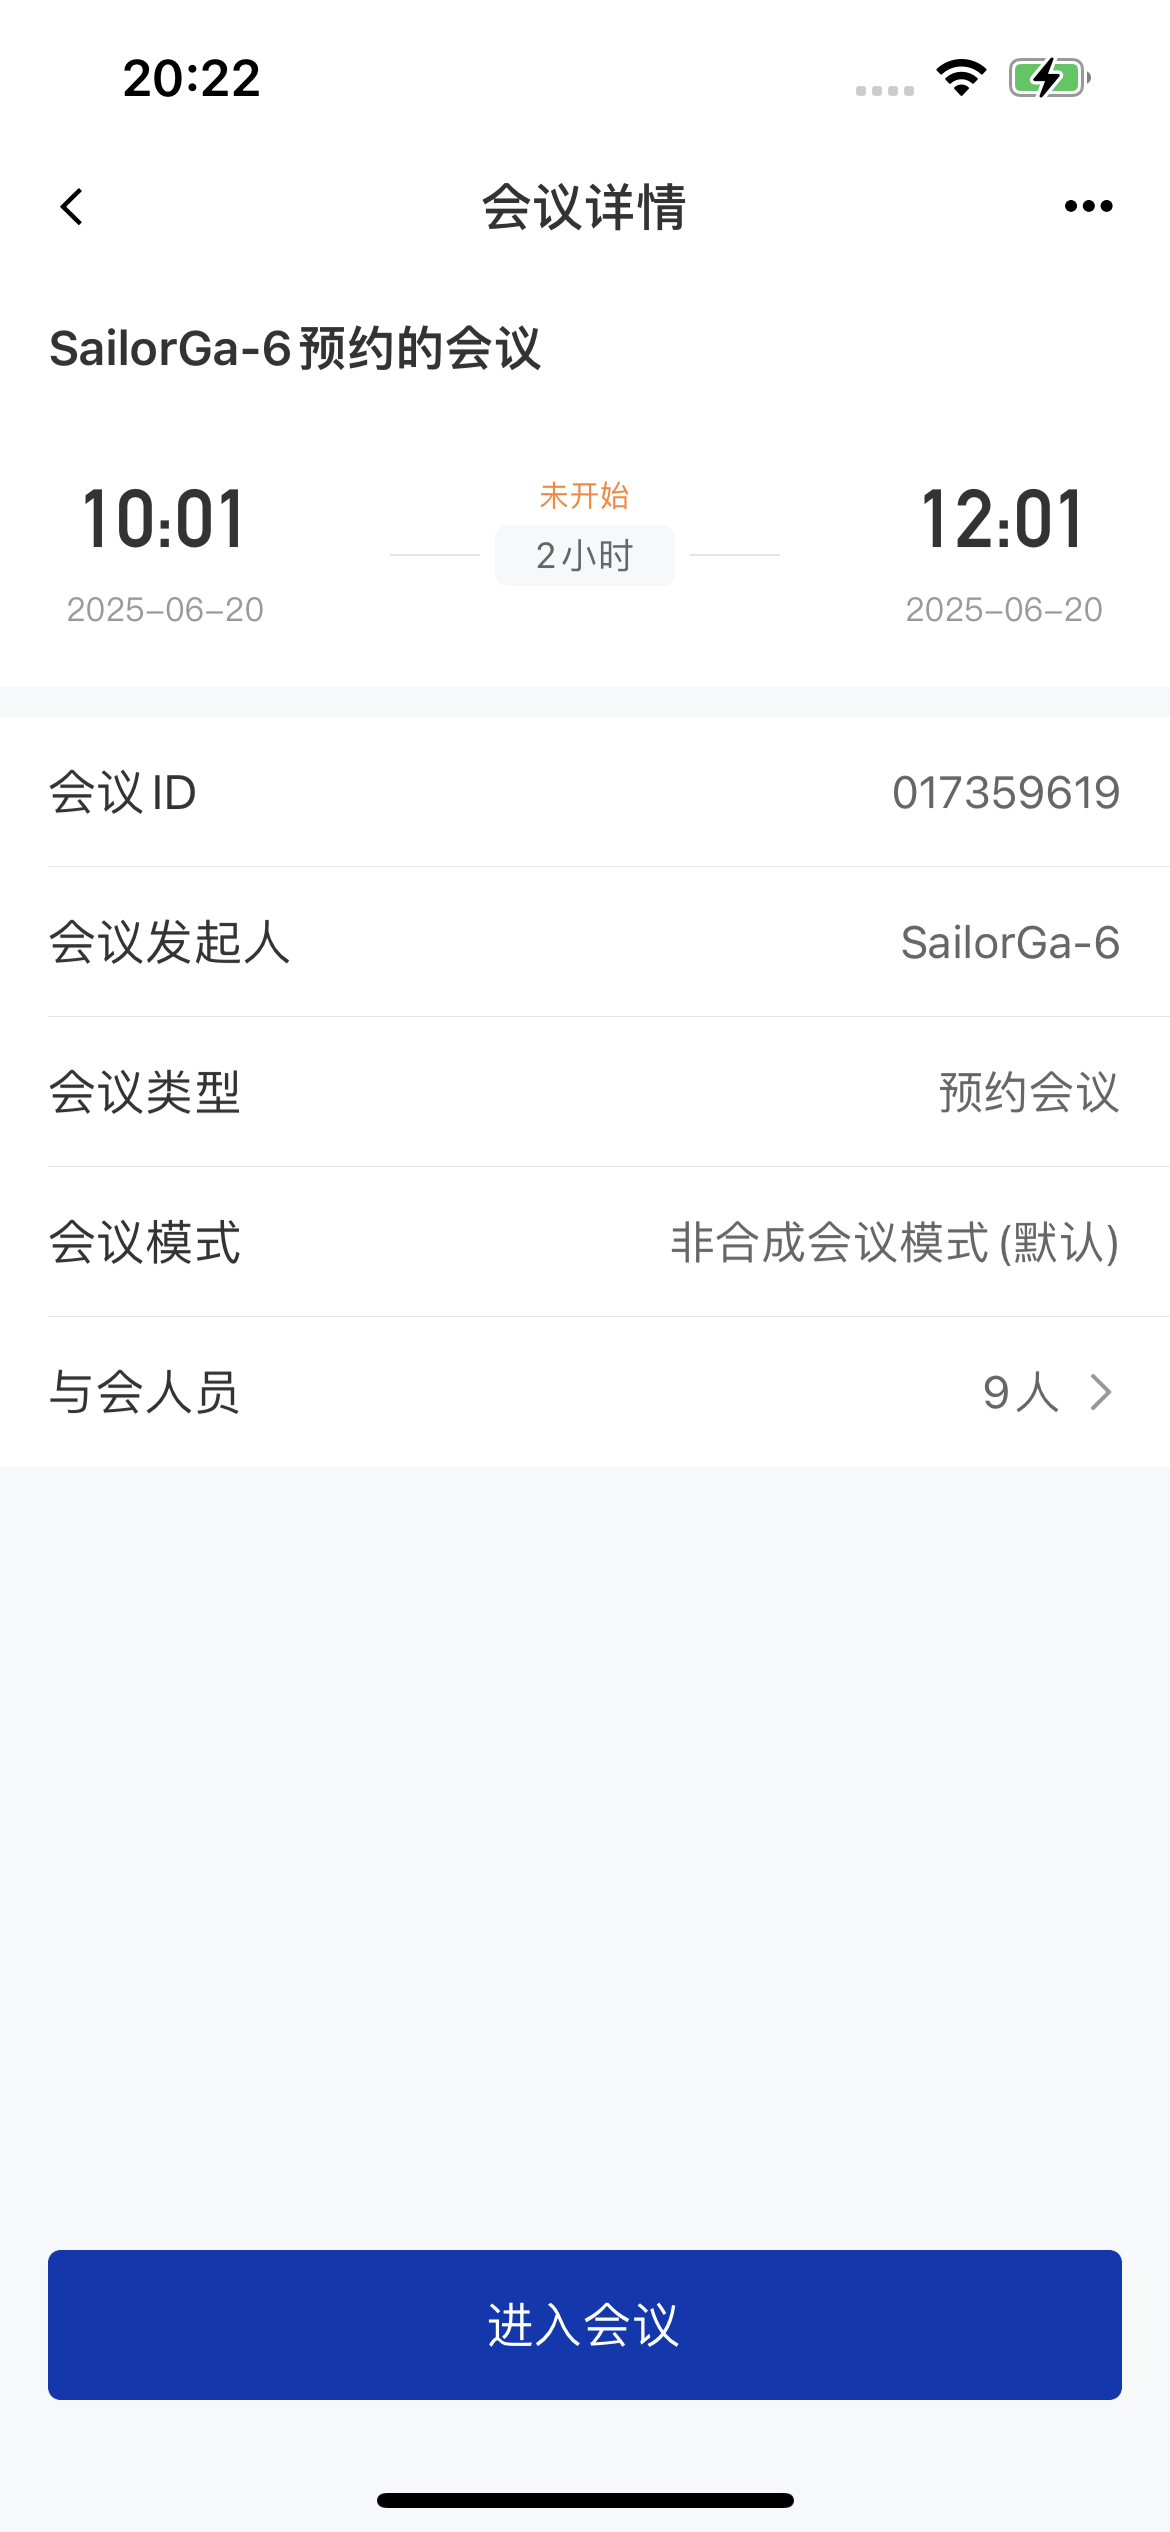
- View the meeting list: the list includes meetings you created and meetings you were invited to.
- View meeting details: tap a meeting to view its details.
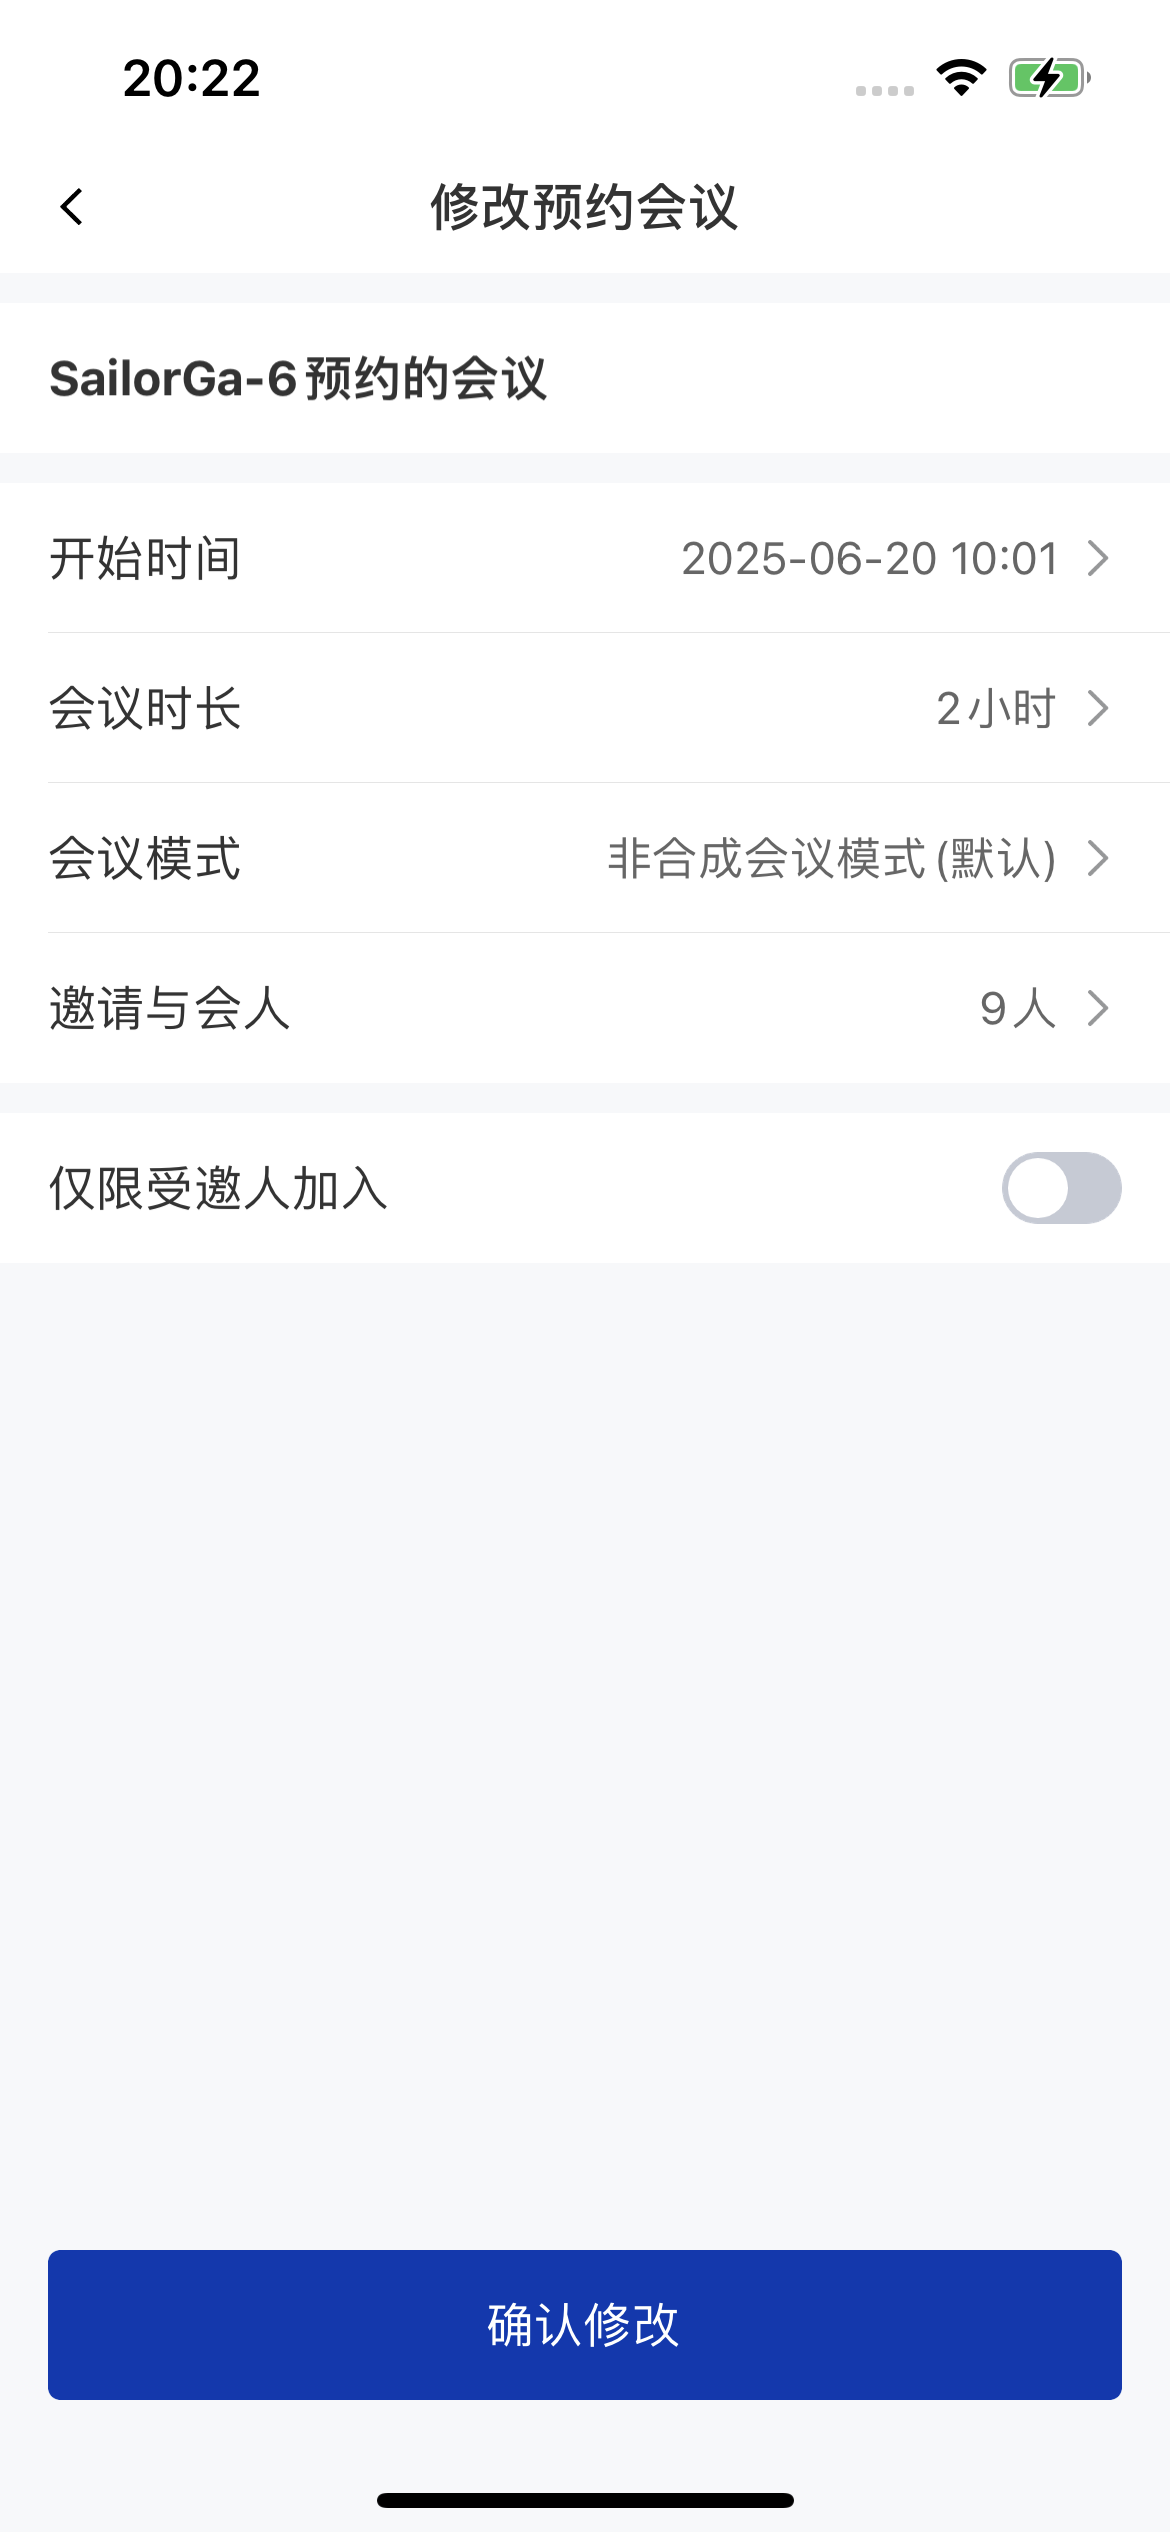
- Edit meeting information: tap a meeting in the list; if it hasn’t started yet and you are the organizer, you can edit its information.
| Meeting list | View meeting details | Edit meeting information |
|---|---|---|
 |  |  |
Meeting controls
Overview
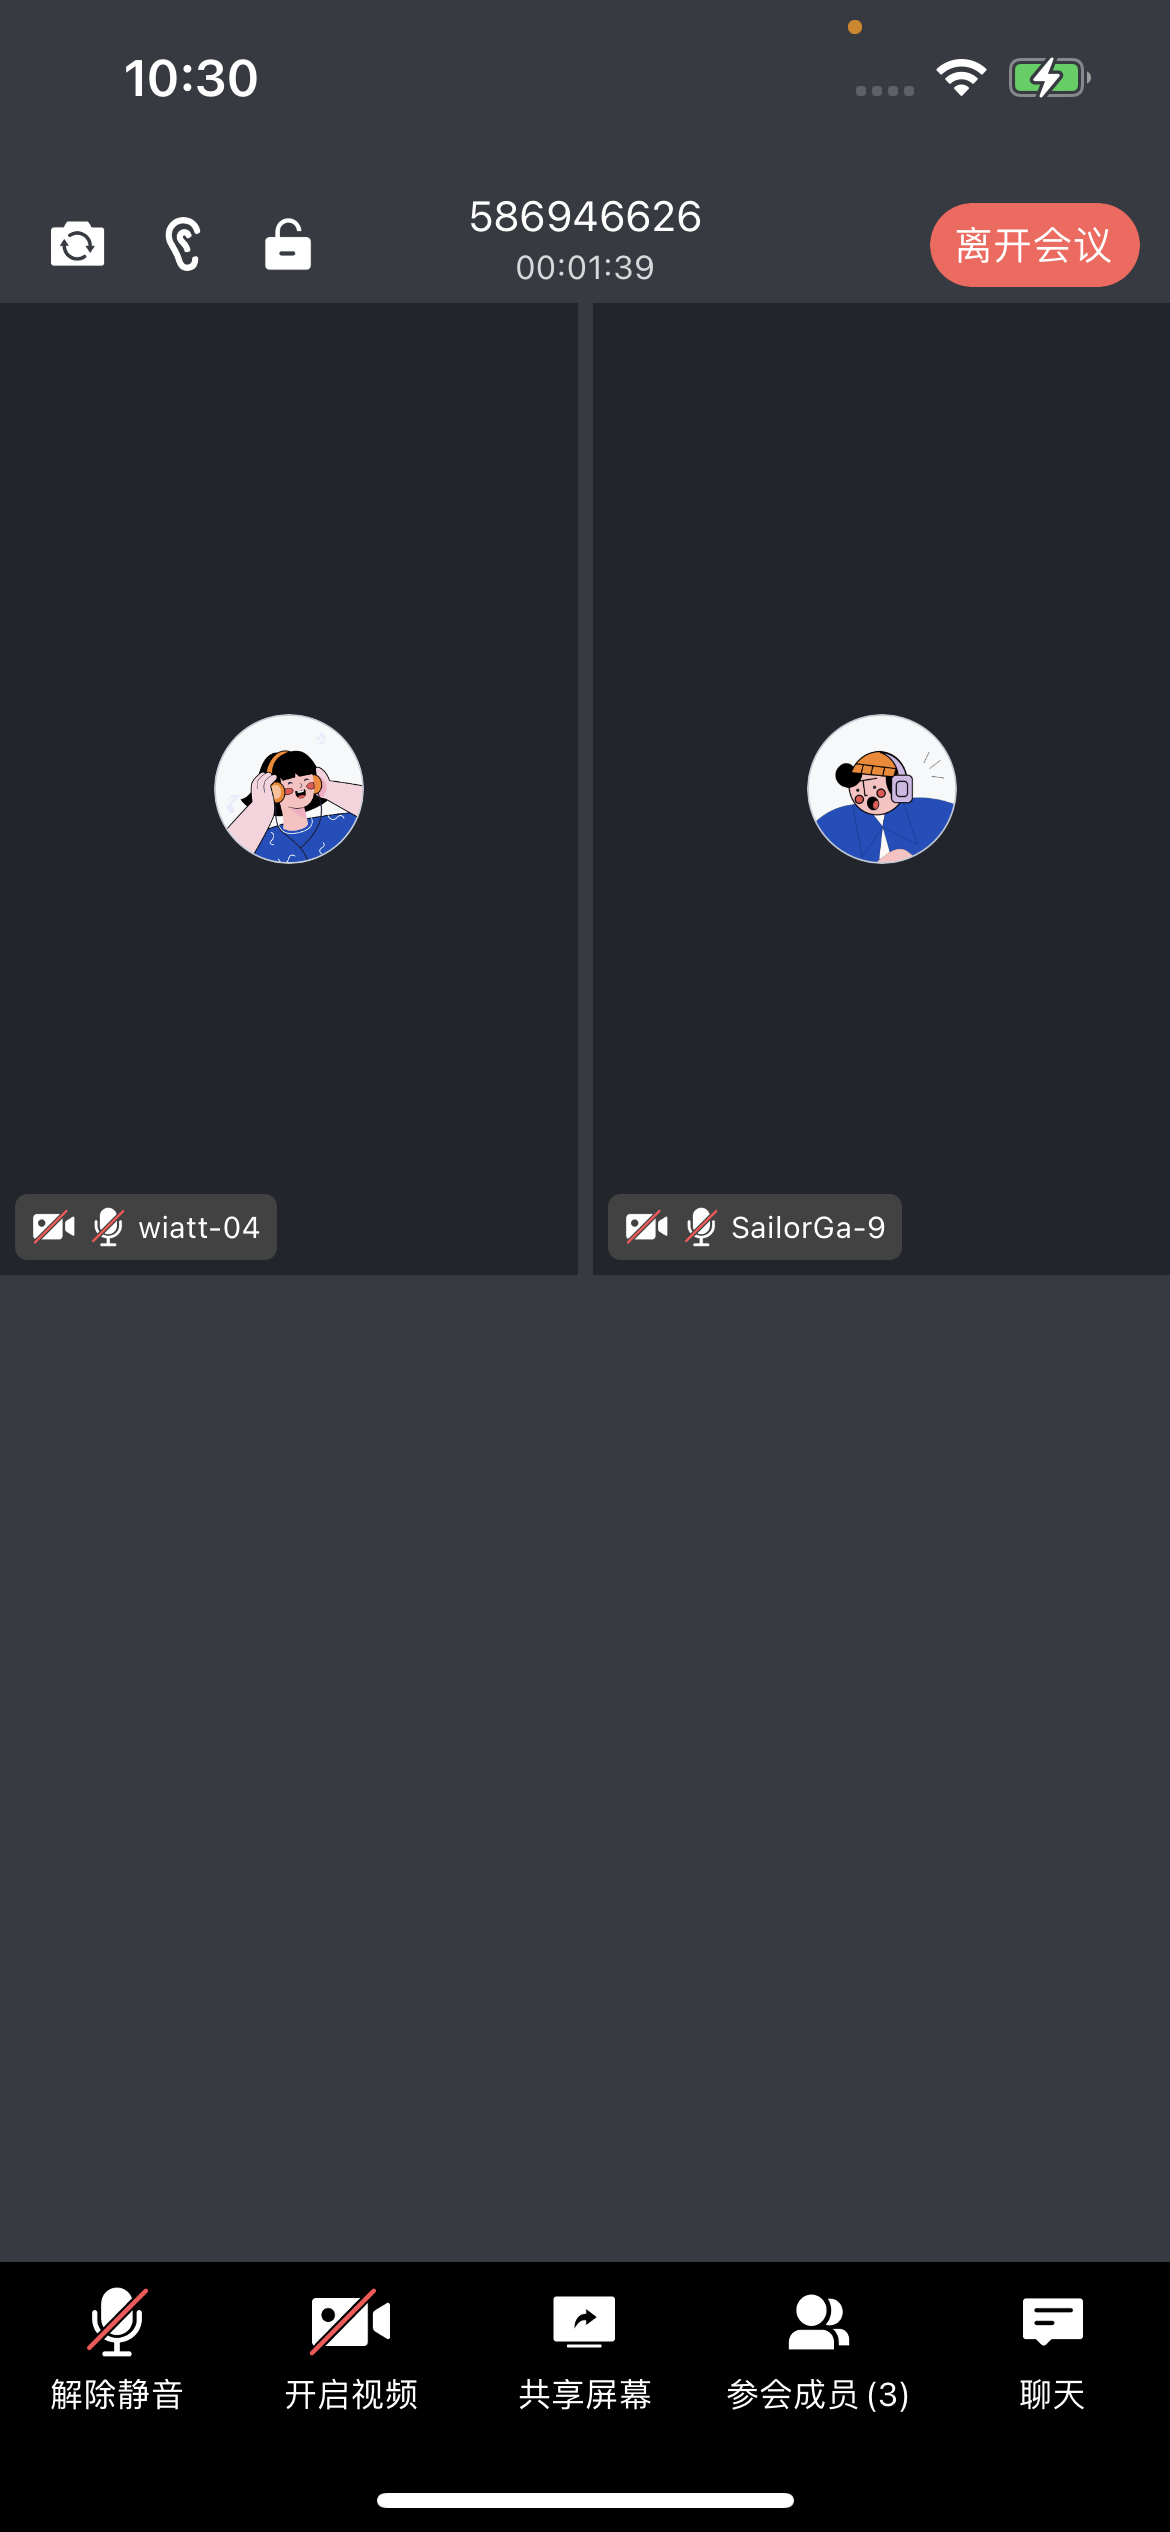
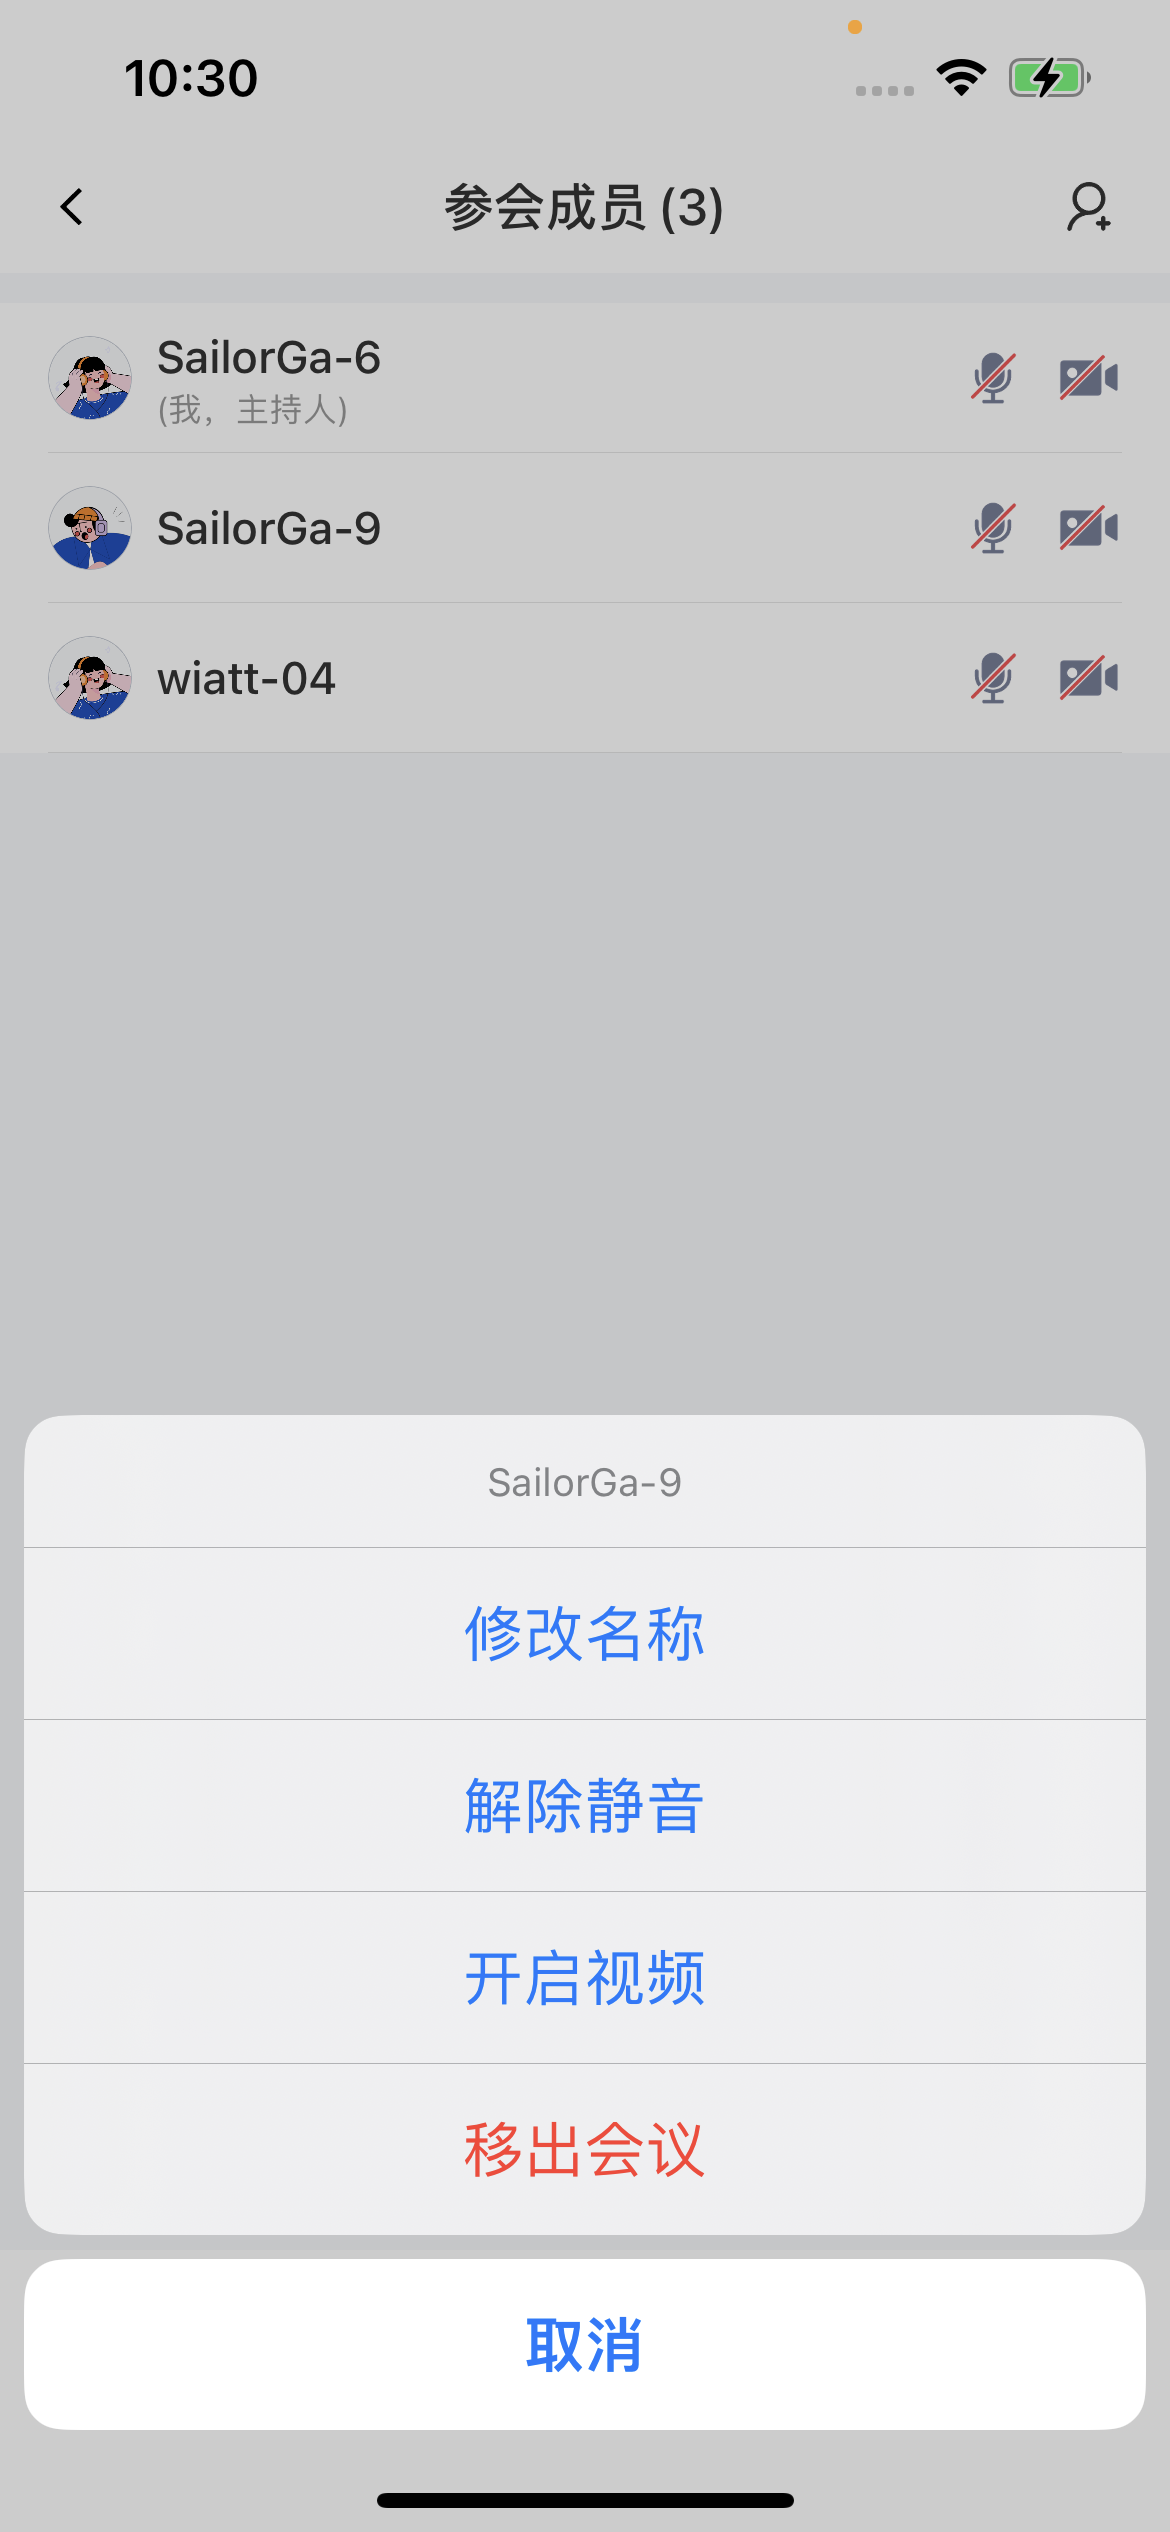
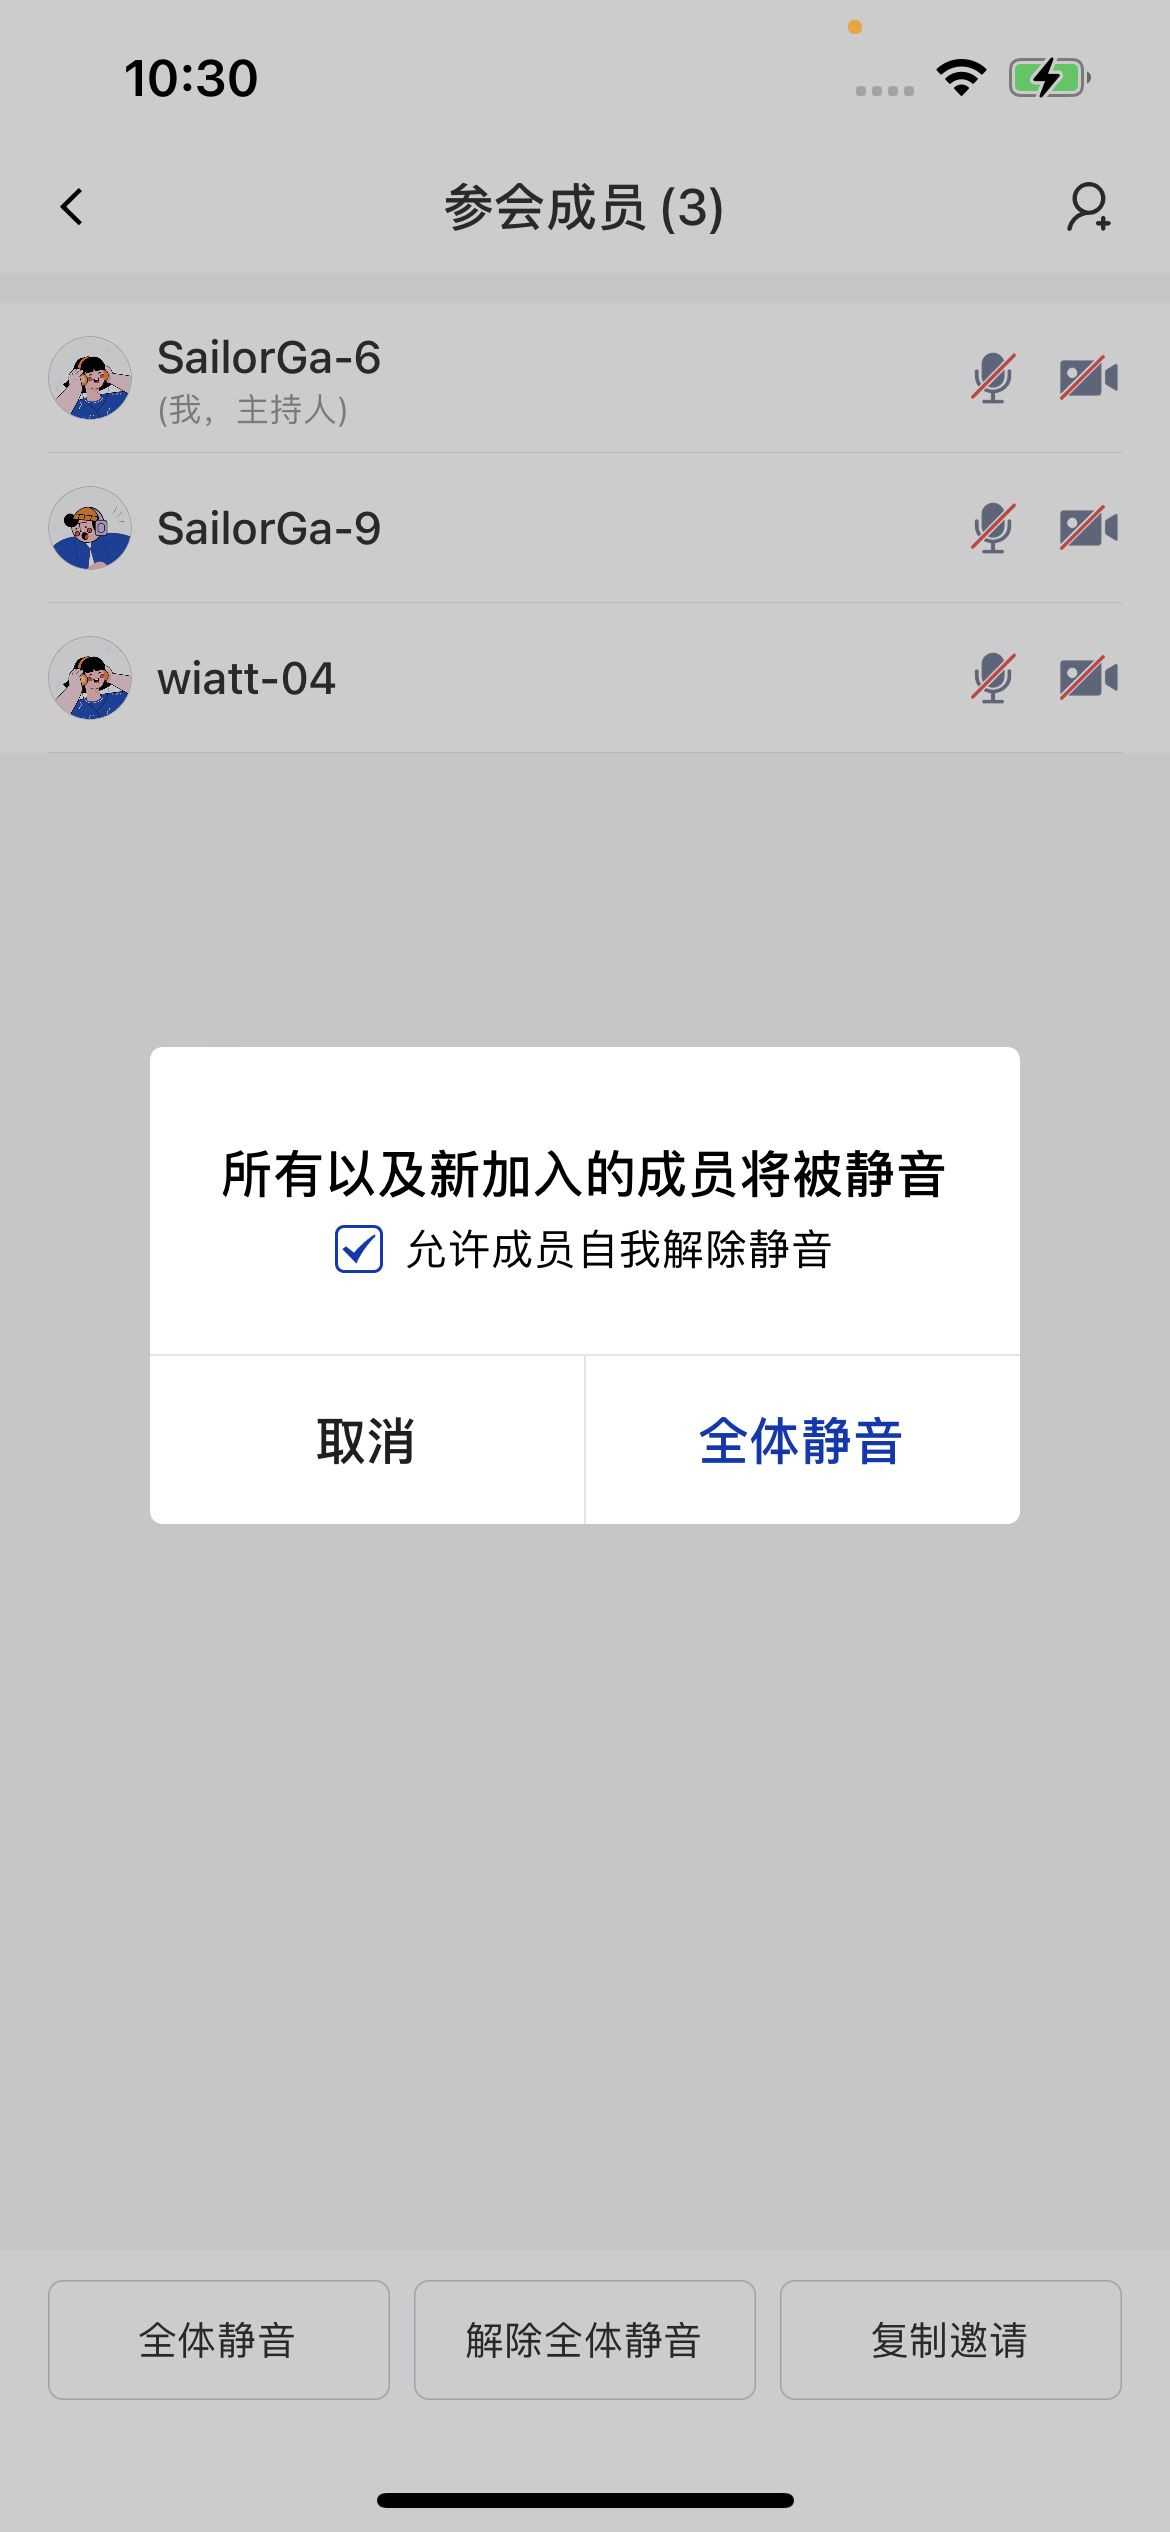
After a user creates and enters a room, the host or a co-host can tap the members button in the bottom toolbar. In the member list that pops up from the bottom, they can select any regular member for meeting control actions such as asking to turn on video/audio, assigning co-hosts, disabling chat, and removing the member from the room, and can also apply meeting control actions such as mute all to all members in the room.| In-meeting screen | Member management | Mute all / camera off for everyone |
|---|---|---|
 |  |  |
Before-the-meeting controls
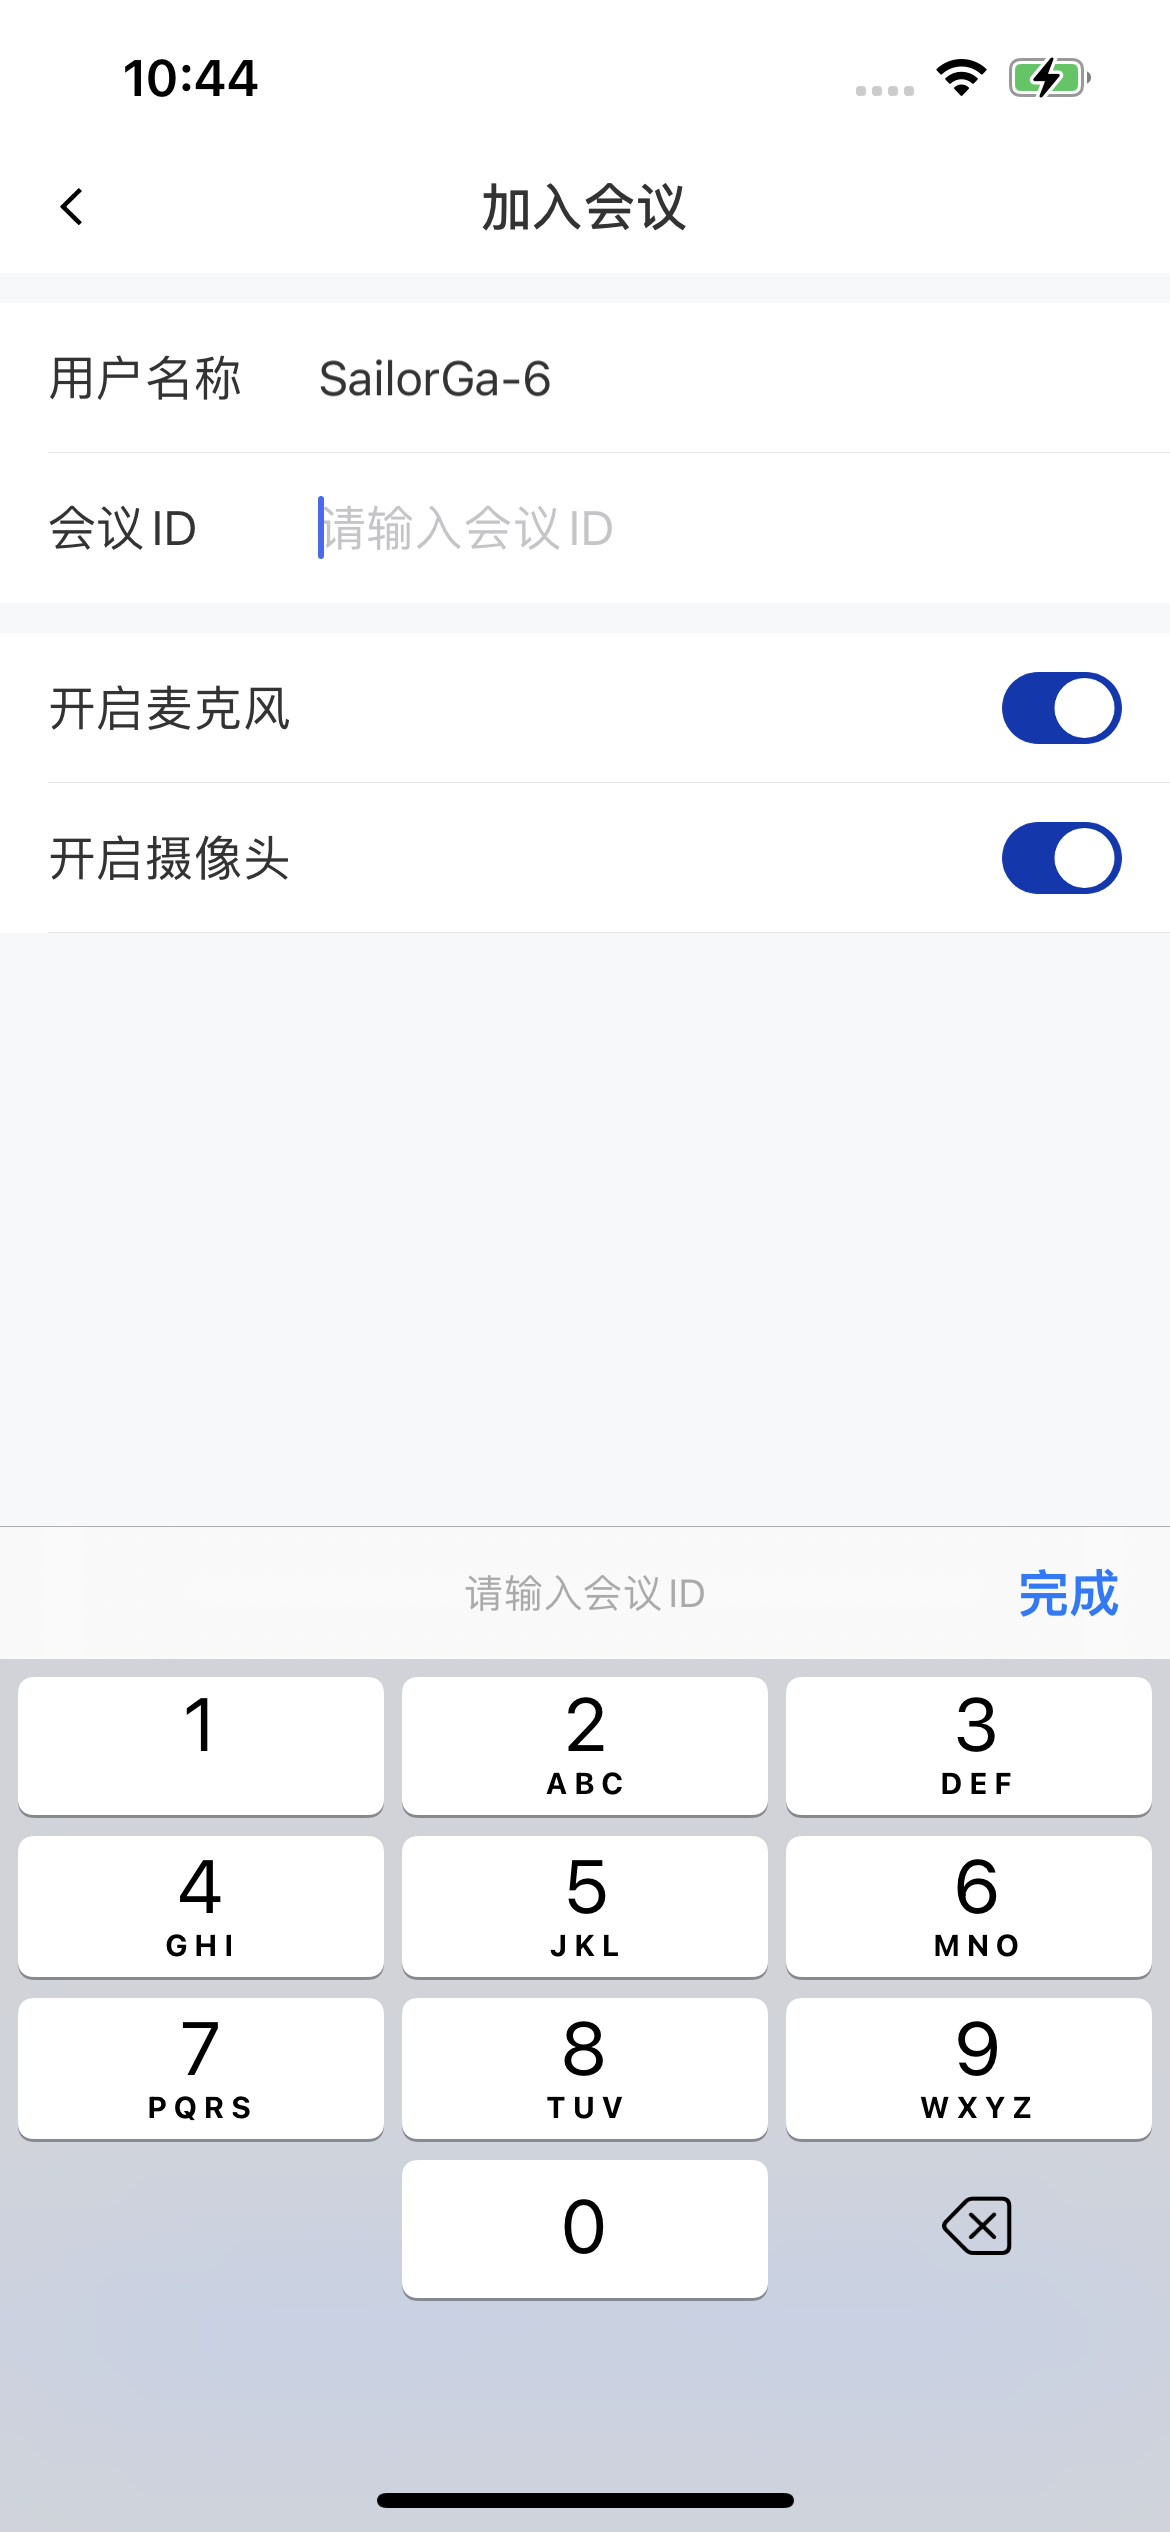
When creating and entering a meeting, you preset the meeting parameters through the before-the-meeting control features ofMeetingKit.
| Create a meeting | Enter a meeting |
|---|---|
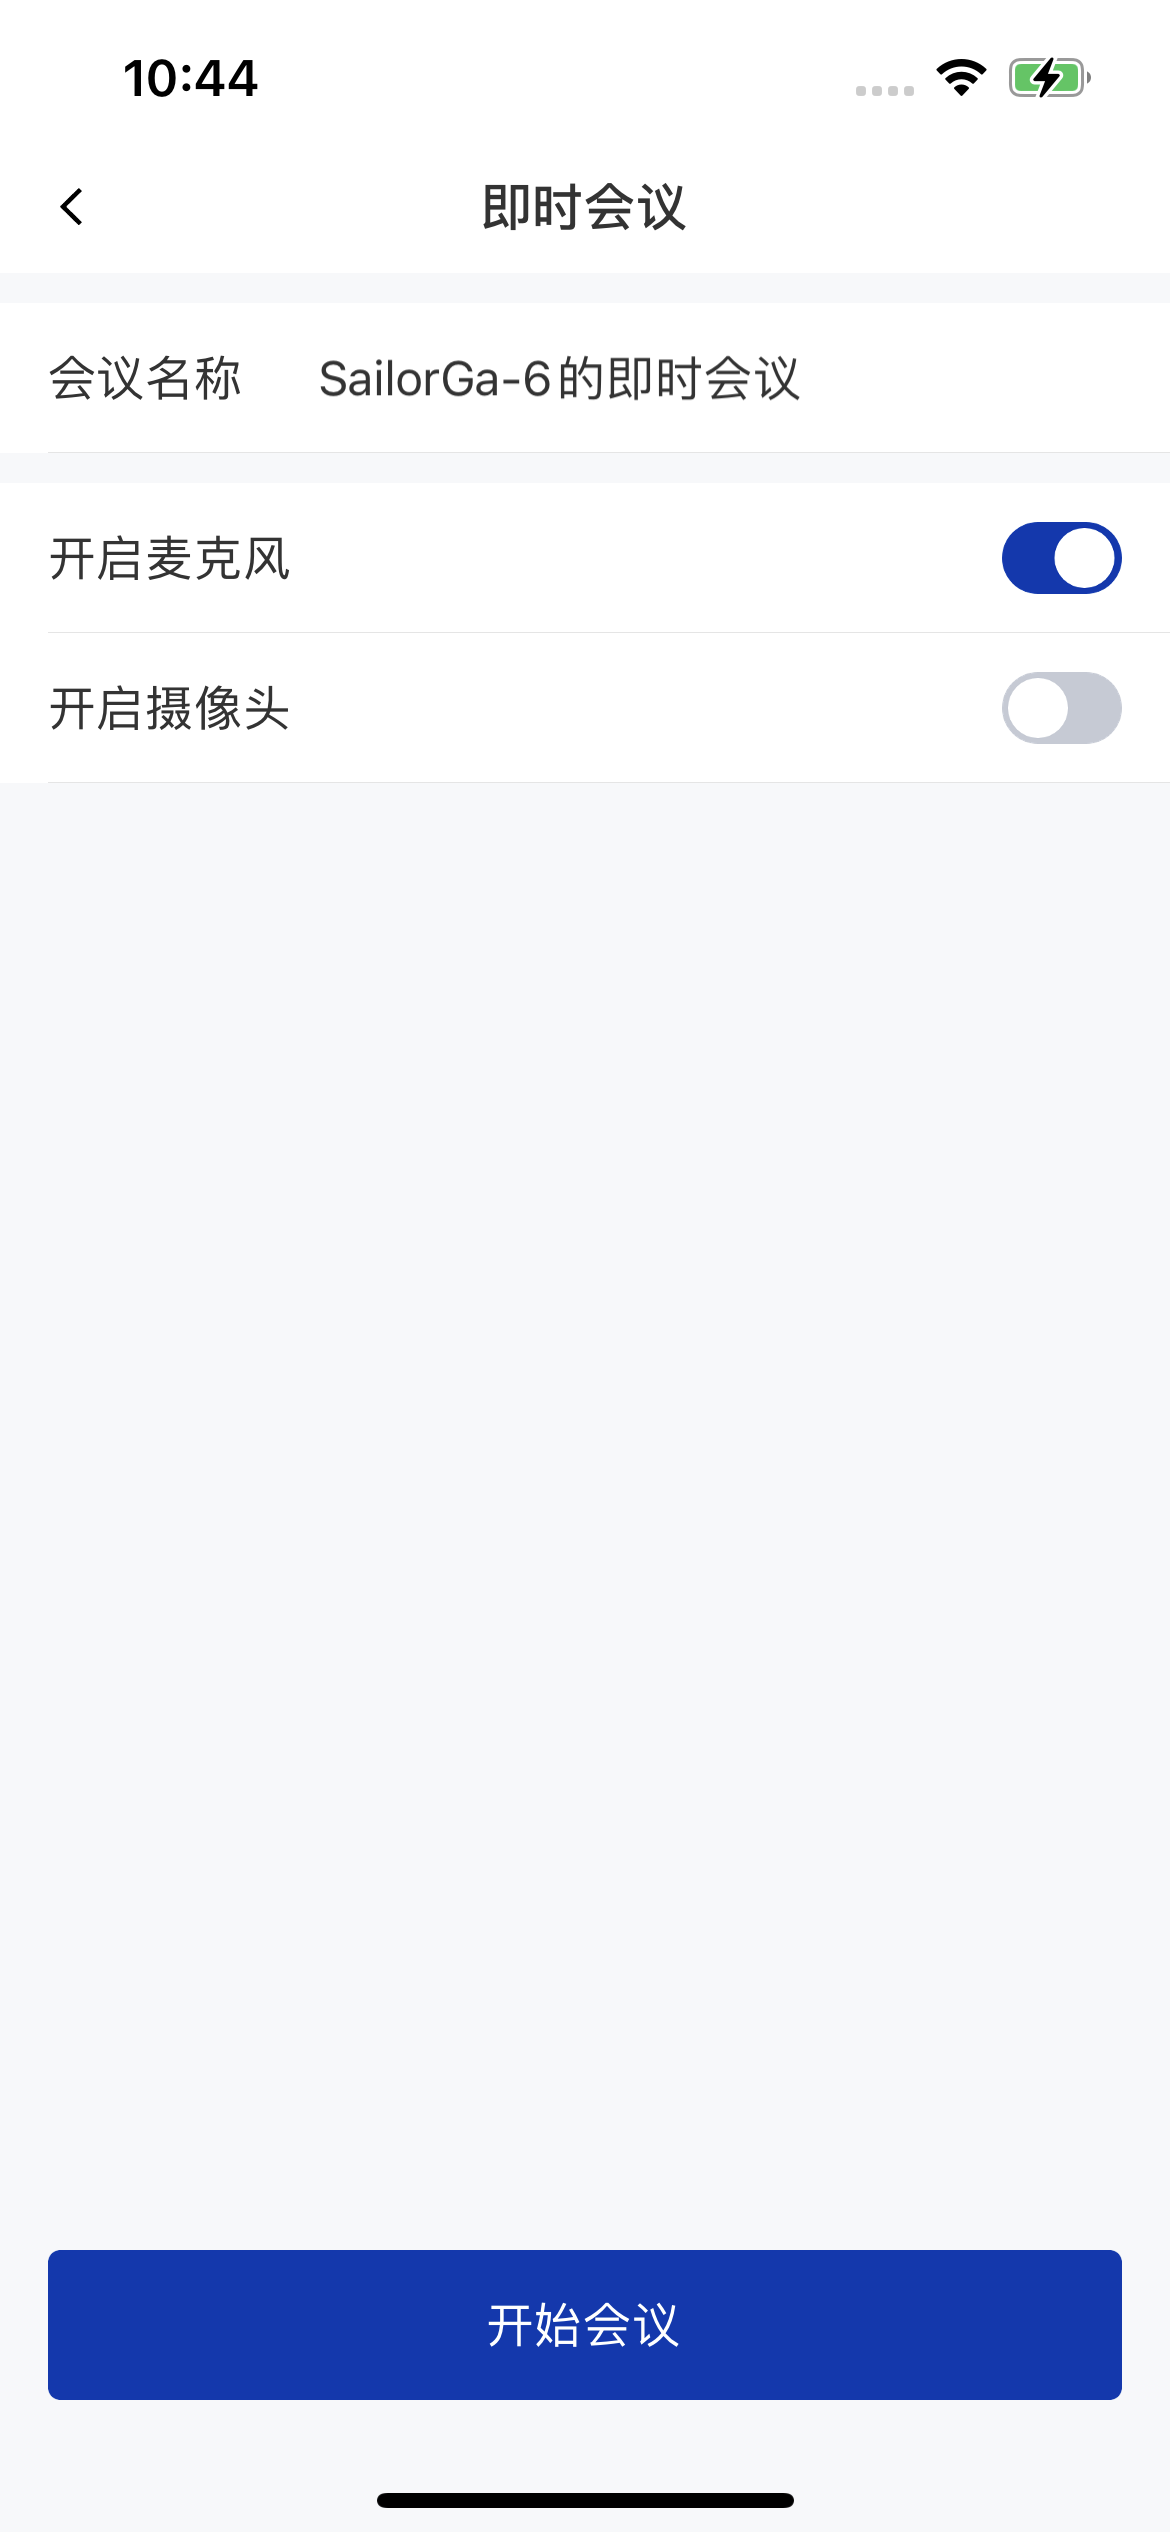 |  |
- Create a room as follows to apply before-the-meeting controls:
- Enter a room and set the entry parameters as follows to apply before-the-meeting controls:
In-meeting controls
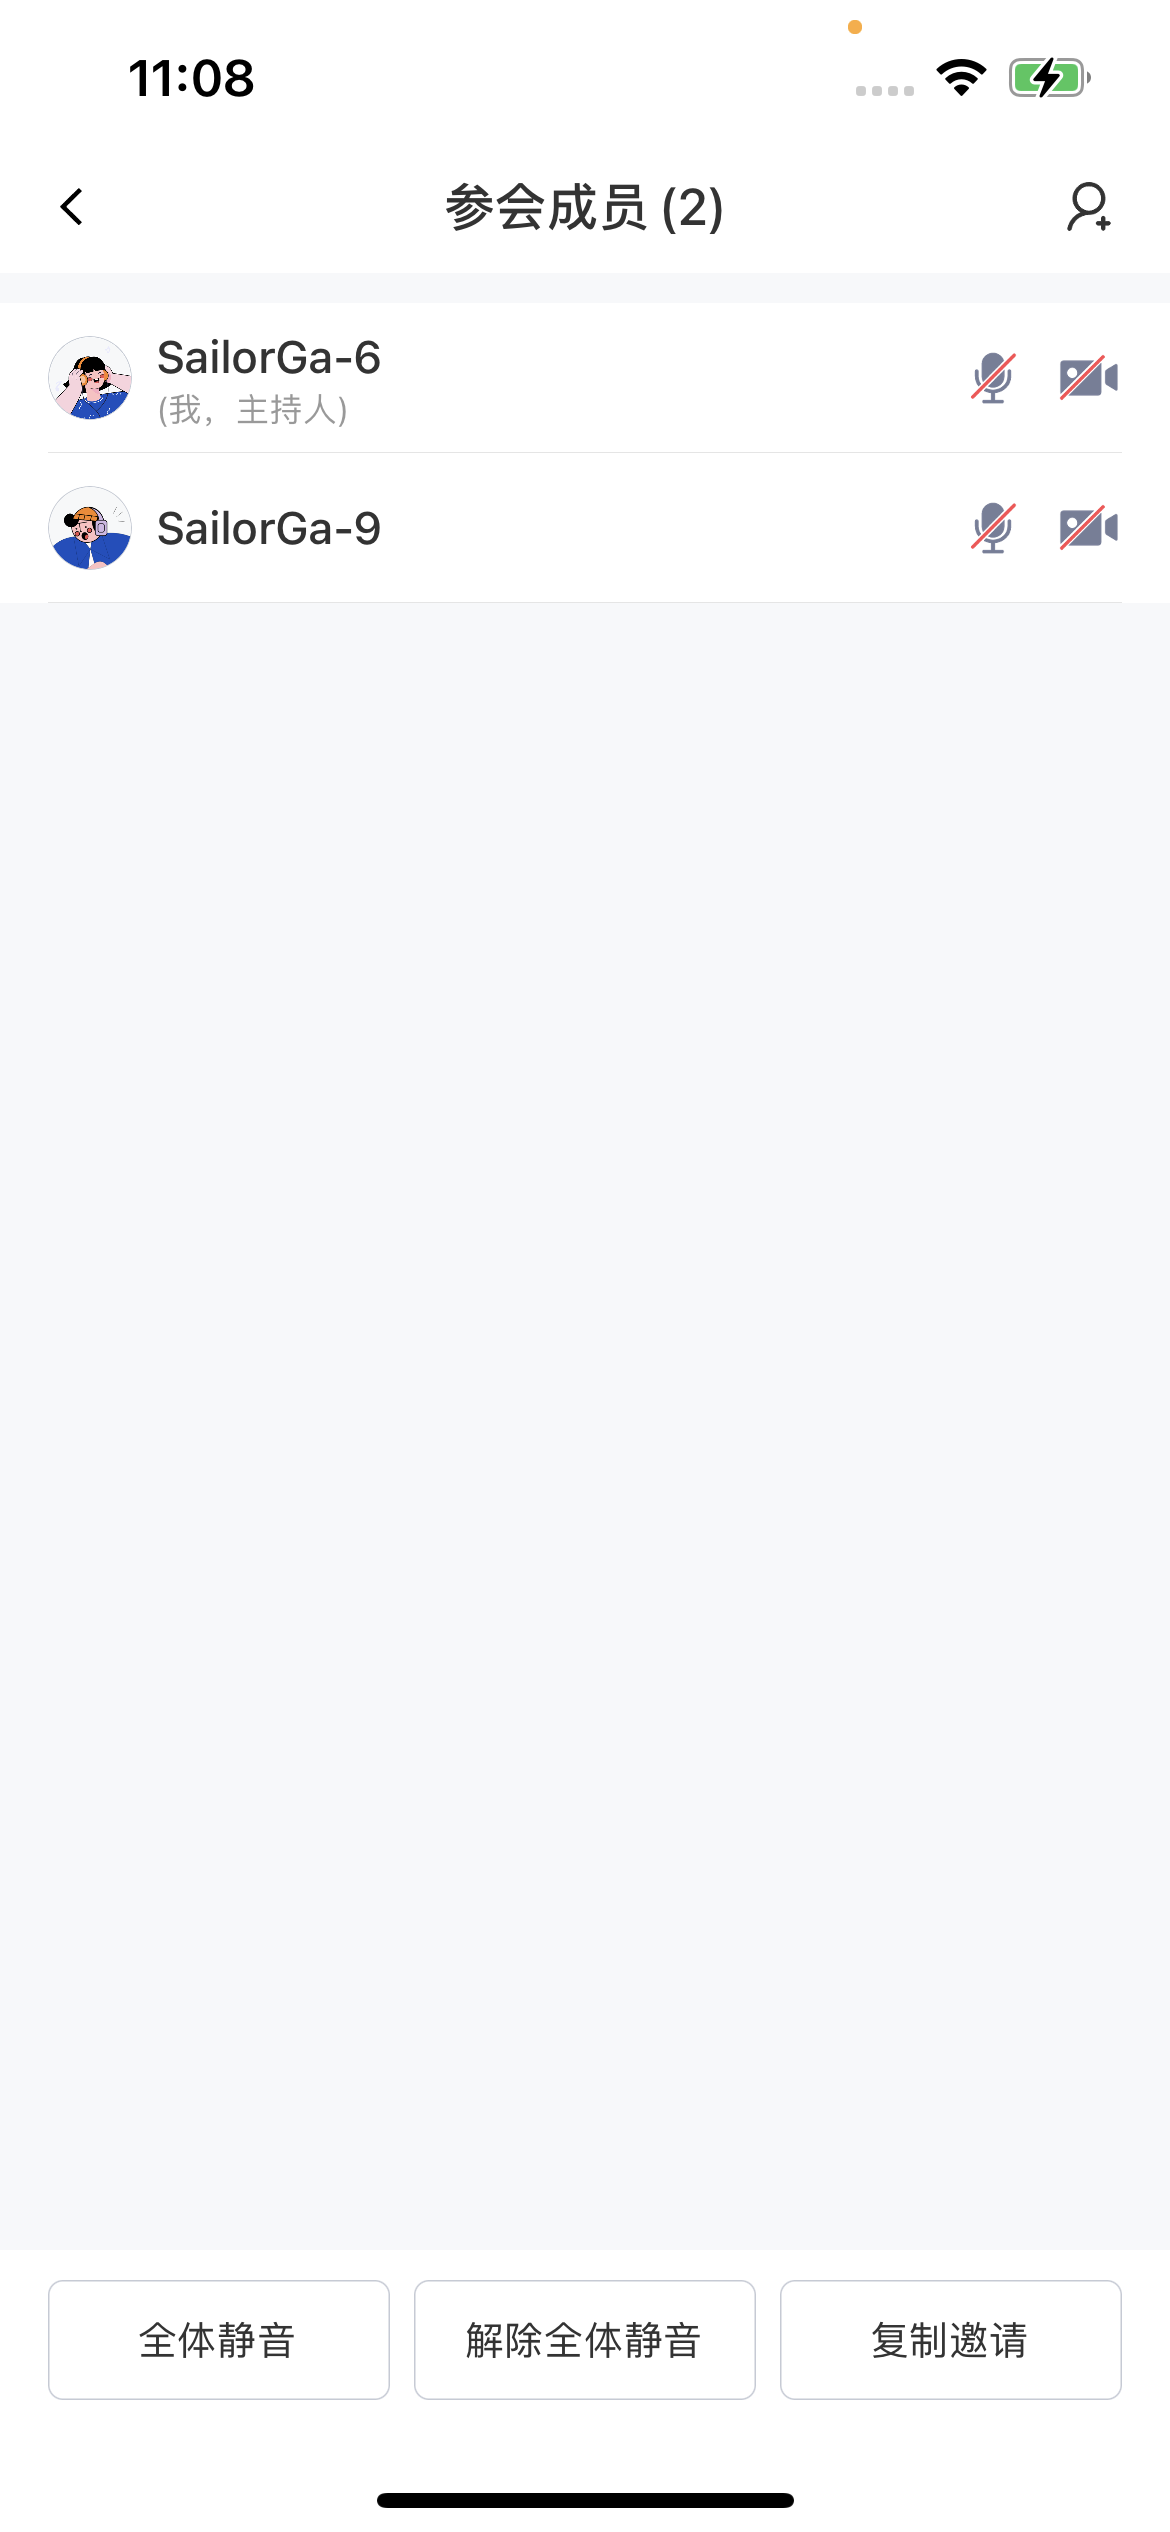
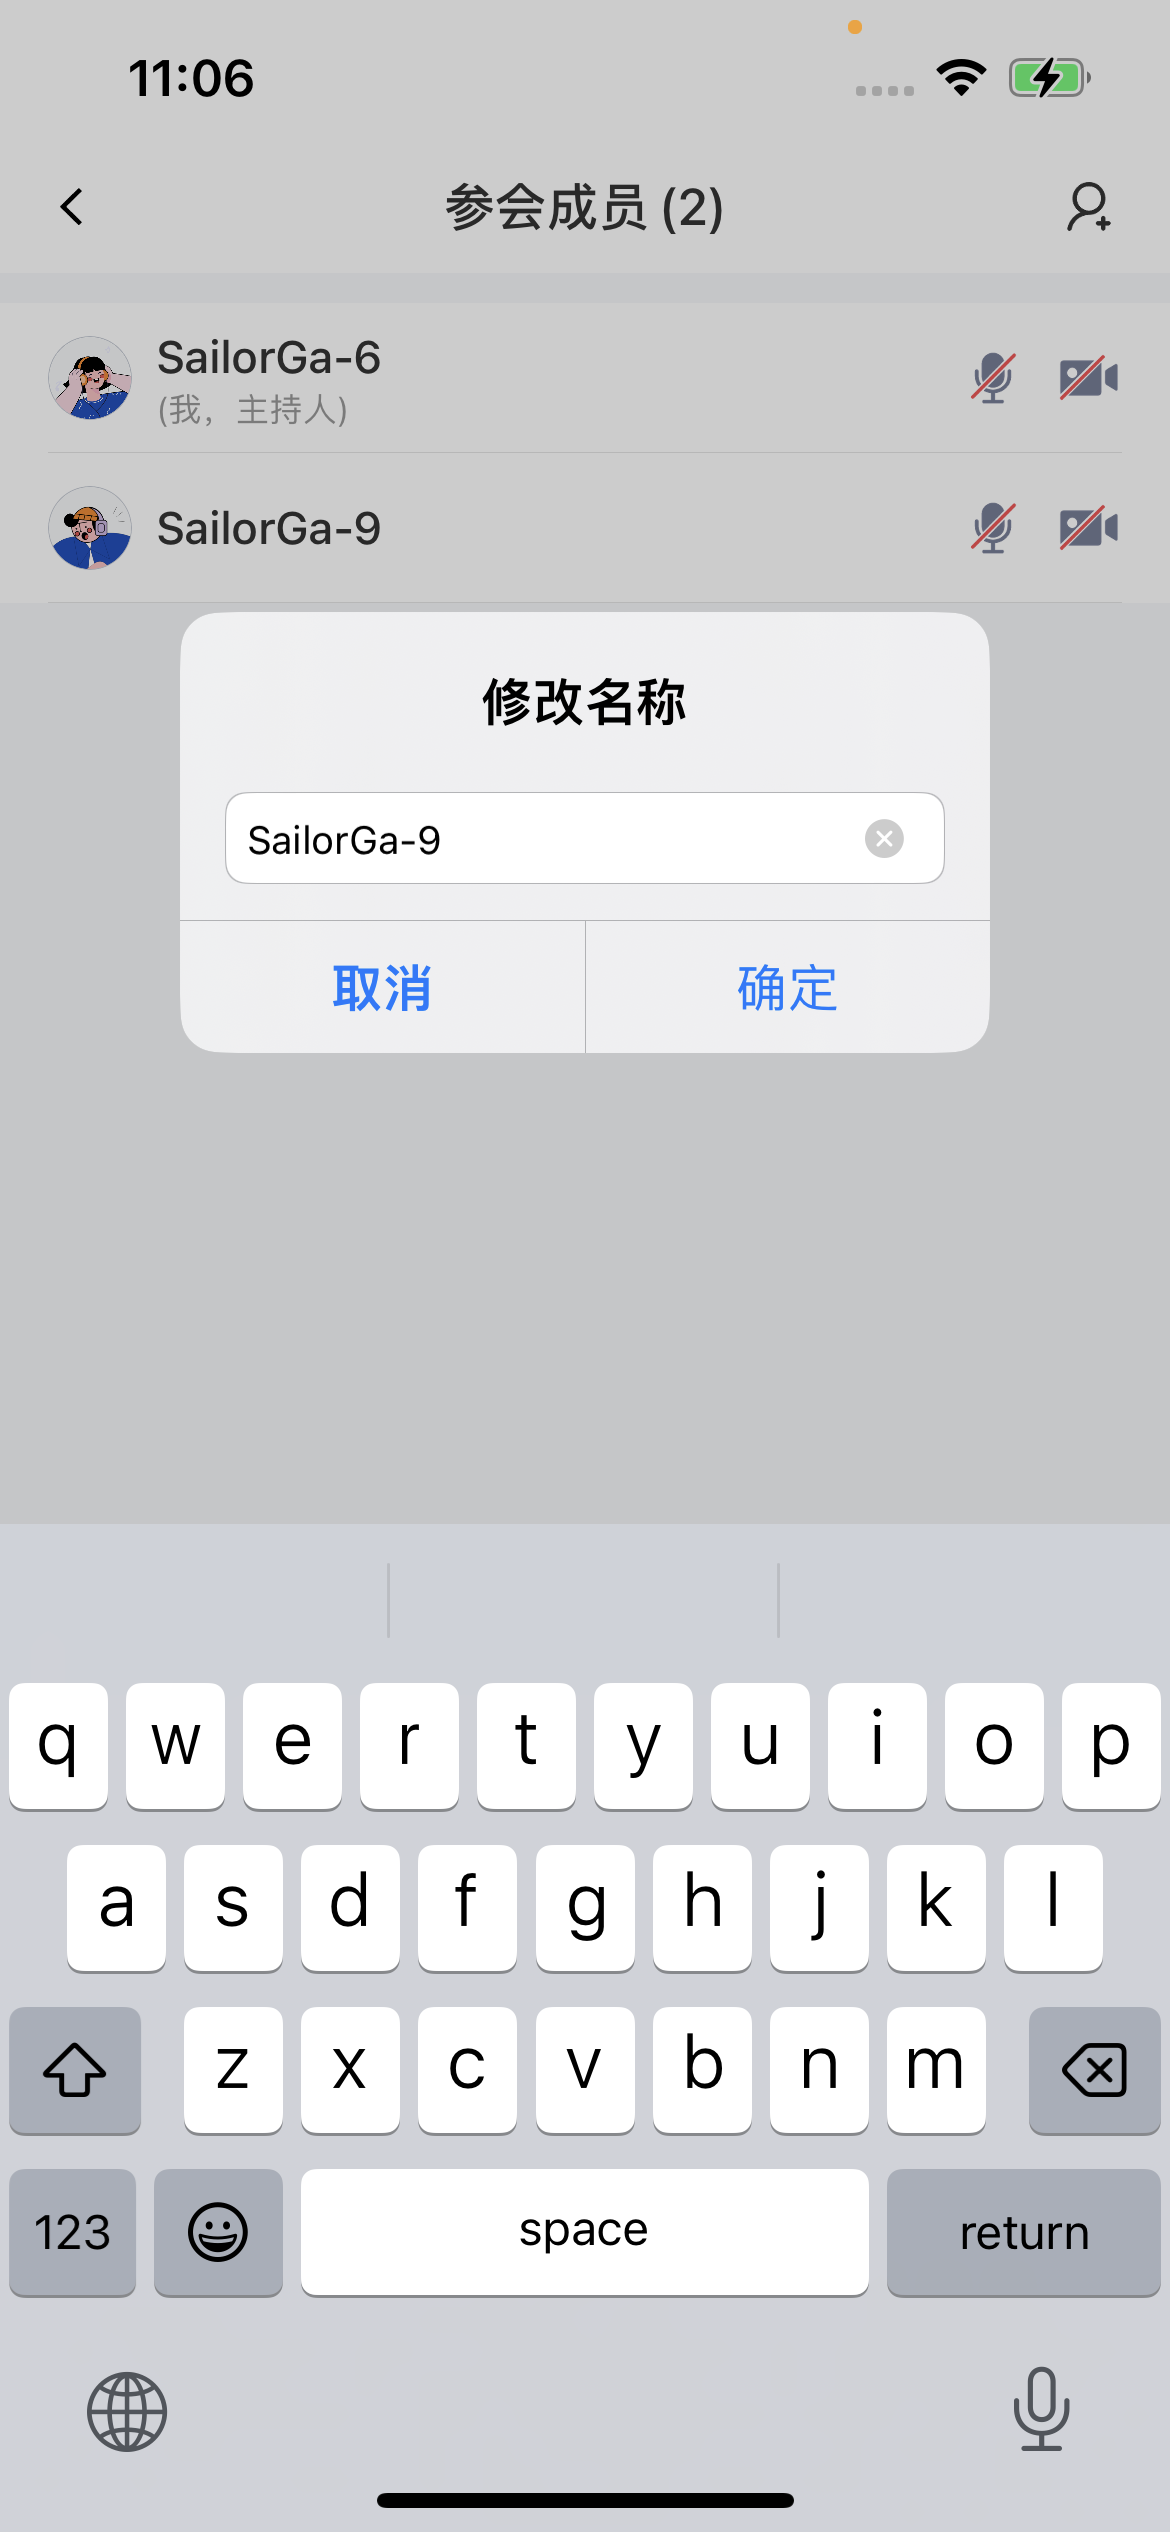
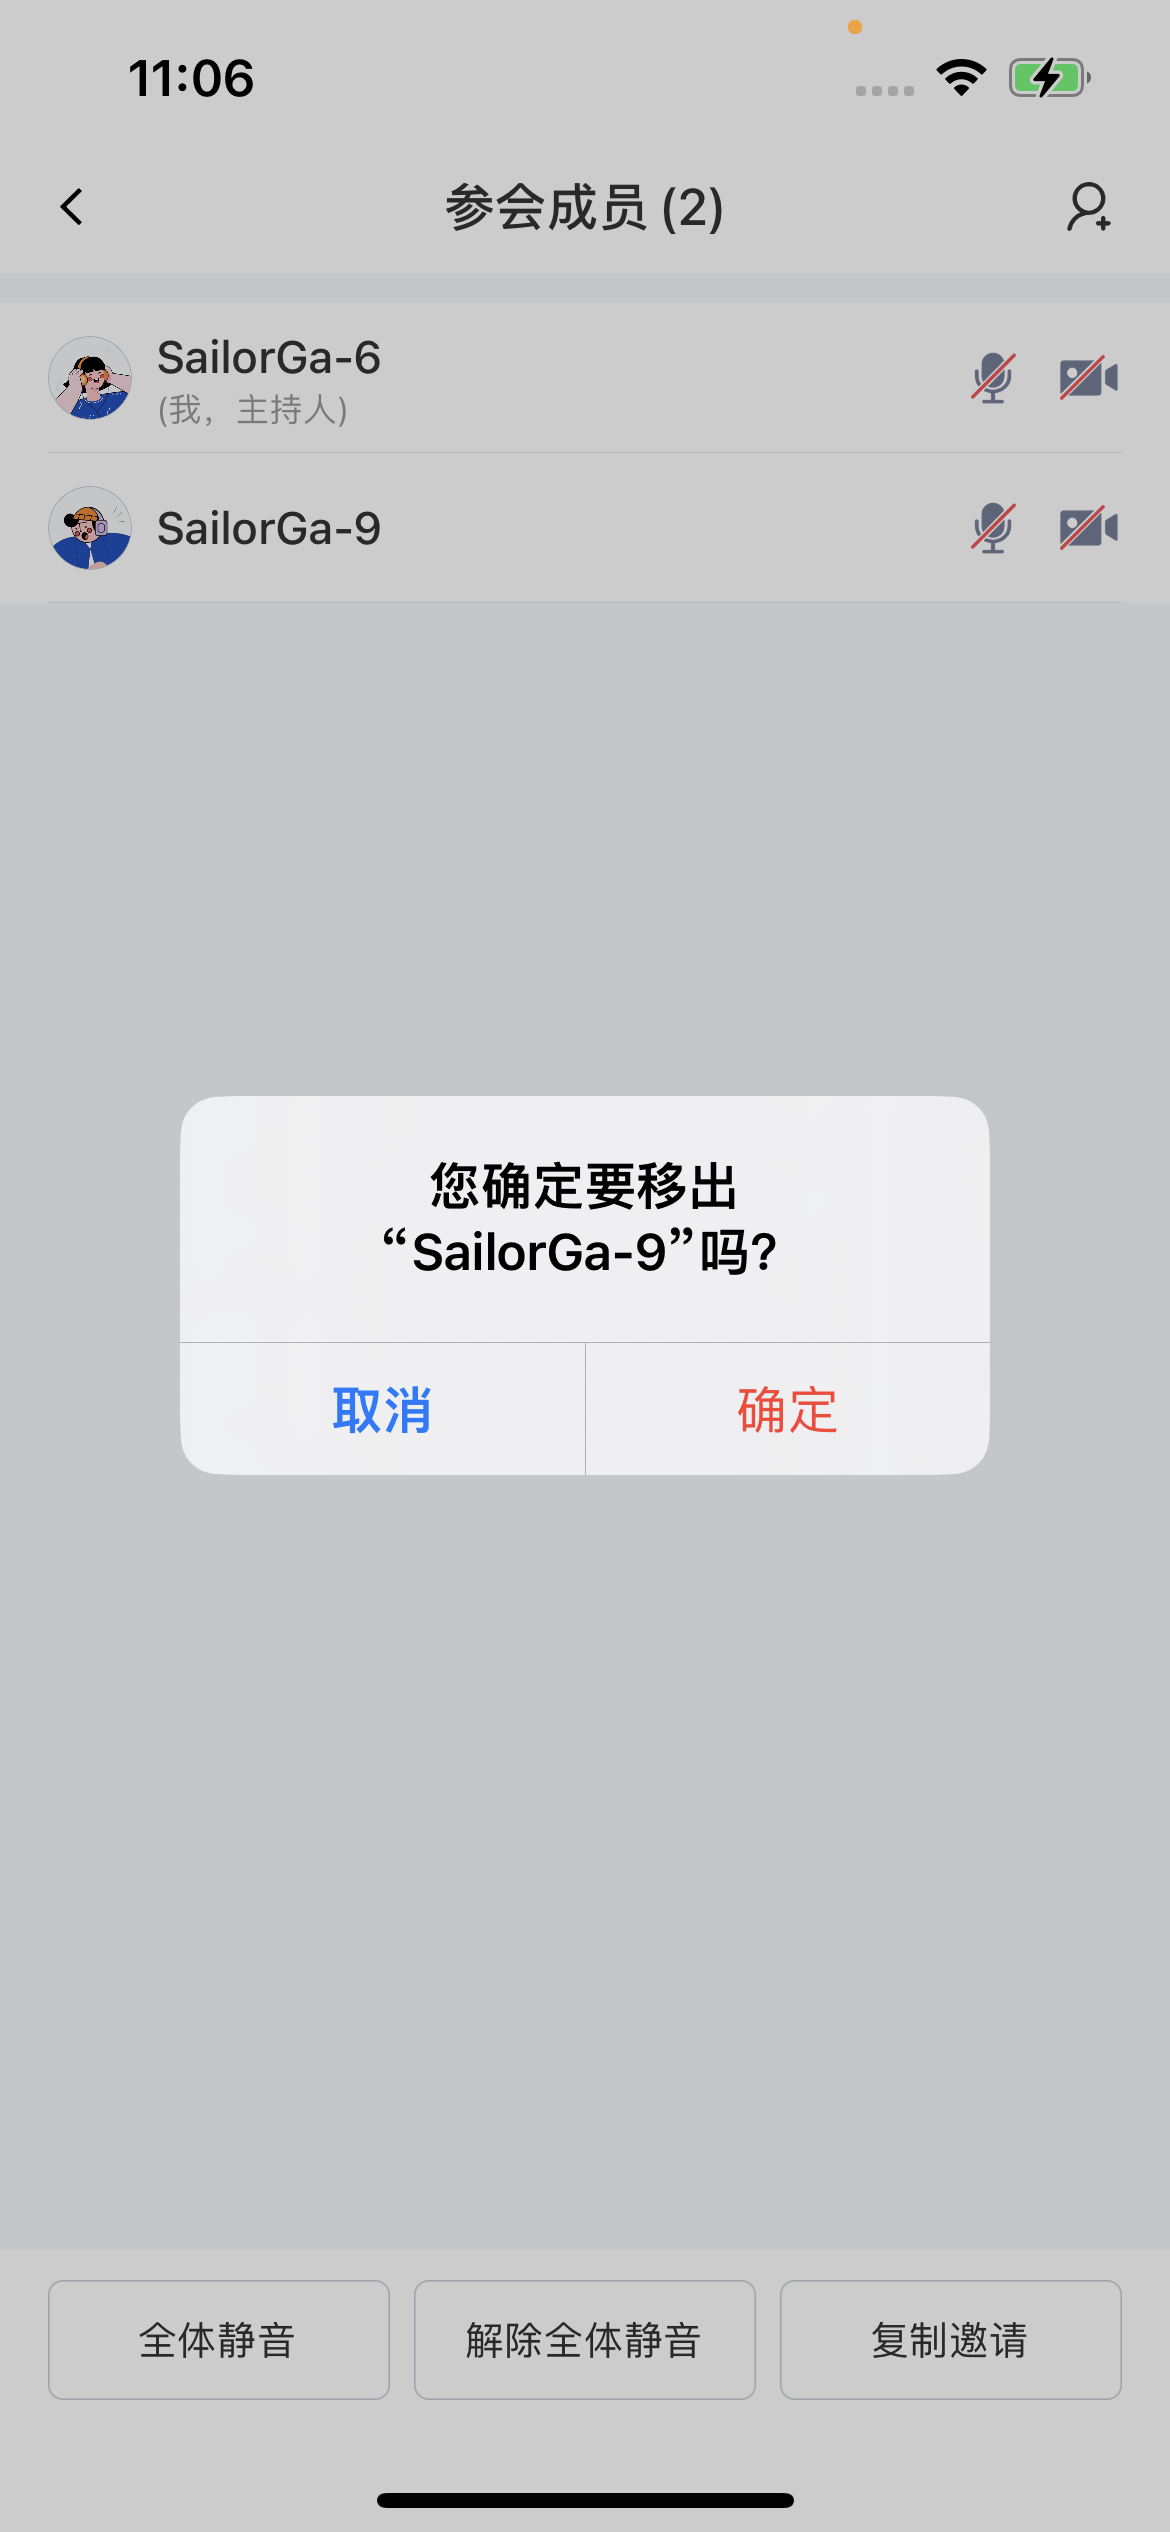
The host or a co-host can manage all members in the meeting under 参会成员 (Members) -> 成员列表 (Member list).- The host or a co-host can select any member and control them individually: unmute/mute, turn video on/off, disable/enable chat, rename, remove from the room, and more.
| Member management | Rename | Remove from meeting |
|---|---|---|
 |  |  |
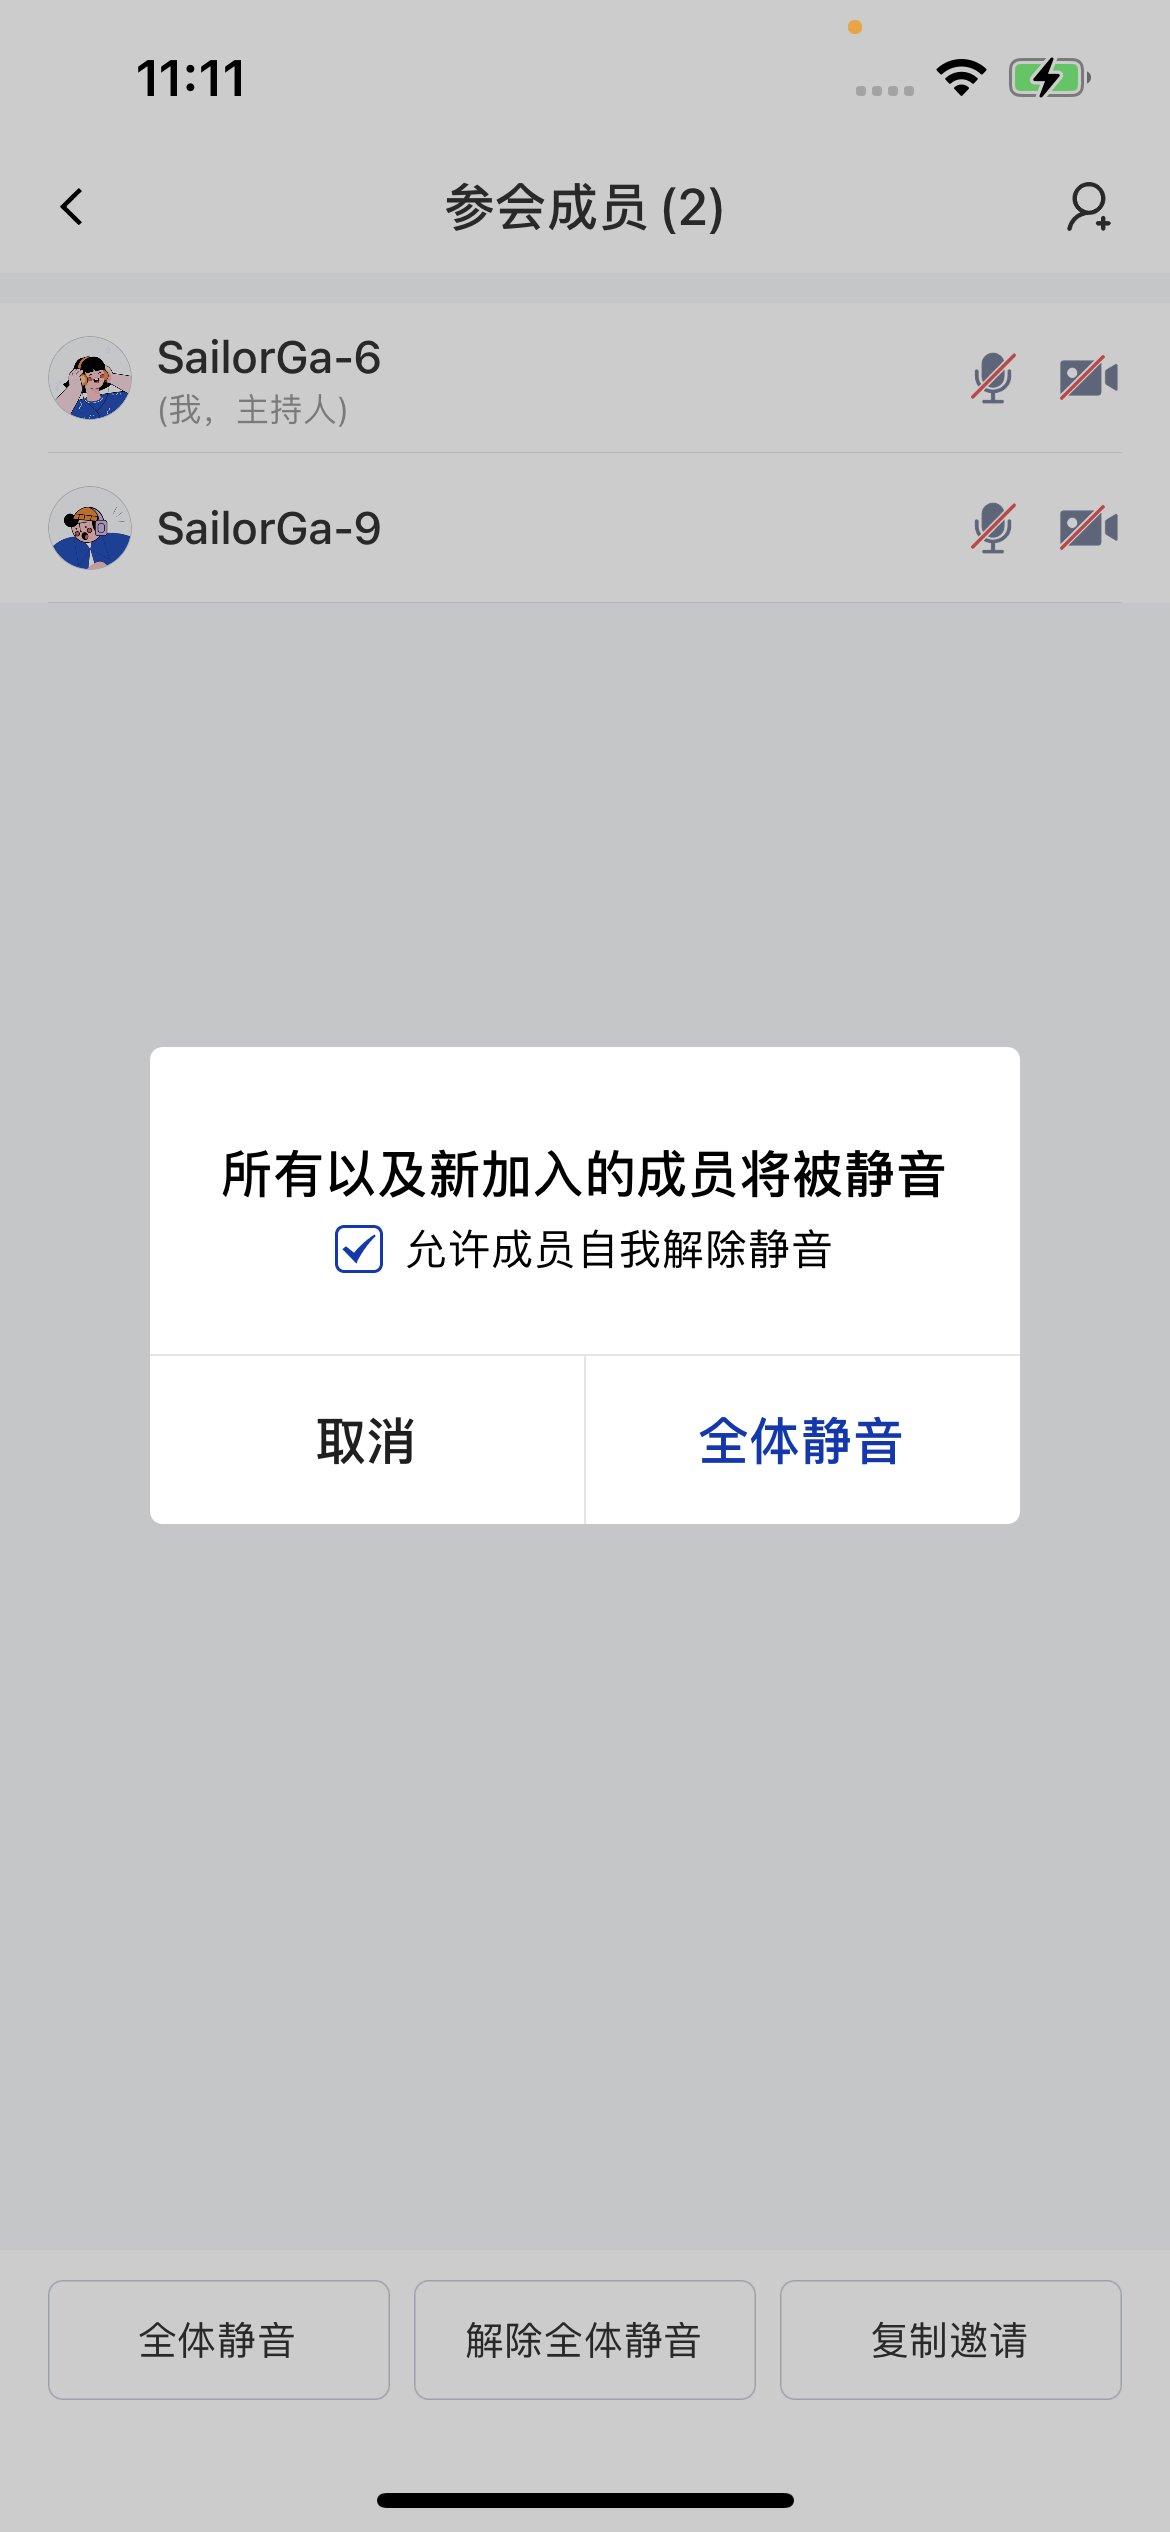
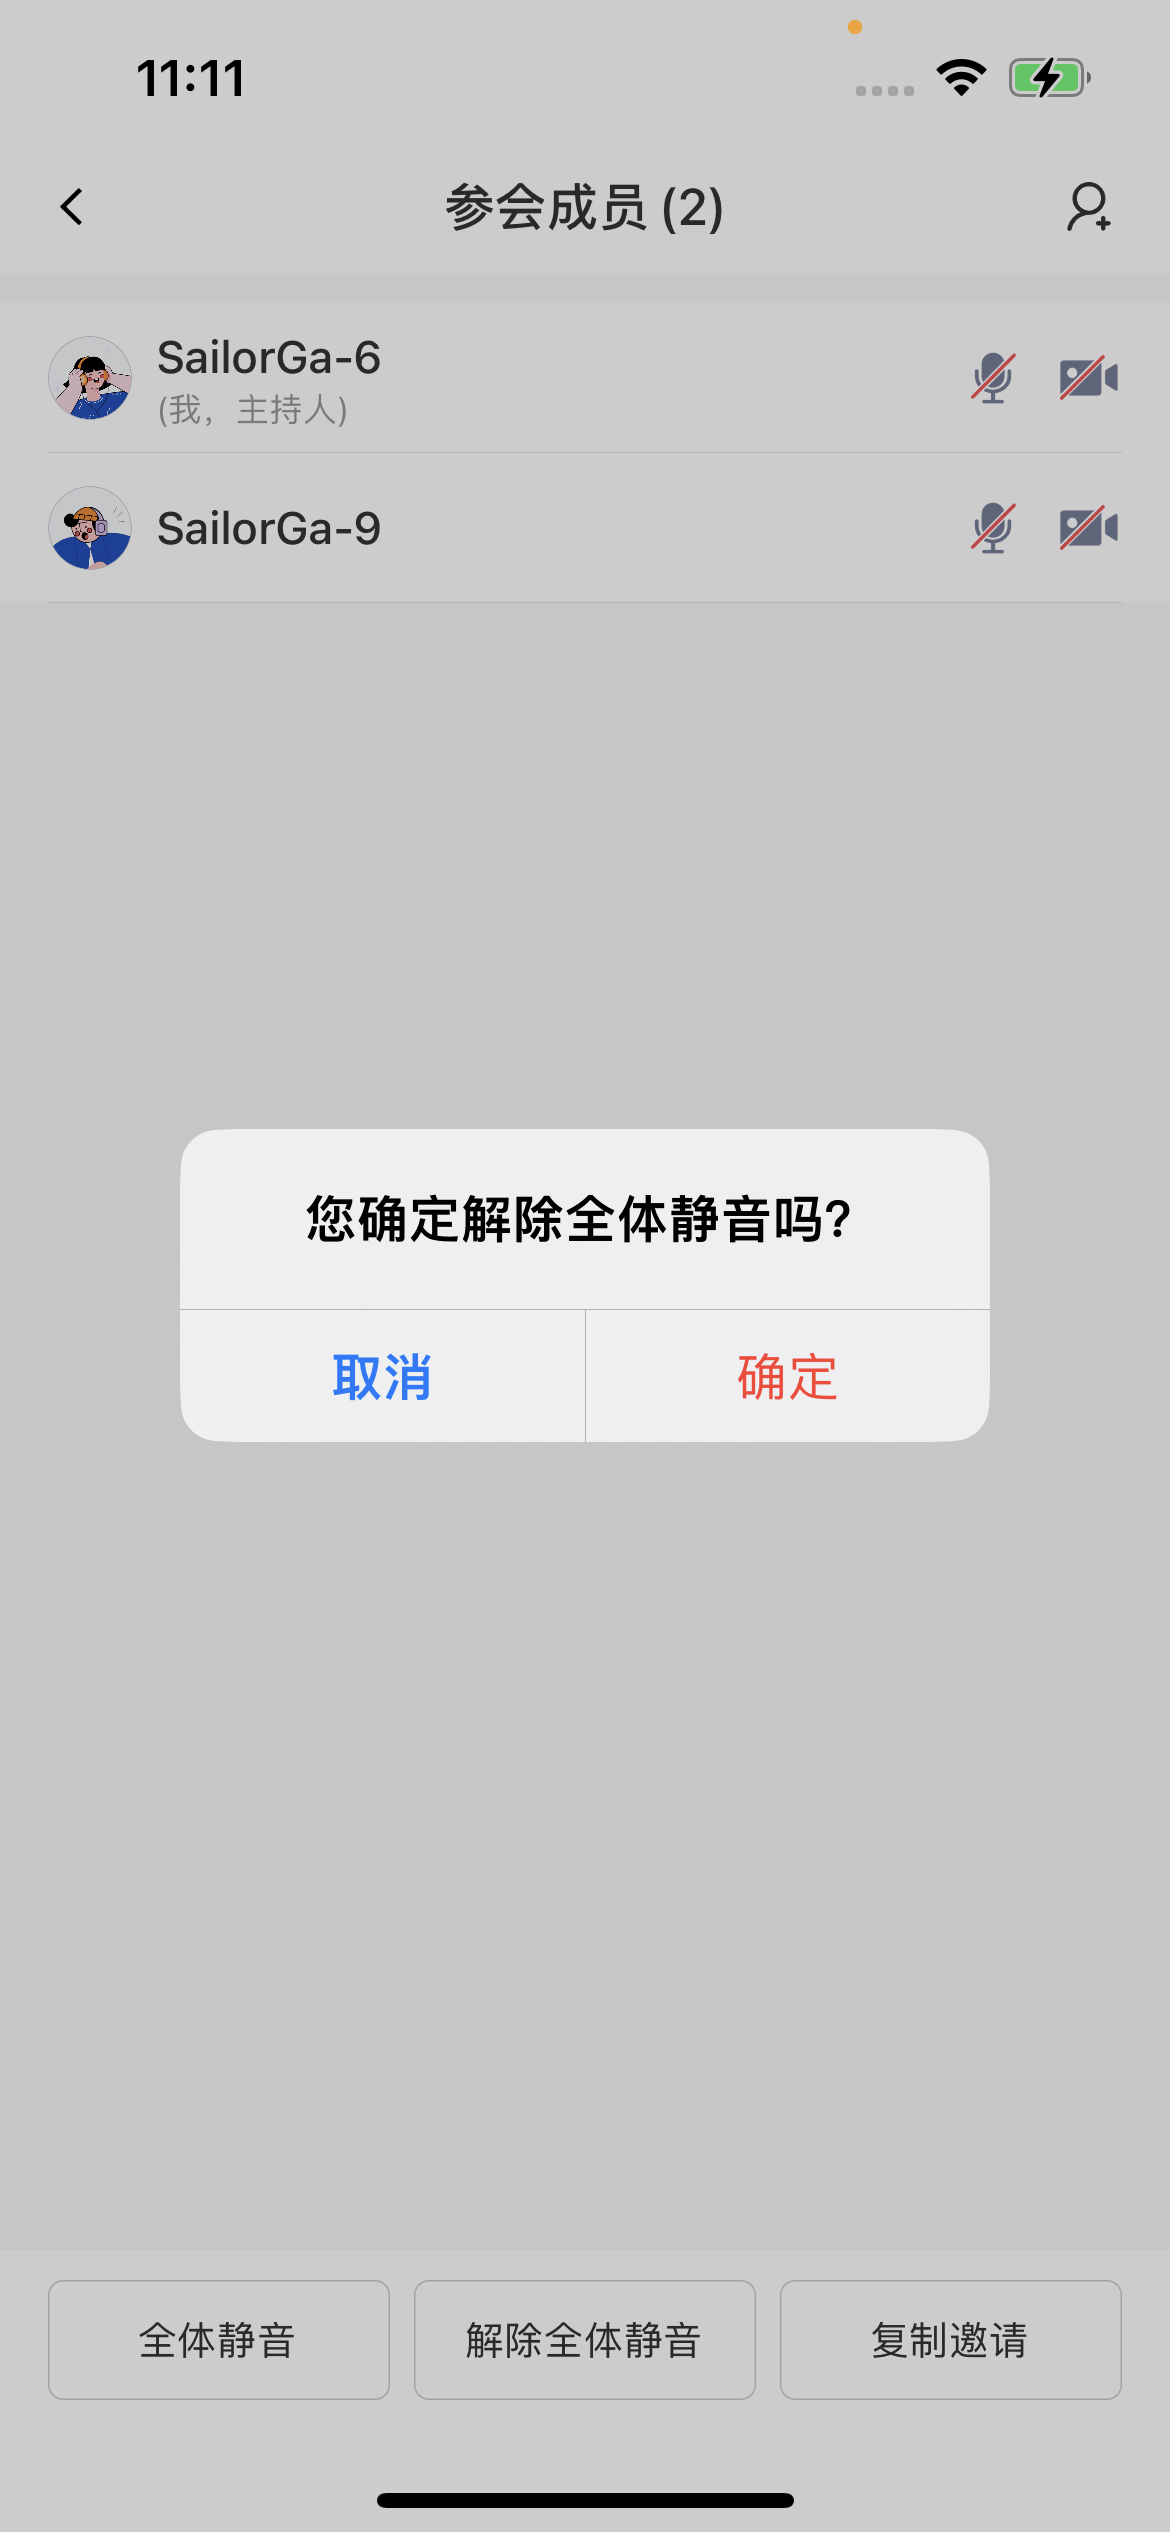
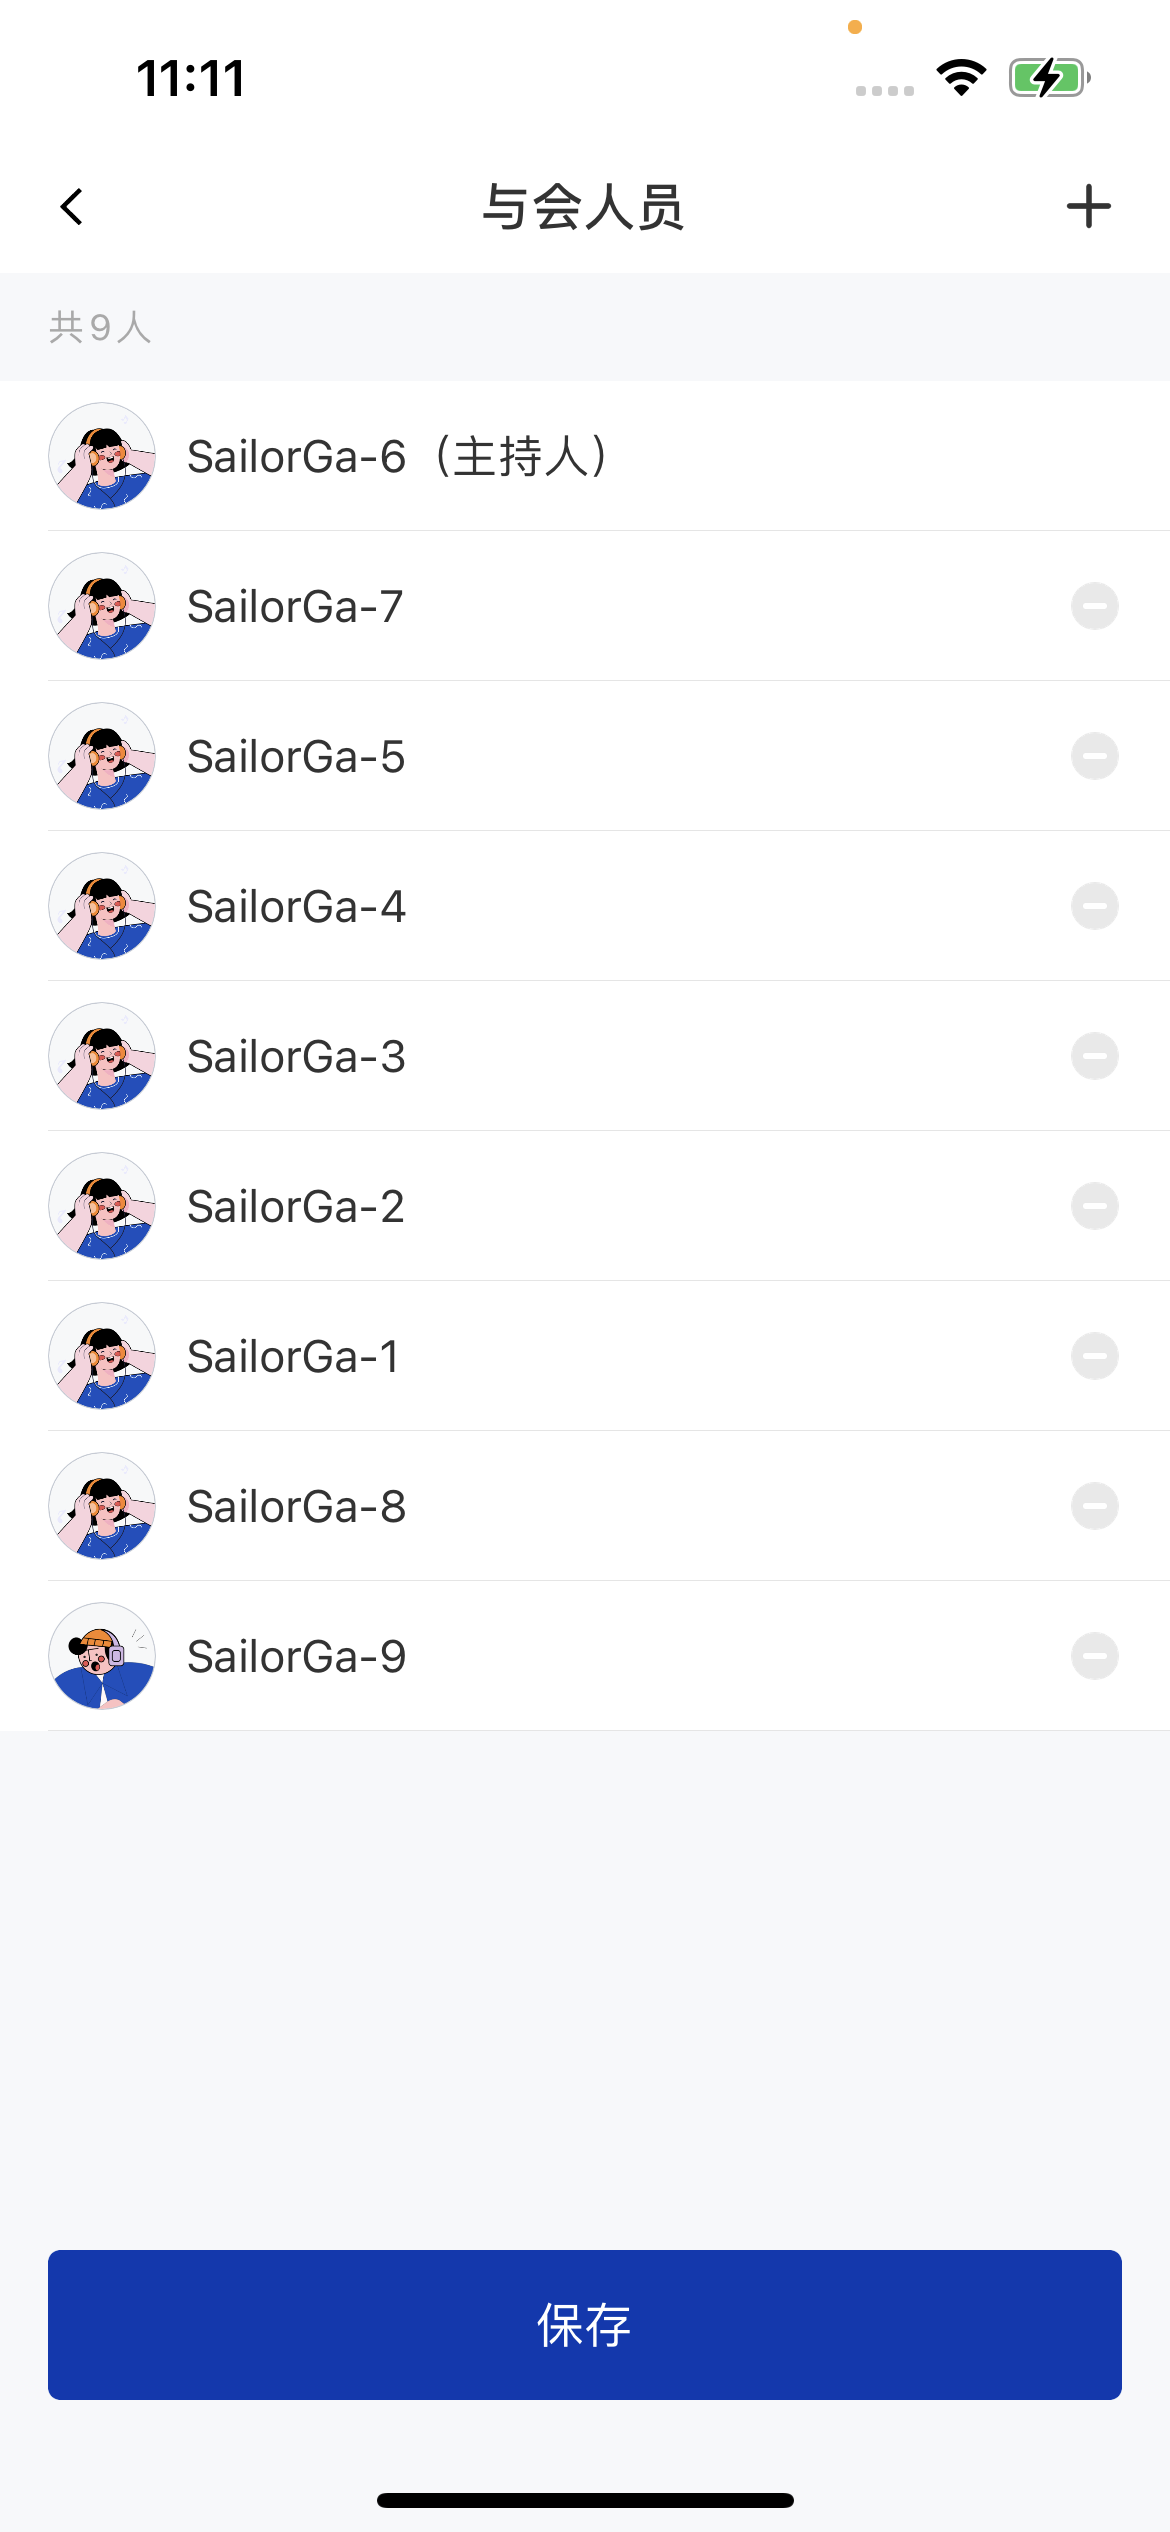
- The host or a co-host can control all members in the room at once: mute all / unmute all, camera off for everyone / lift camera off for everyone, invite members, and more.
| Mute all | Unmute all | Invite members |
|---|---|---|
 |  |  |
Screen sharing
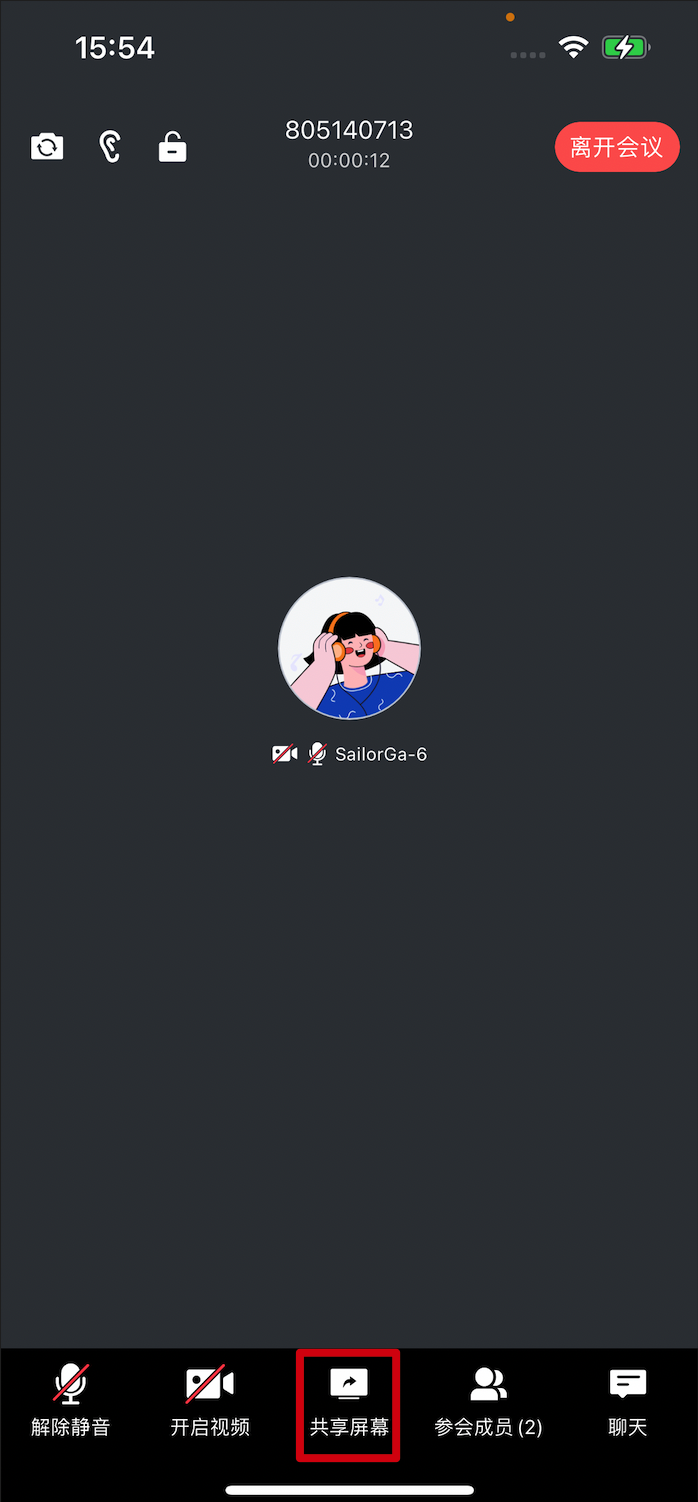
Overview
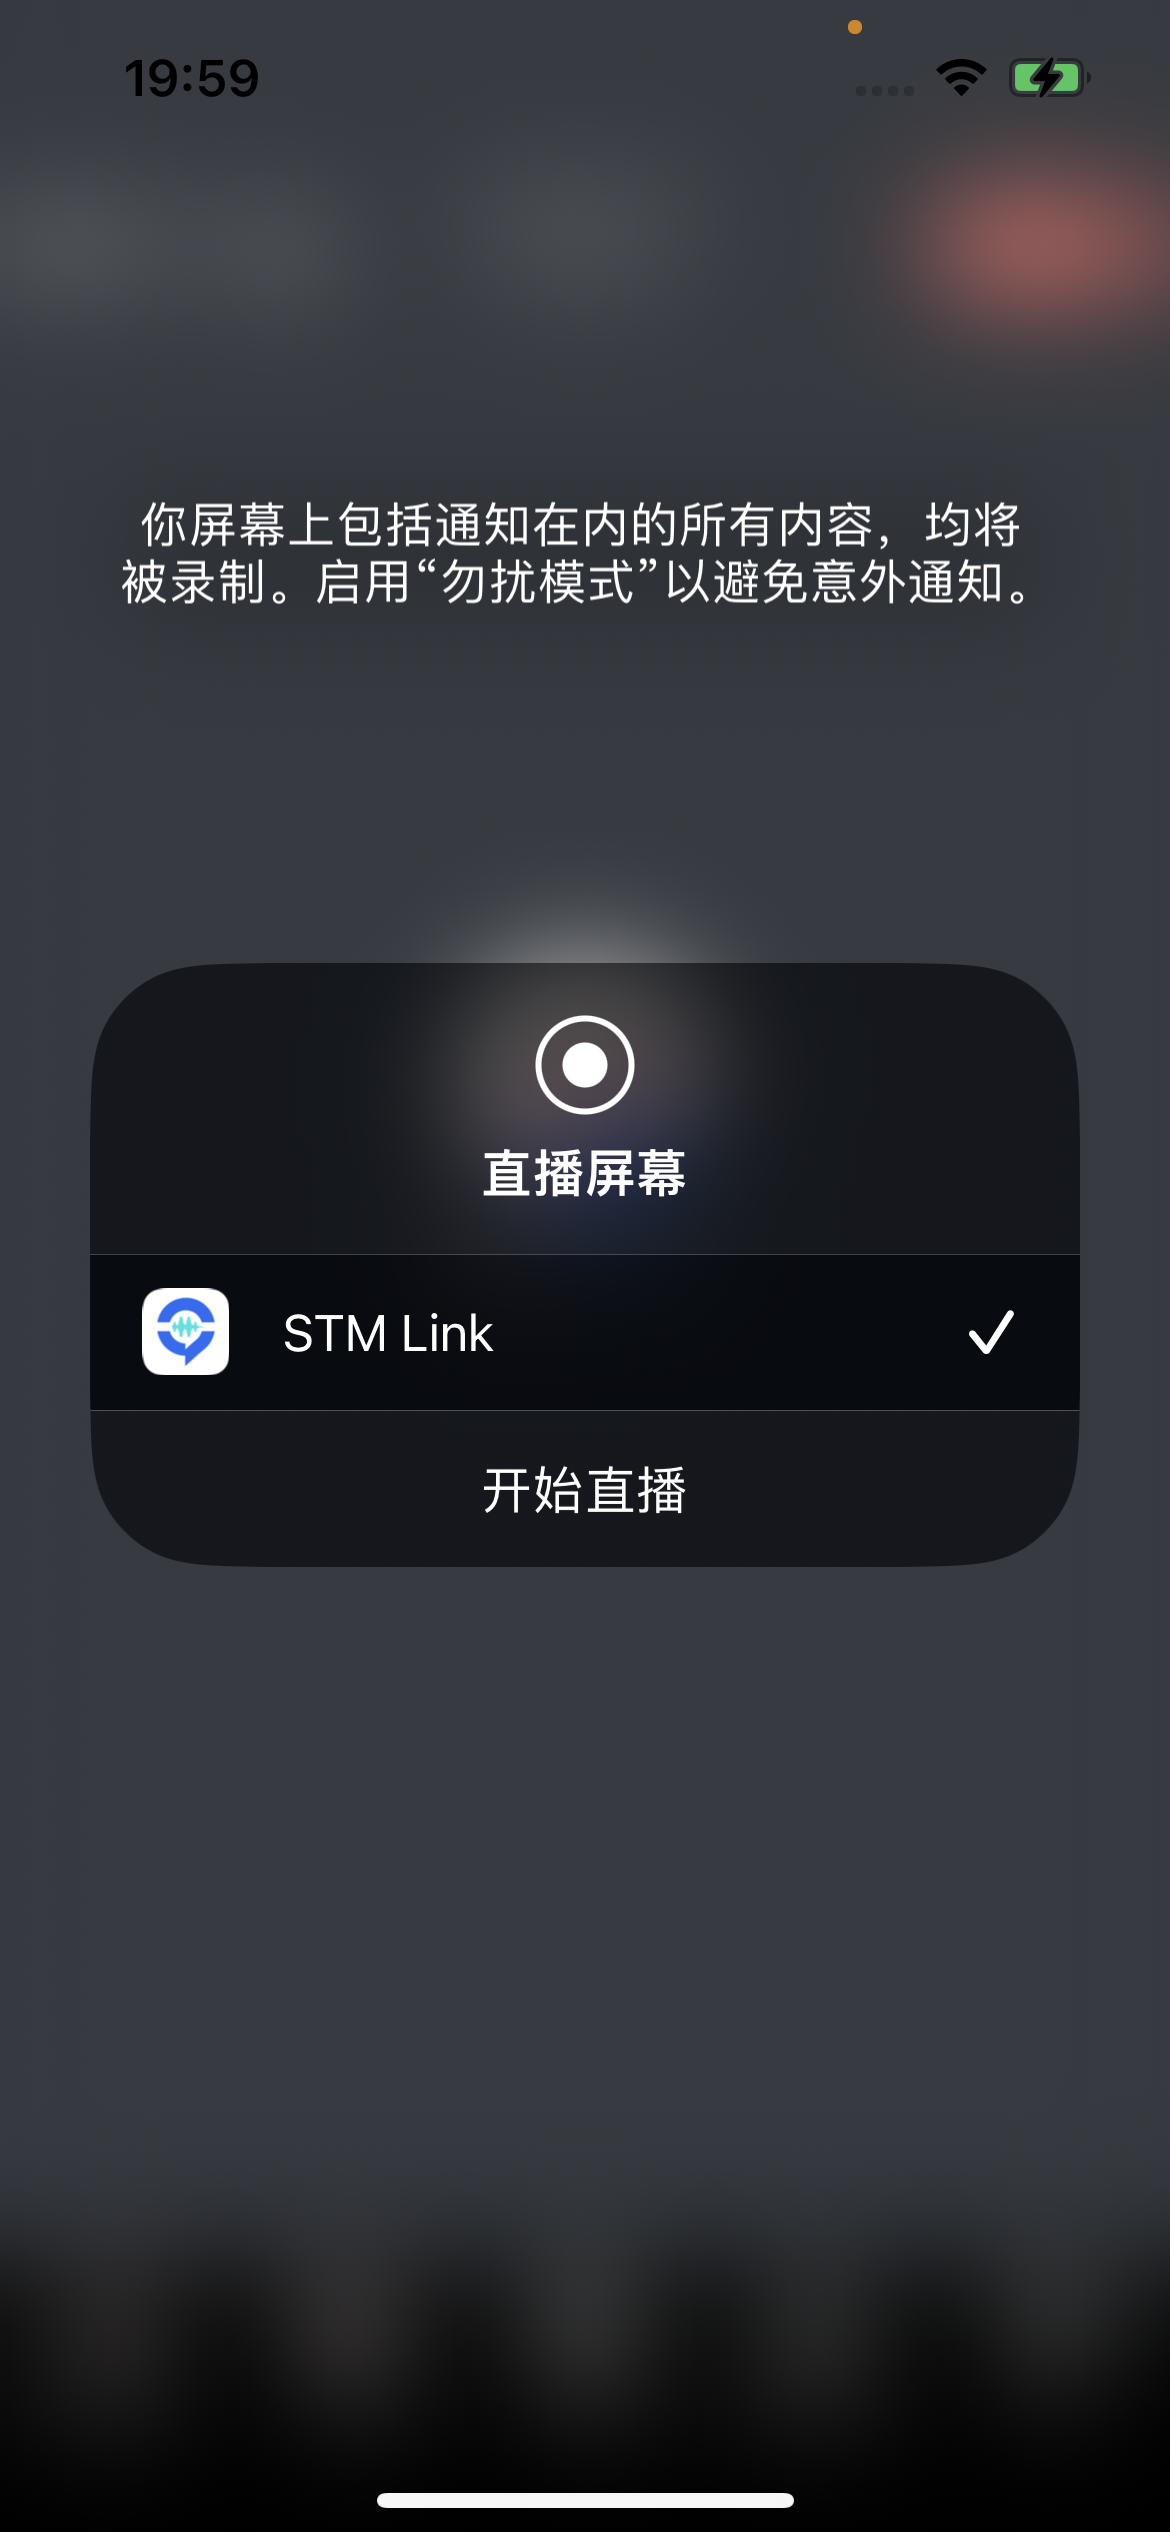
After entering a room, users can share their screen by tapping the share button in the bottom toolbar.| Screen sharing | Start screen capture |
|---|---|
 |  |
Integration
Cross-app screen sharing on iOS requires iOS 12 or later and a Broadcast Upload Extension screen recording process that works with the host app process to publish the stream. The system creates the extension’s recording process when screen recording is needed, and it receives the screen images captured by the system. So you need to:- Create an App Group and configure it in Xcode (required). This lets the extension’s recording process communicate with the host app process across processes;
- In your project, create a new Broadcast Upload Extension target and integrate the
MeetingKit.frameworkcustomized for extension modules in the SDK; - Implement the receiving logic on the host app side, so that the host app waits for the screen recording data from the Broadcast Upload Extension.
1. Create an App Group
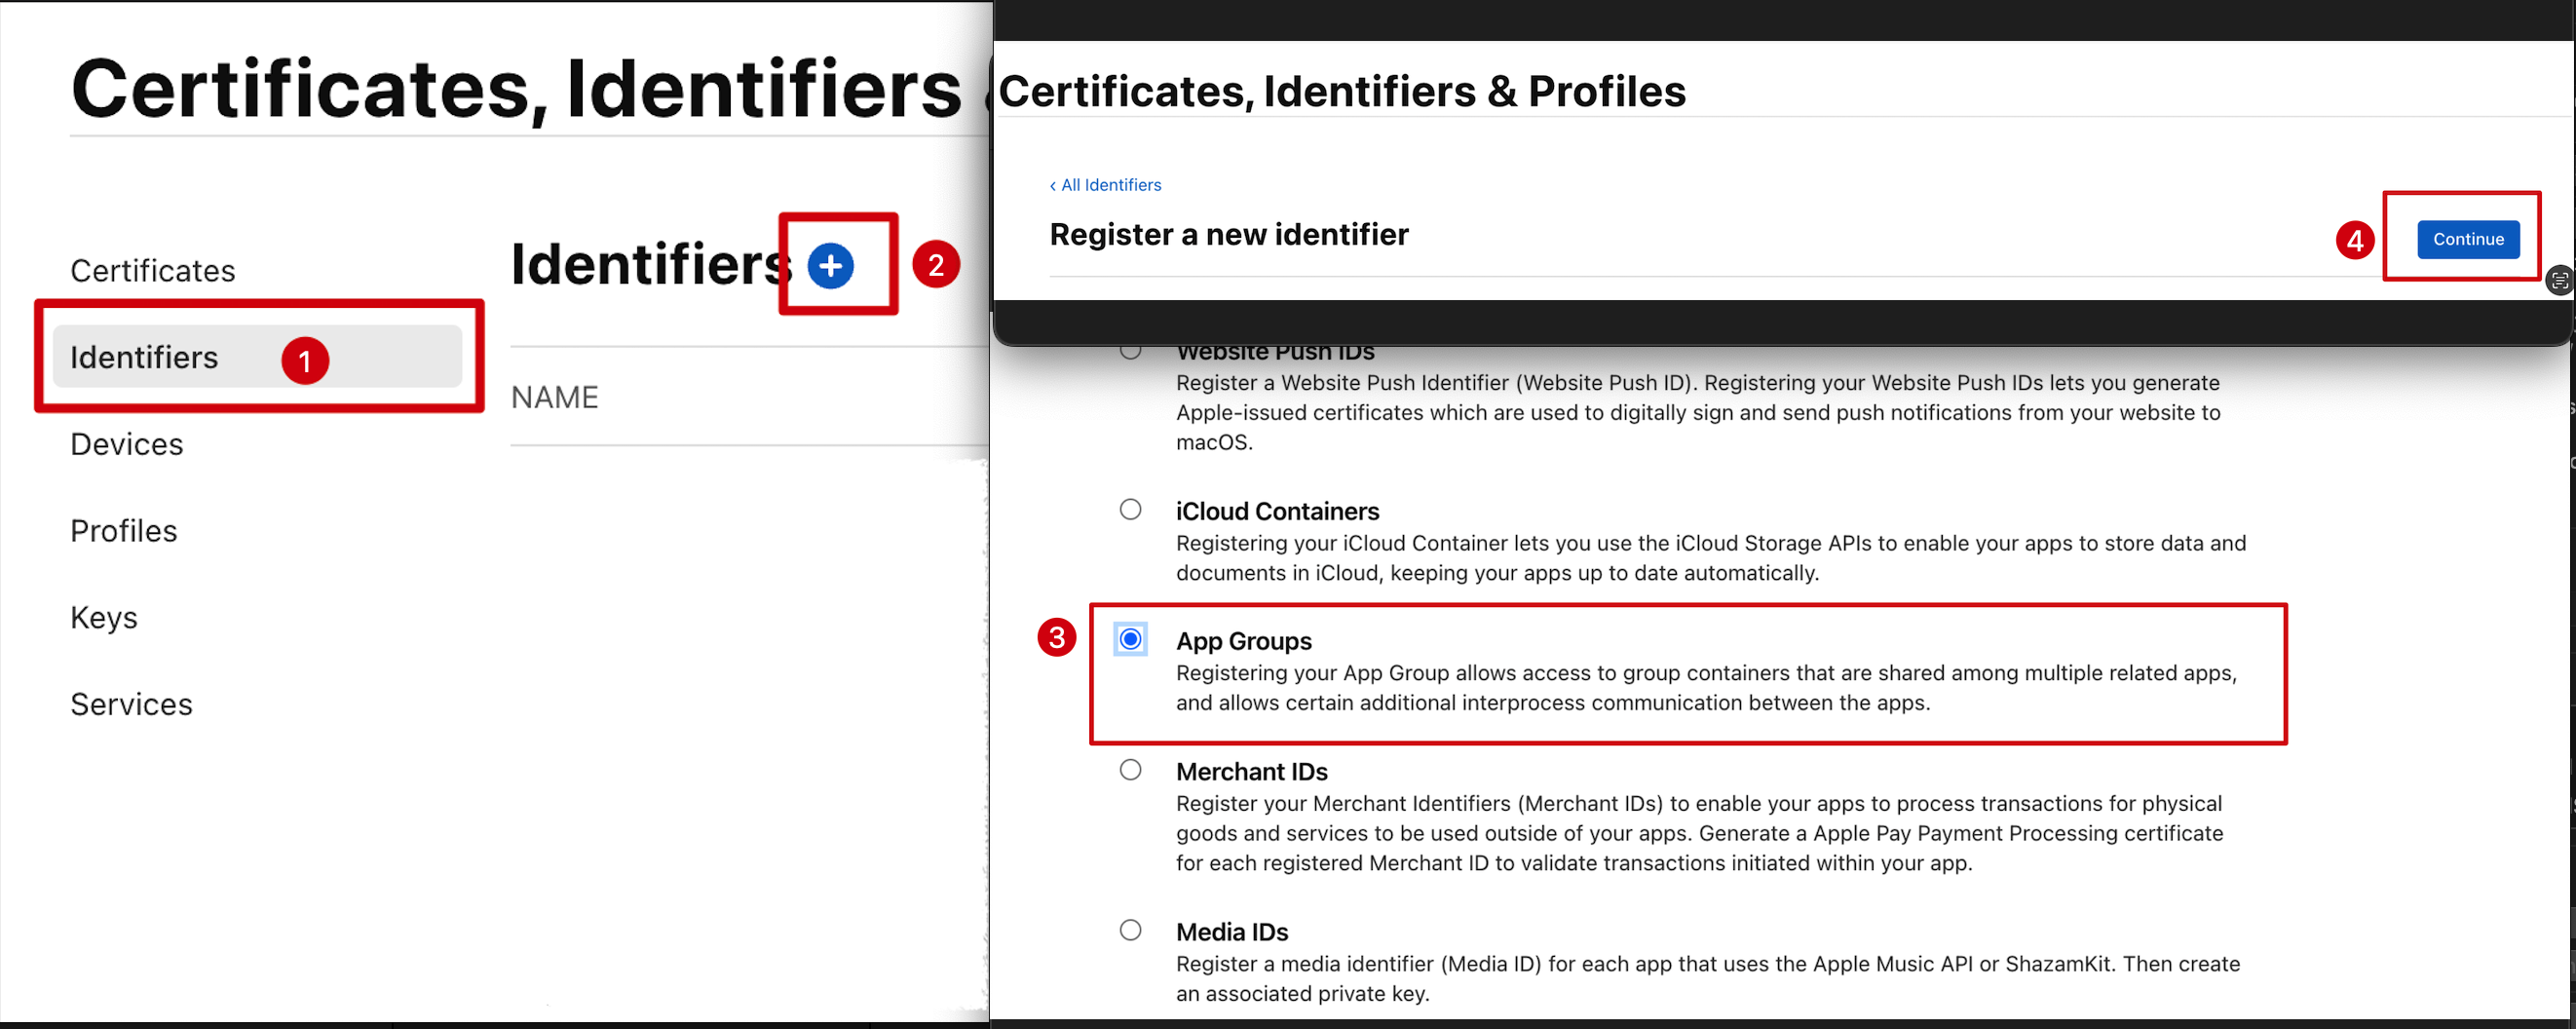
Log in to https://developer.apple.com/ with your developer account and do the following. Note that you need to download the corresponding Provisioning Profile again afterward.- Click Identifiers
- Click the plus button on the right
- Select App Groups and click Continue
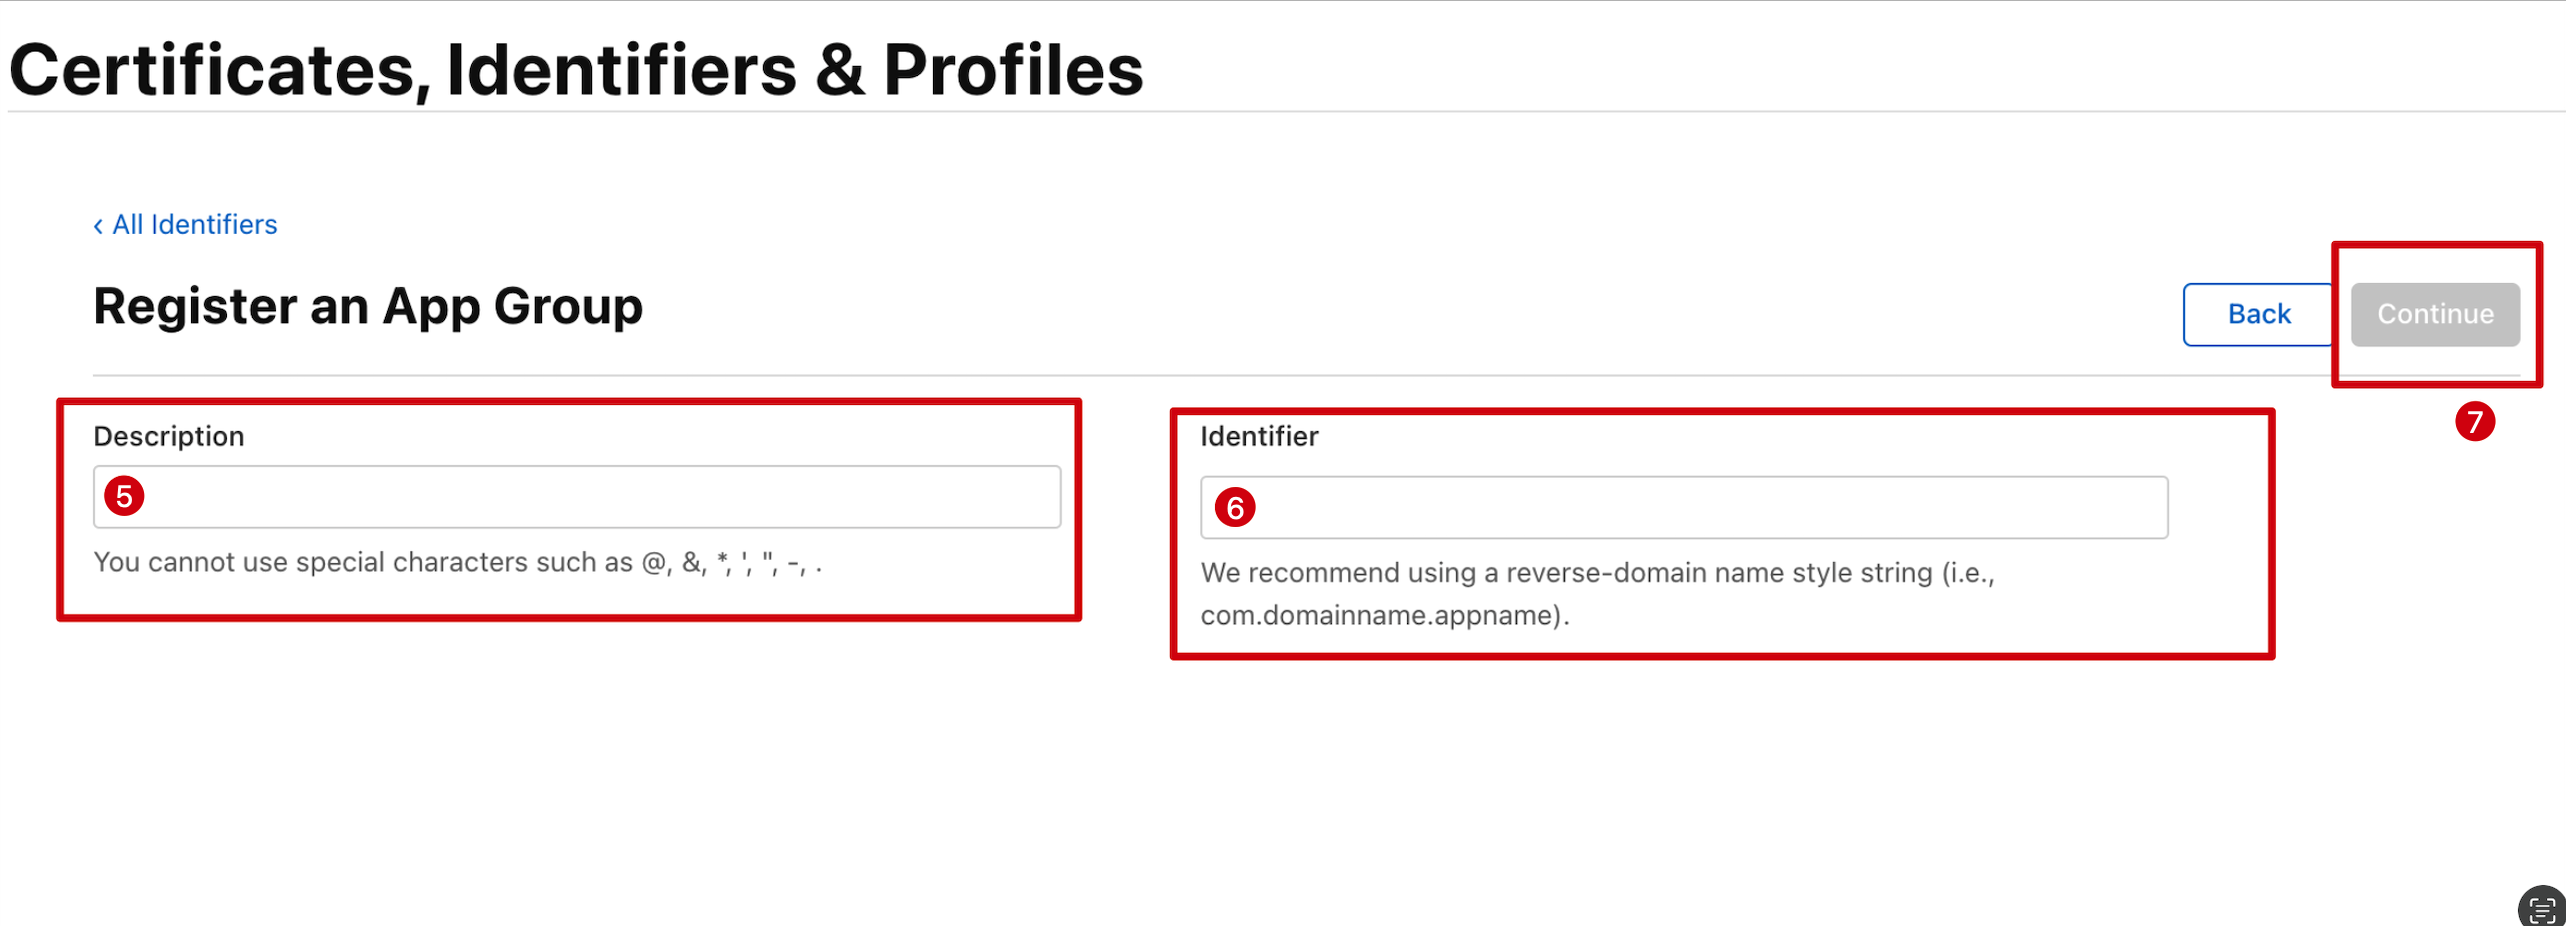
- Fill in Description and Identifier in the form. The Identifier is what you pass as the corresponding AppGroup parameter of the API. Then click Continue
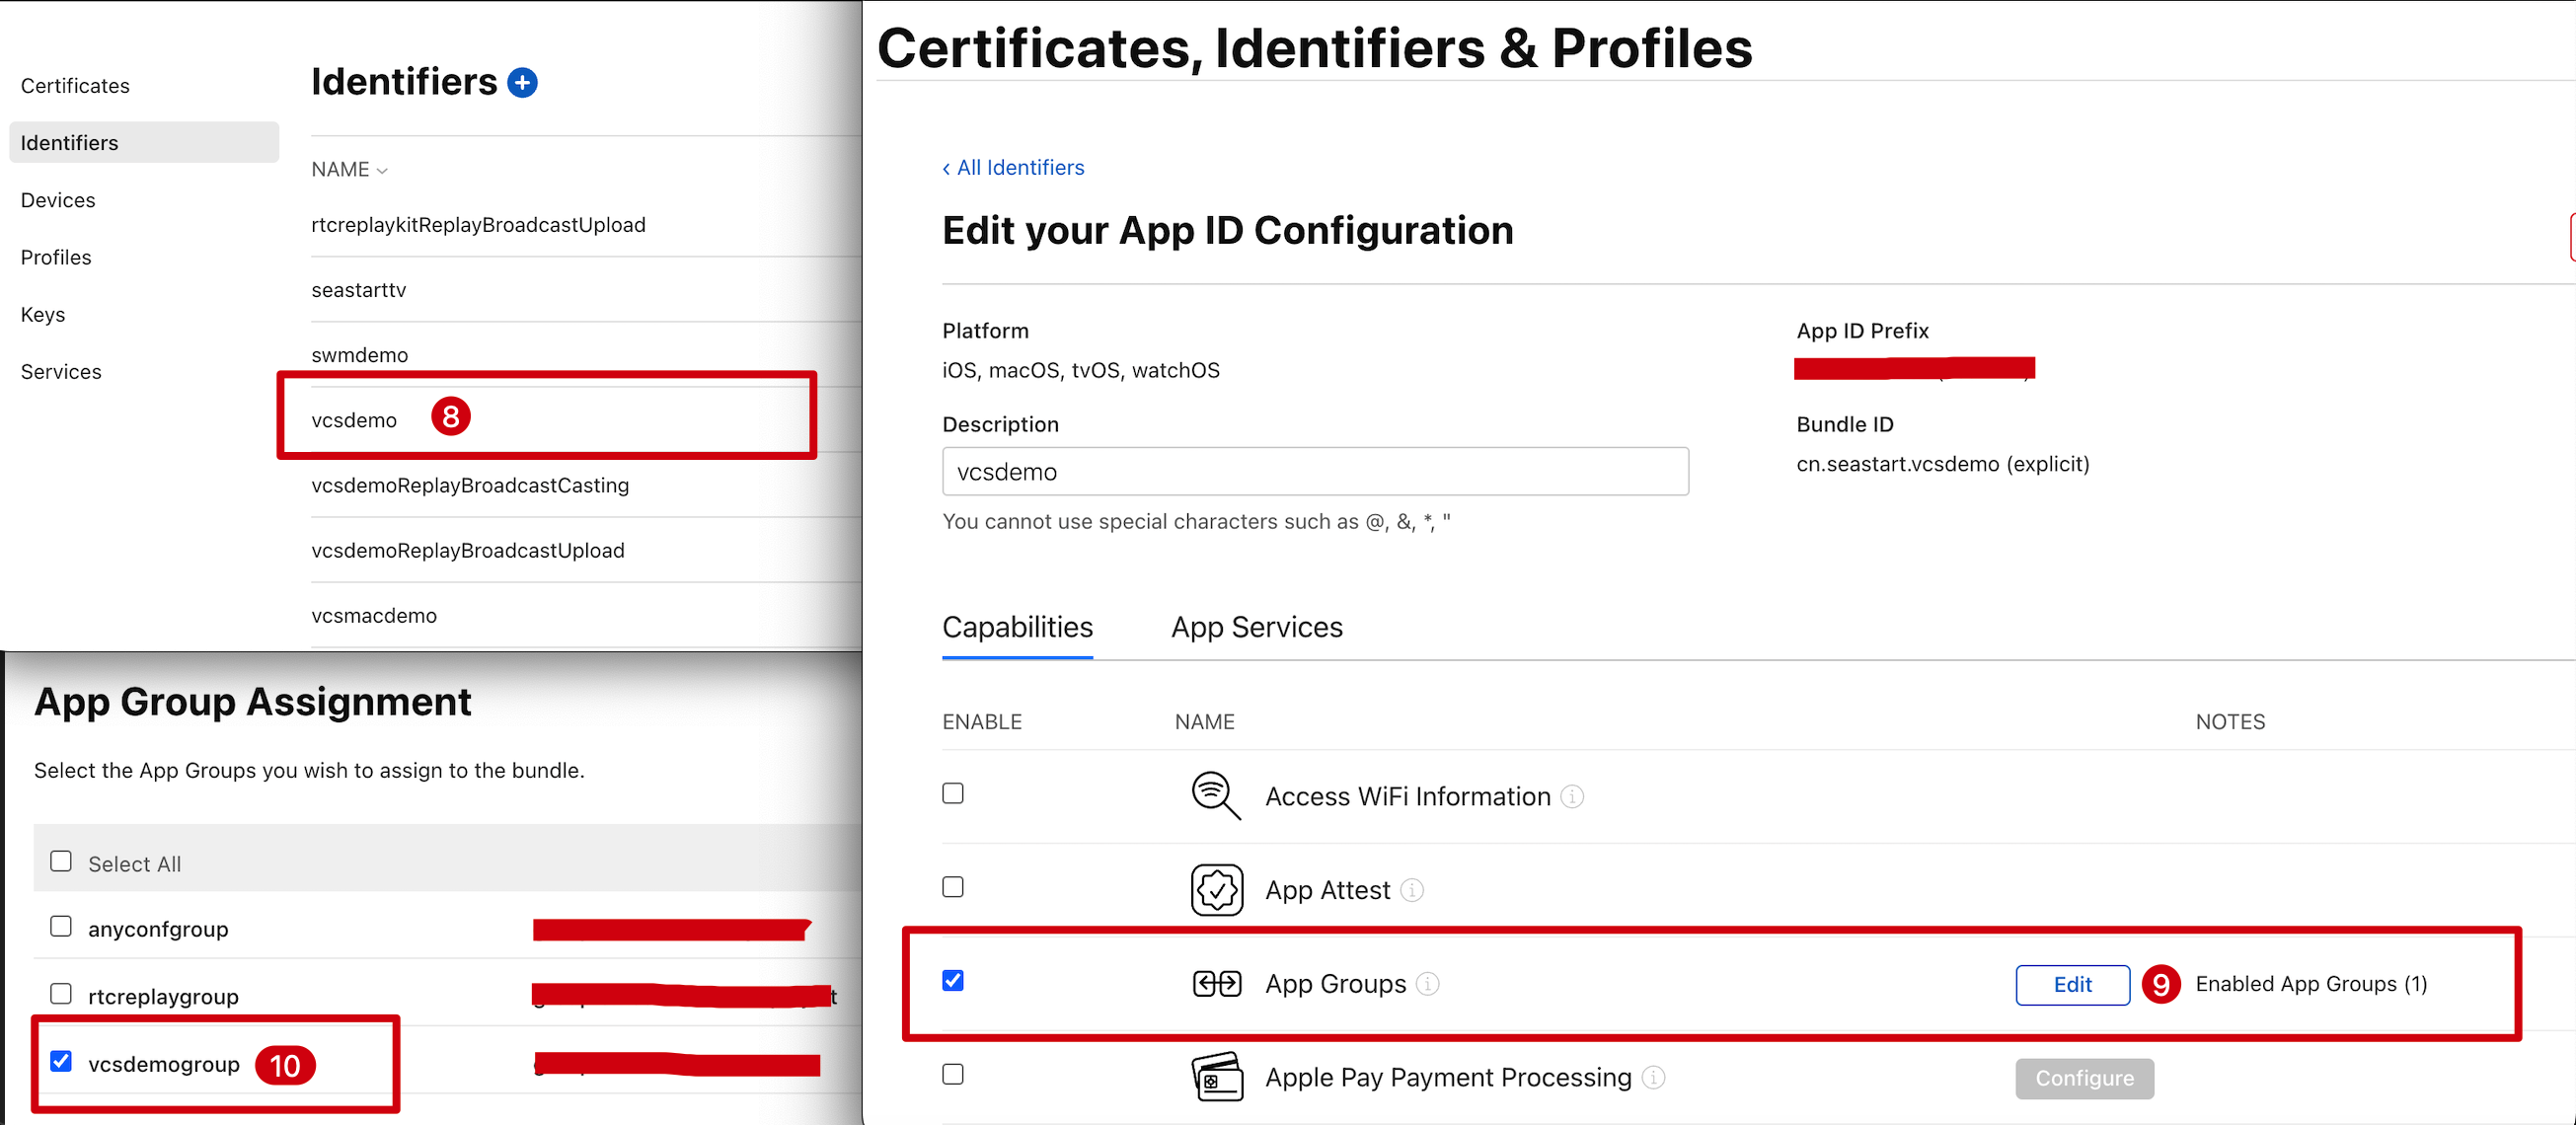
- Back on the Identifier page, select App IDs from the menu in the upper right, then click your App ID (the host App and the Extension AppID need the same configuration)
- Select App Groups and click Edit
- In the form, select the App Group you created earlier, click Continue to return to the edit page, and click Save
- Download the Provisioning Profile again and configure it in Xcode
2. Create a Broadcast Upload Extension
In your existing project, choose [New] -> [Target…] and select [Broadcast Upload Extension], as shown: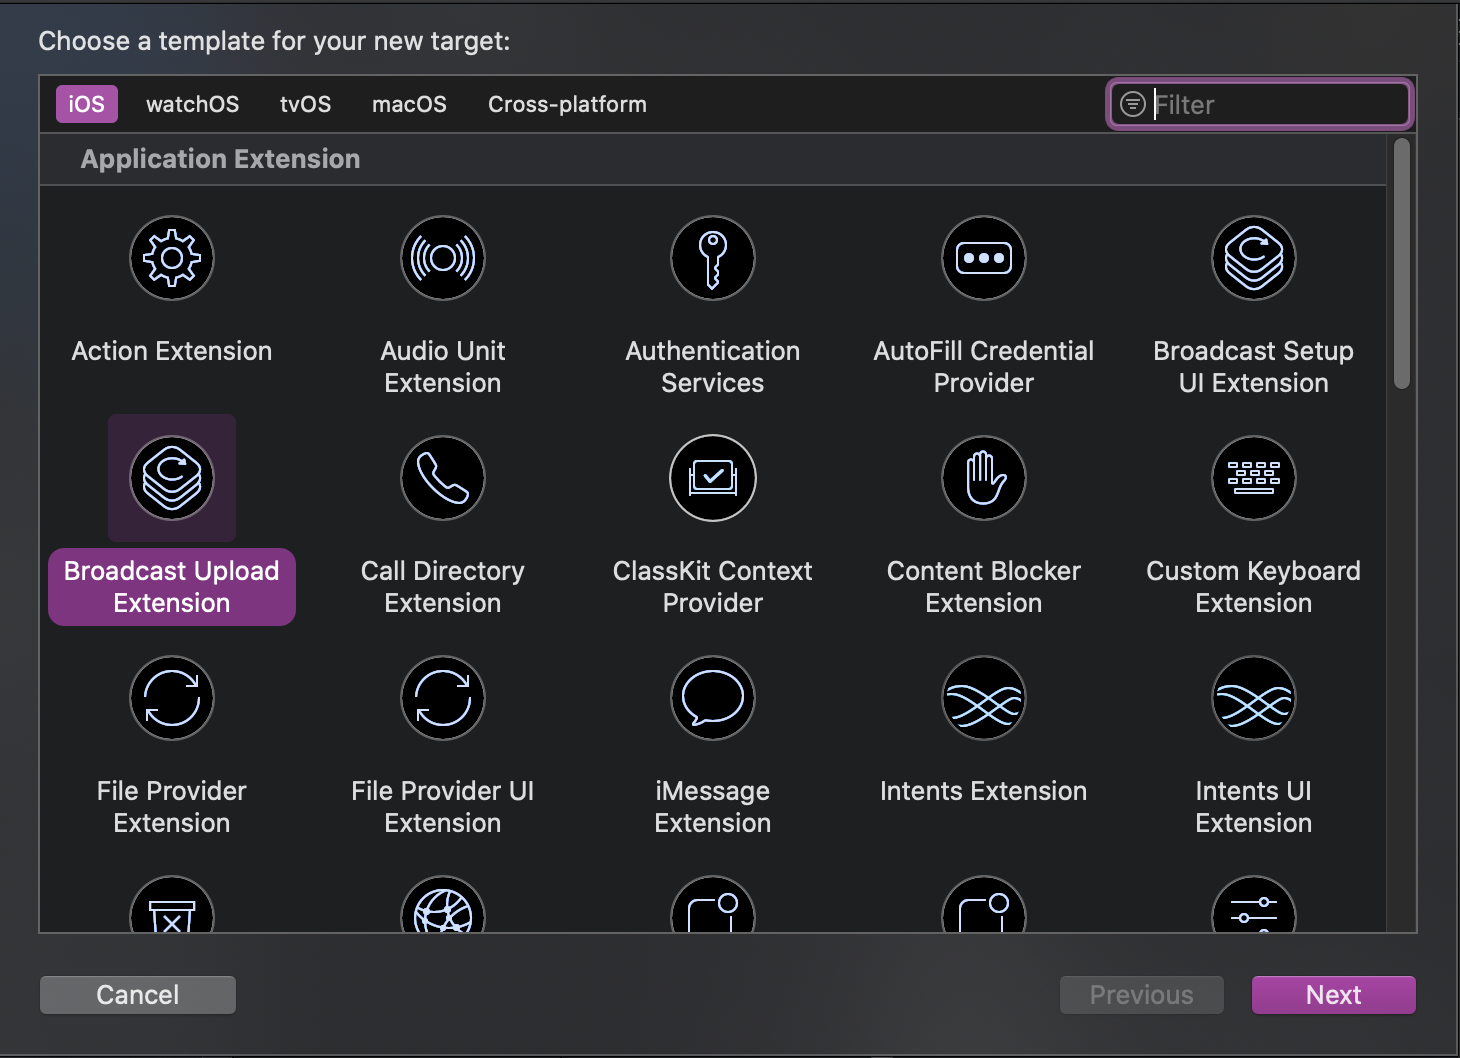
SampleHandler class that handles screen recording.
3. Add the SDK dependency to the extension
- For manual integration, import
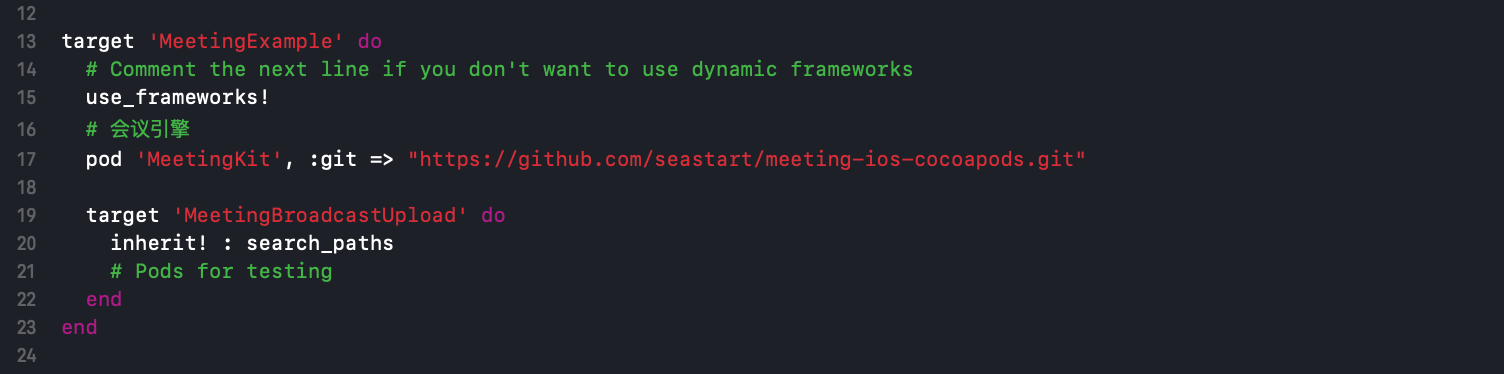
MeetingKit.frameworkinto the project directory of the Product Name above and configure the required system libraries; - For automatic integration, update the
Podfileand runpod install, as shown:
4. Add background permissions to the host project
In the host project, go to [TARGETS] -> [Signing & Capabilities] -> [Capability] and select [Background Modes], as shown: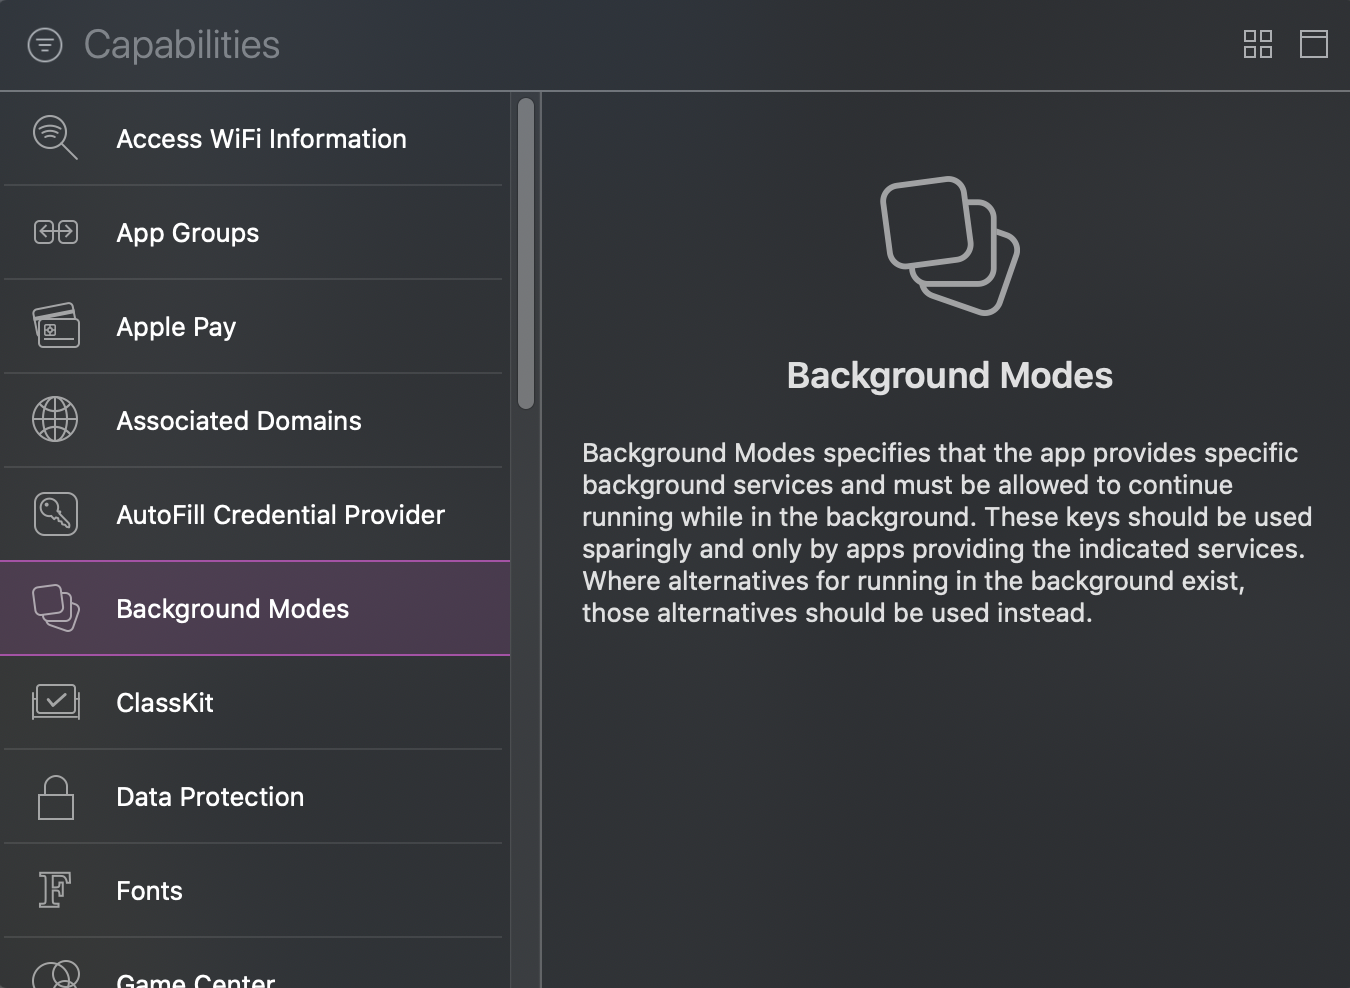
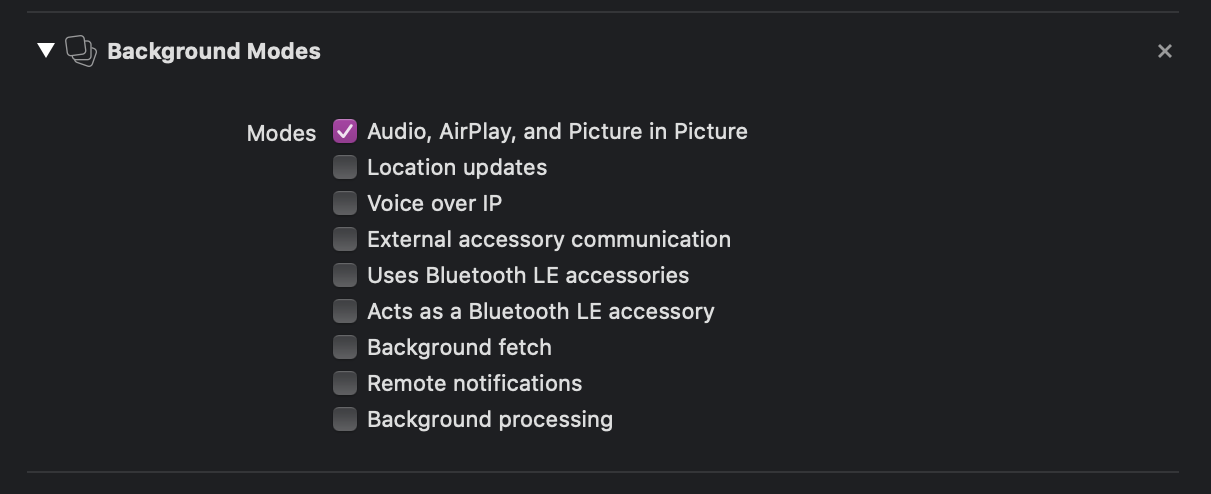
5. Add the App Group to the extension project
Select the new target, click + Capability, and double-click App Groups, as shown: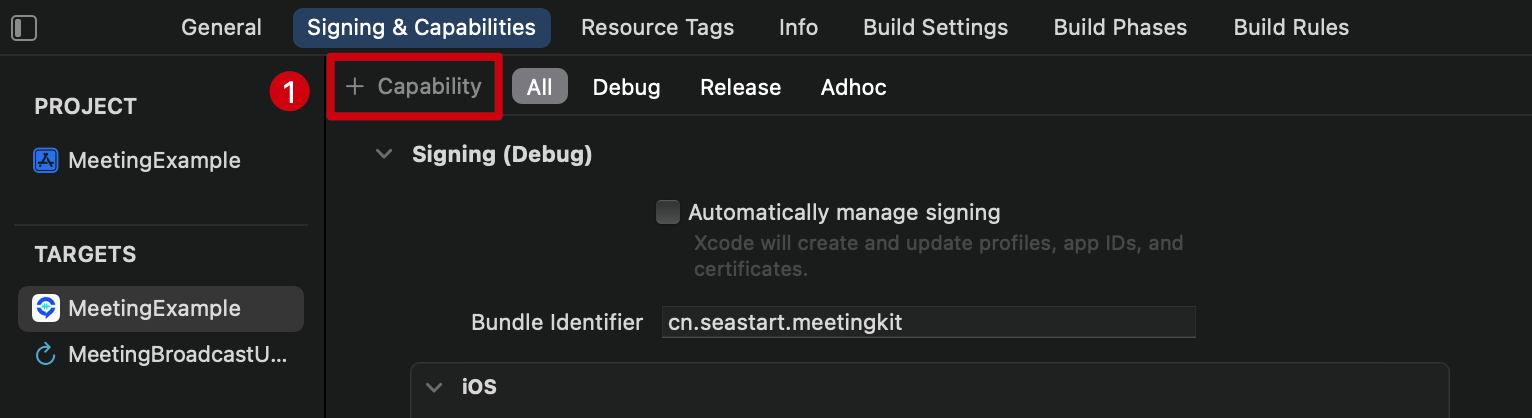
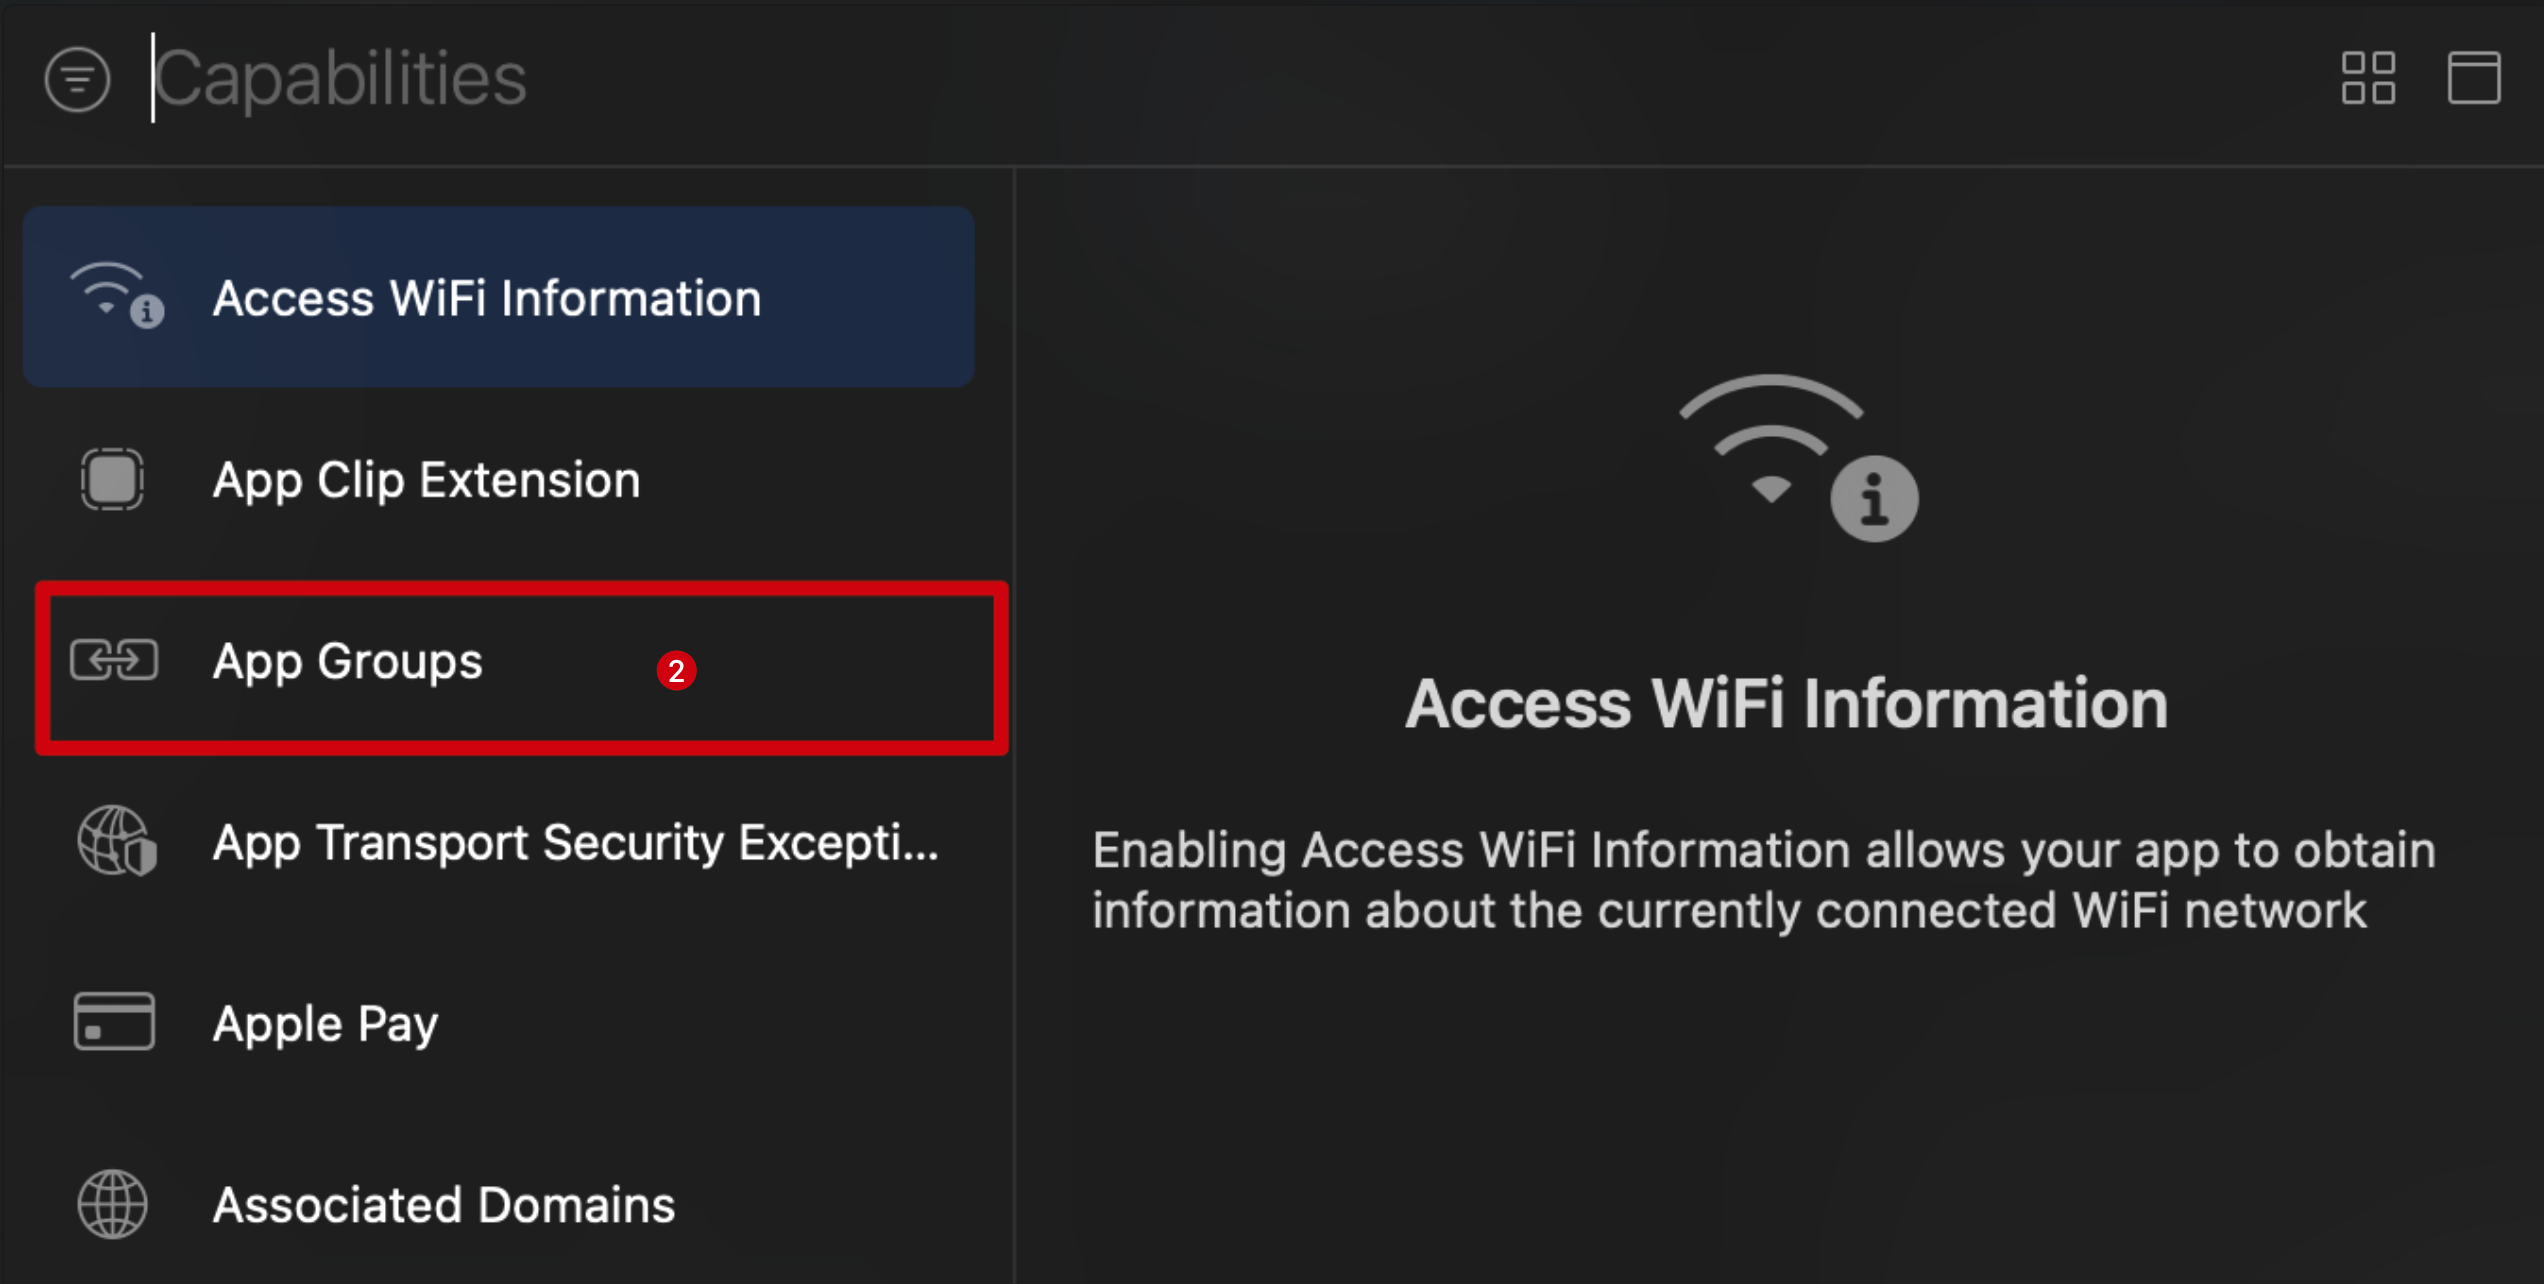
<target name>.entitlements appears in the file list, as shown below. Select it, click +, and enter the App Group from the steps above.

SampleHandler.h. Replace it with the following code, changing kAppGroup to the App Group Identifier you created above.
Integration steps
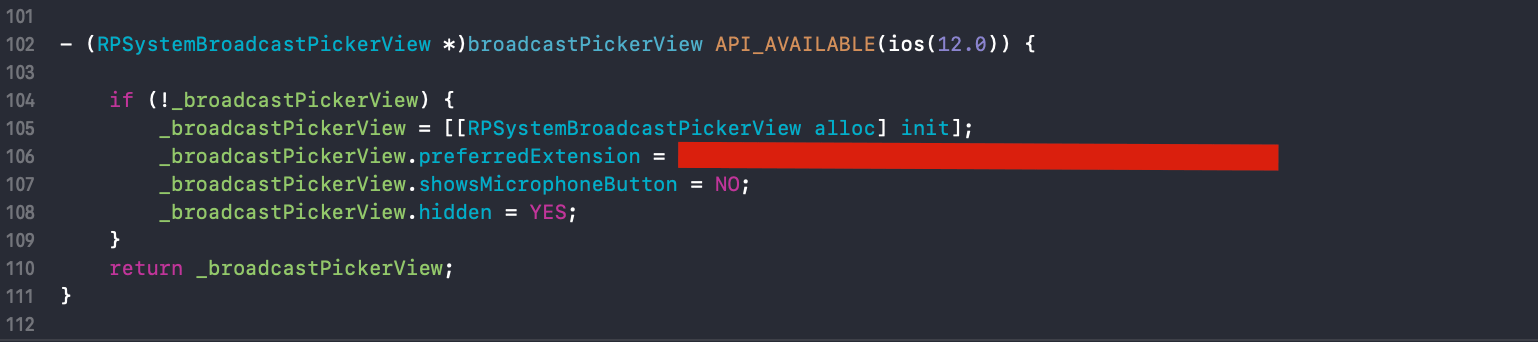
1. Where you need the recording service, import#import <MeetingKit/MeetingKit.h> and create an RPSystemBroadcastPickerView object, as shown:
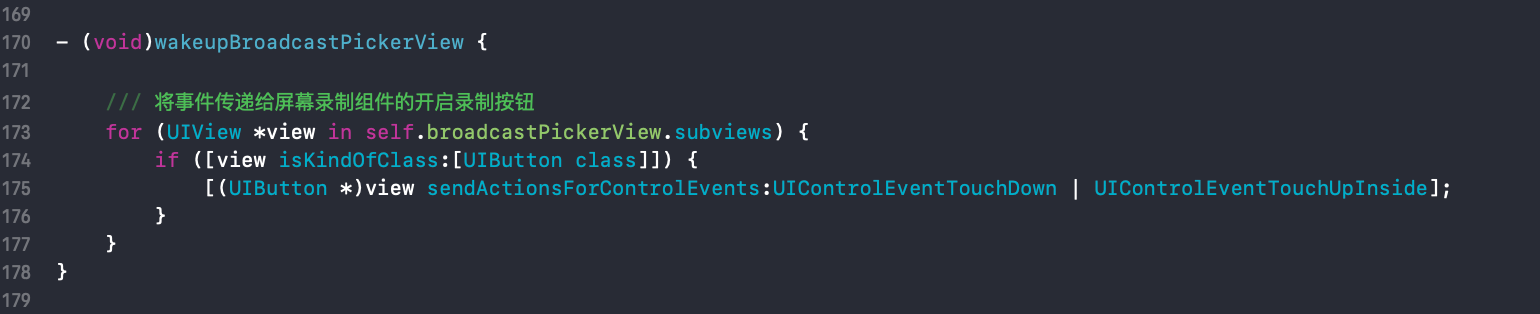
RPSystemBroadcastPickerView button as follows. If the following page appears after the broadcastButton event, the extension is integrated successfully:
MeetingKit, implement the screen sharing status callback:
RTCScreenDelegate delegate in the screen extension’s SampleHandler:
SampleHandler:
SampleHandler:
Meeting chat
Overview
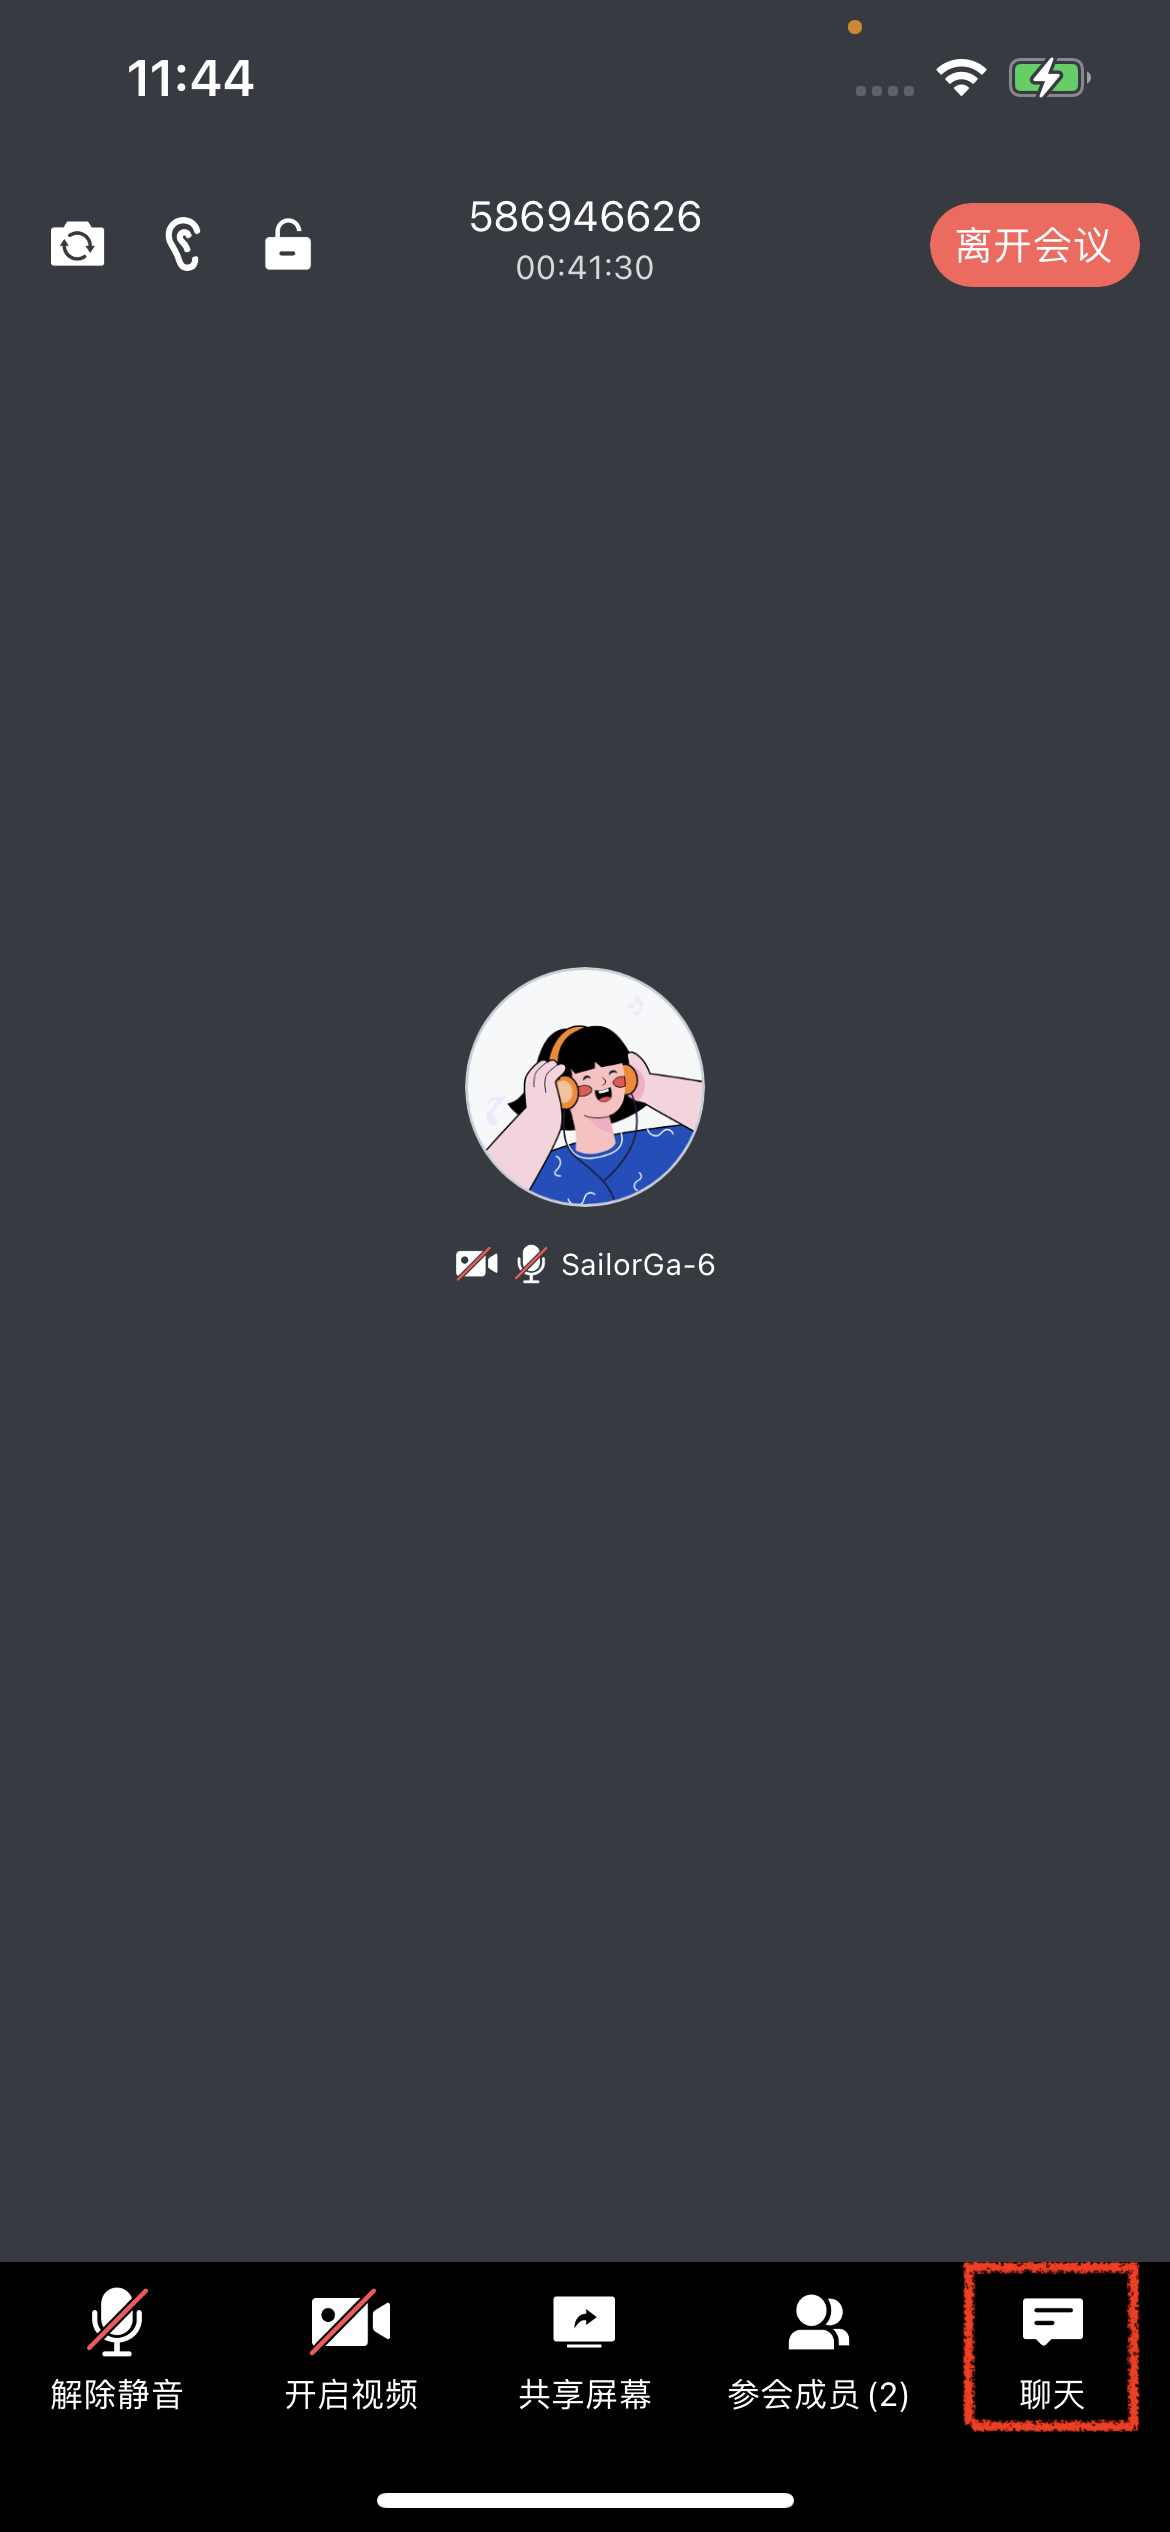
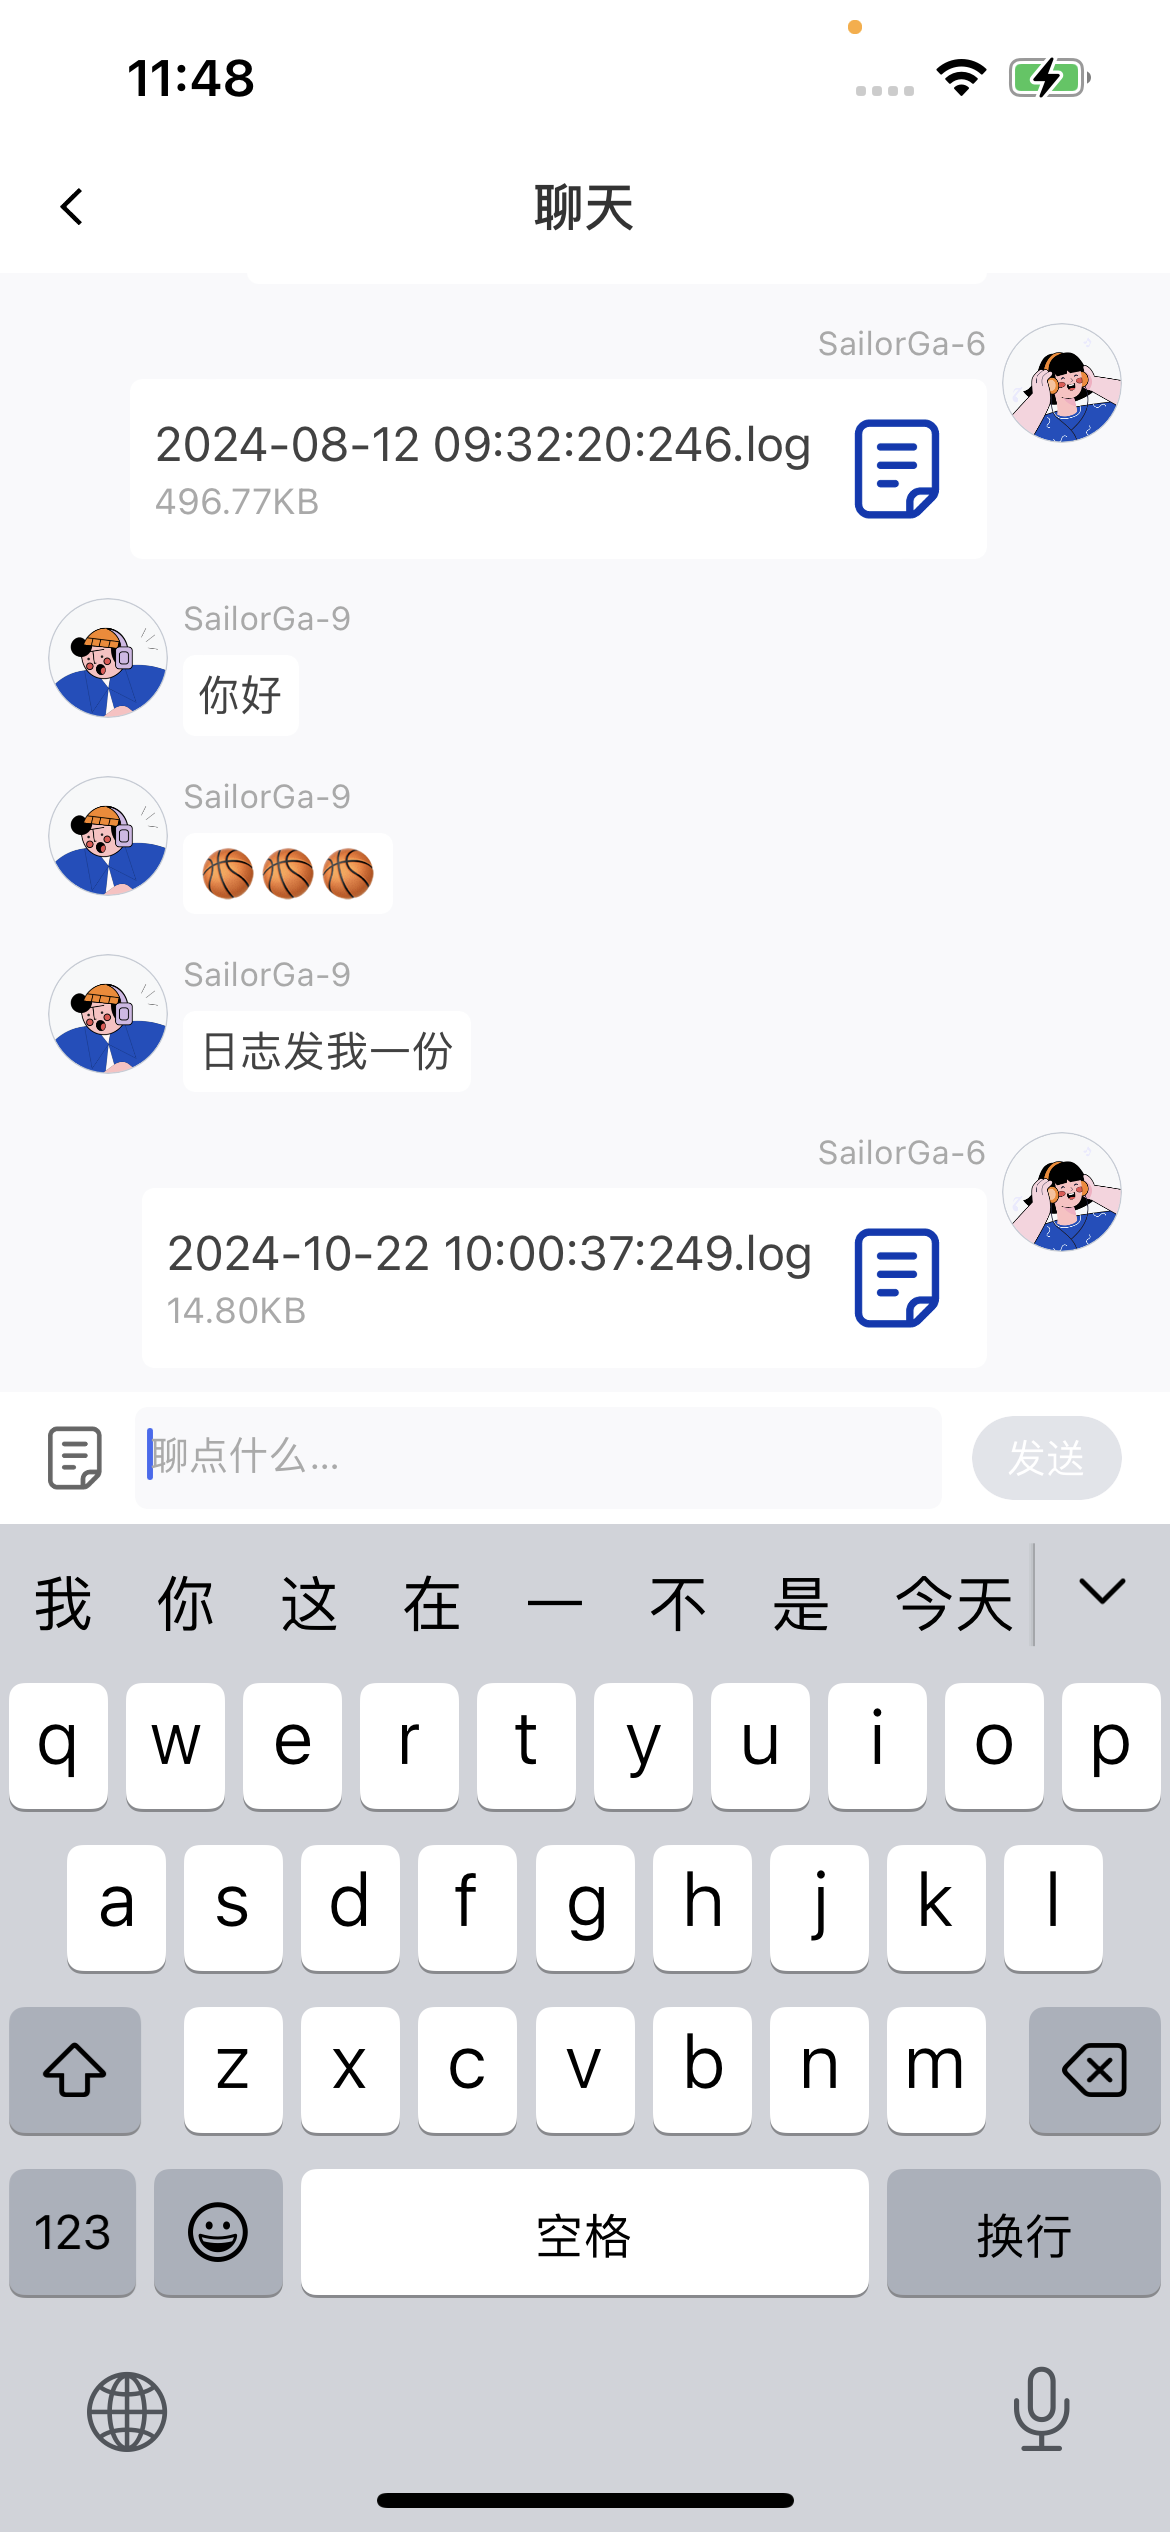
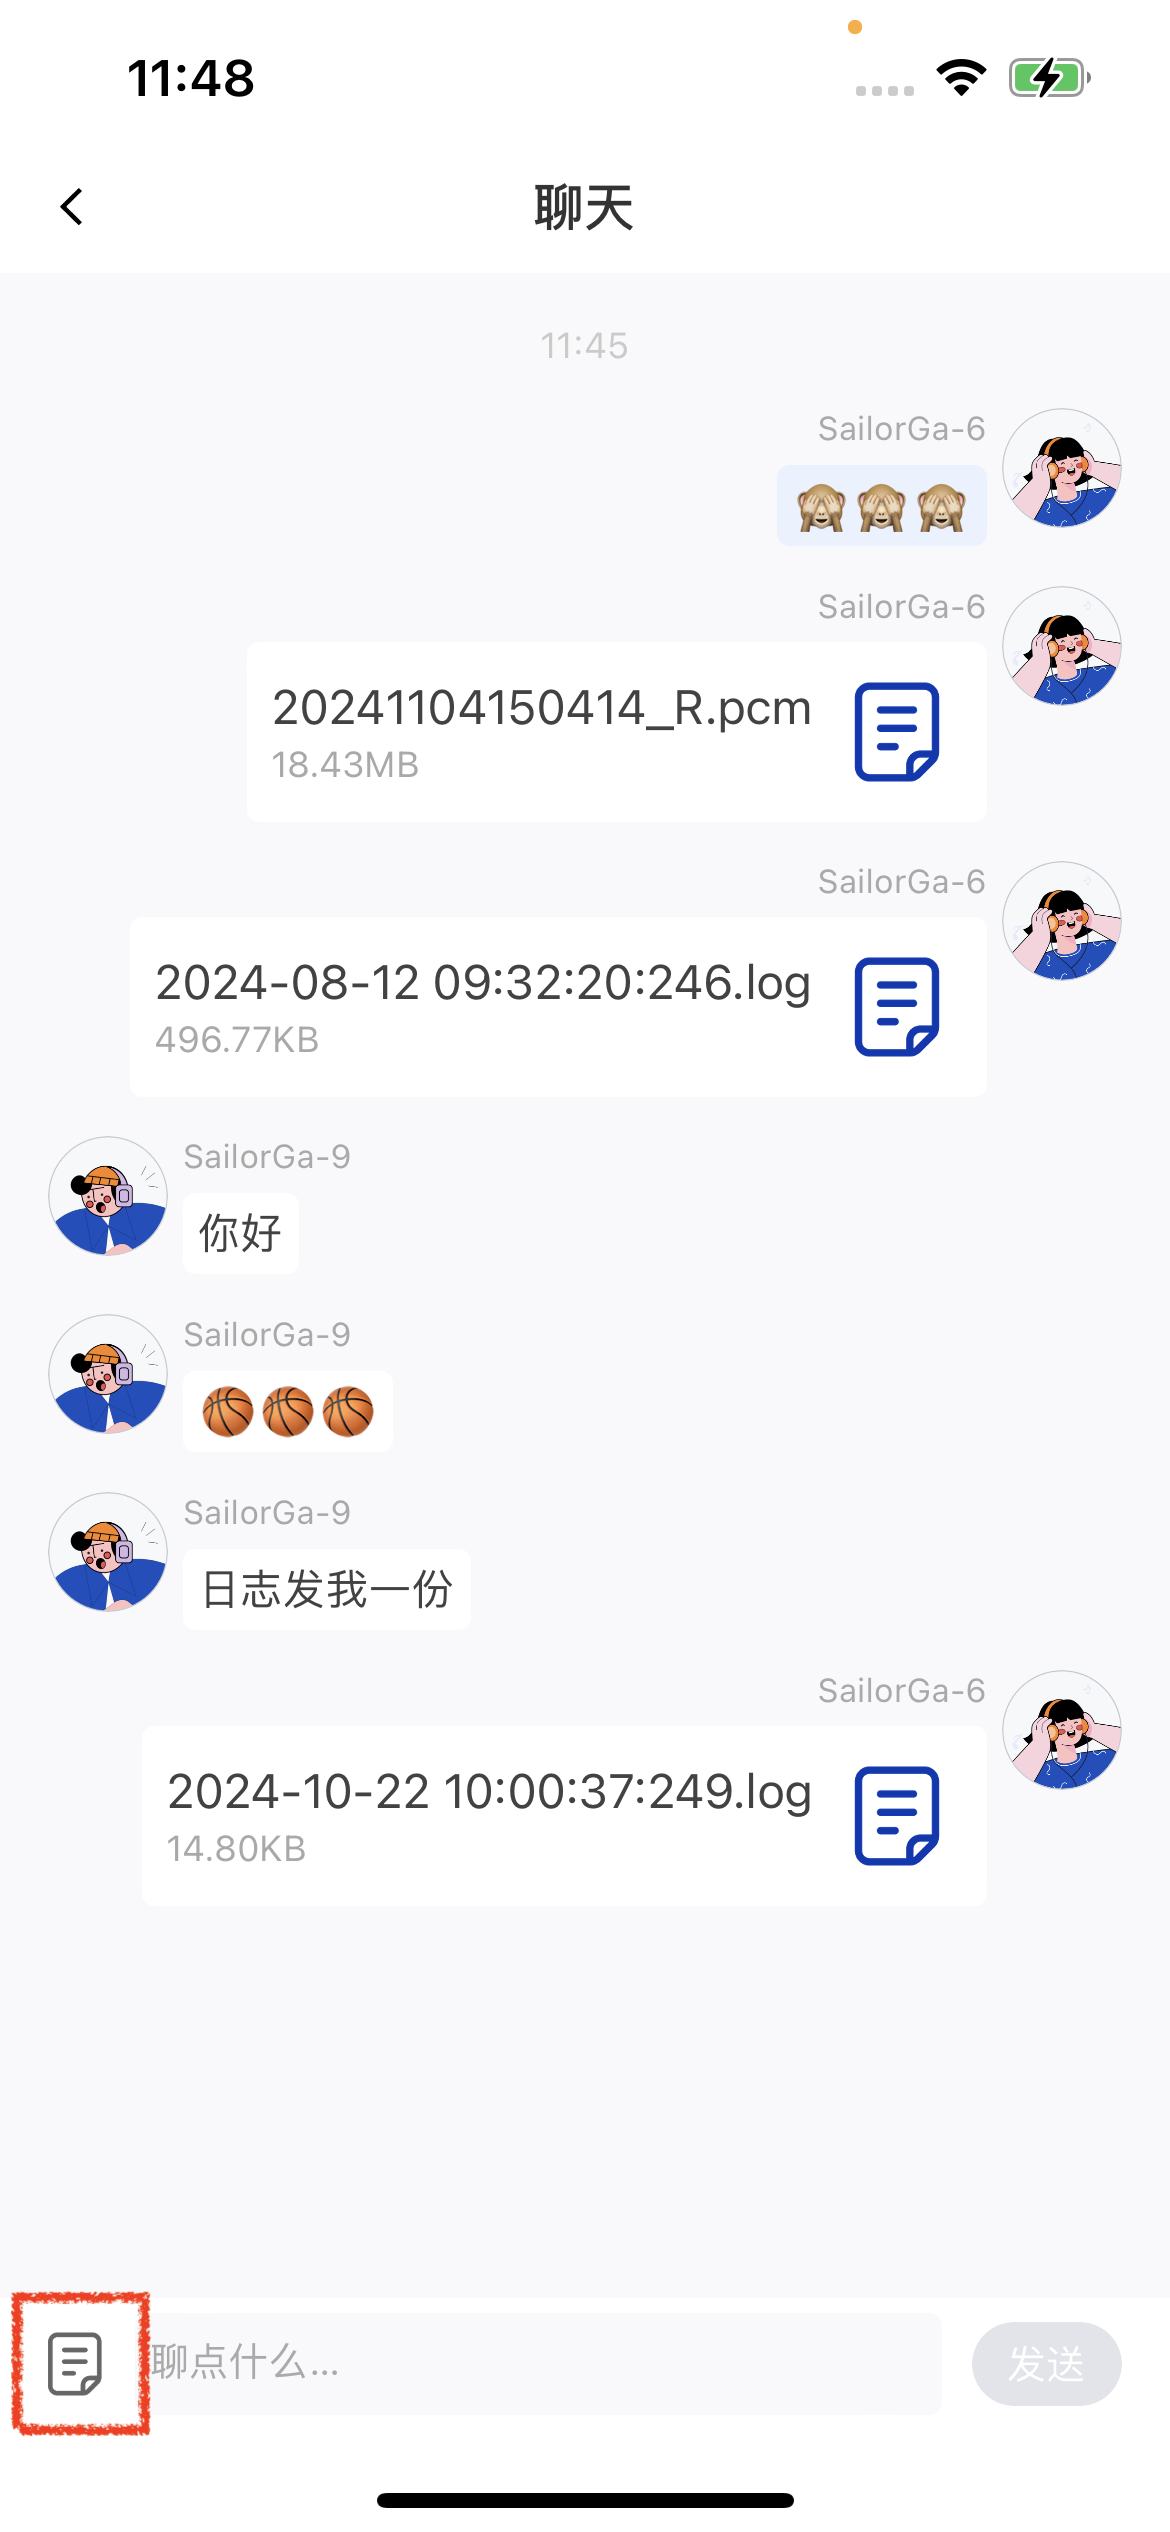
After entering a room, users can send text and emoji messages and transfer and view files under 聊天 (Chat) -> 聊天窗口 (Chat window).| In-meeting screen | Chat screen | Upload files |
|---|---|---|
 |  |  |